How to Install Hermes Agent on Your Server with 1Panel
Hermes Agent by Nous Research: self-improving AI with memory and skills. Step-by-step install in 1Panel using Model Accounts and Agents, open WebUI, and tune model access for production.
What is Hermes Agent?
Hermes Agent is a self-improving AI agent from Nous Research. It ships with a built-in learning loop: over time it can create and refine skills from real use, keep long-term memory, look up past sessions, and keep building a clearer picture of how you work across many conversations.
It is not tied to one laptop. You can run it on a VPS, GPU cluster, or similar environments, and talk to it through the command line, a Web UI, or messaging-style channels, depending on how you operate it.
The 1Panel packaging path gives you a browser Web UI so you can manage configuration and API keys, and inspect runtime status plus session information from the panel. In 1Panel, deployment and day-to-day control go through AI → Agents (Agents under the AI menu), together with Model Accounts for upstream LLM access.
Why use 1Panel for Hermes Agent?
You keep model credentials, agent definition (type, version, ports, which model to call), and WebUI entry in one workflow. That matches how teams already run databases, websites, and certificates on the same host—less one-off scripting, more repeatable operations.
Prerequisites
Before you deploy, make sure:
- 1Panel is installed and you can open the dashboard normally.
- You have a usable LLM API key, or a local model already connected inside 1Panel.
- The server can reach the internet (for install pulls and typical cloud model traffic, unless you are fully local-only).
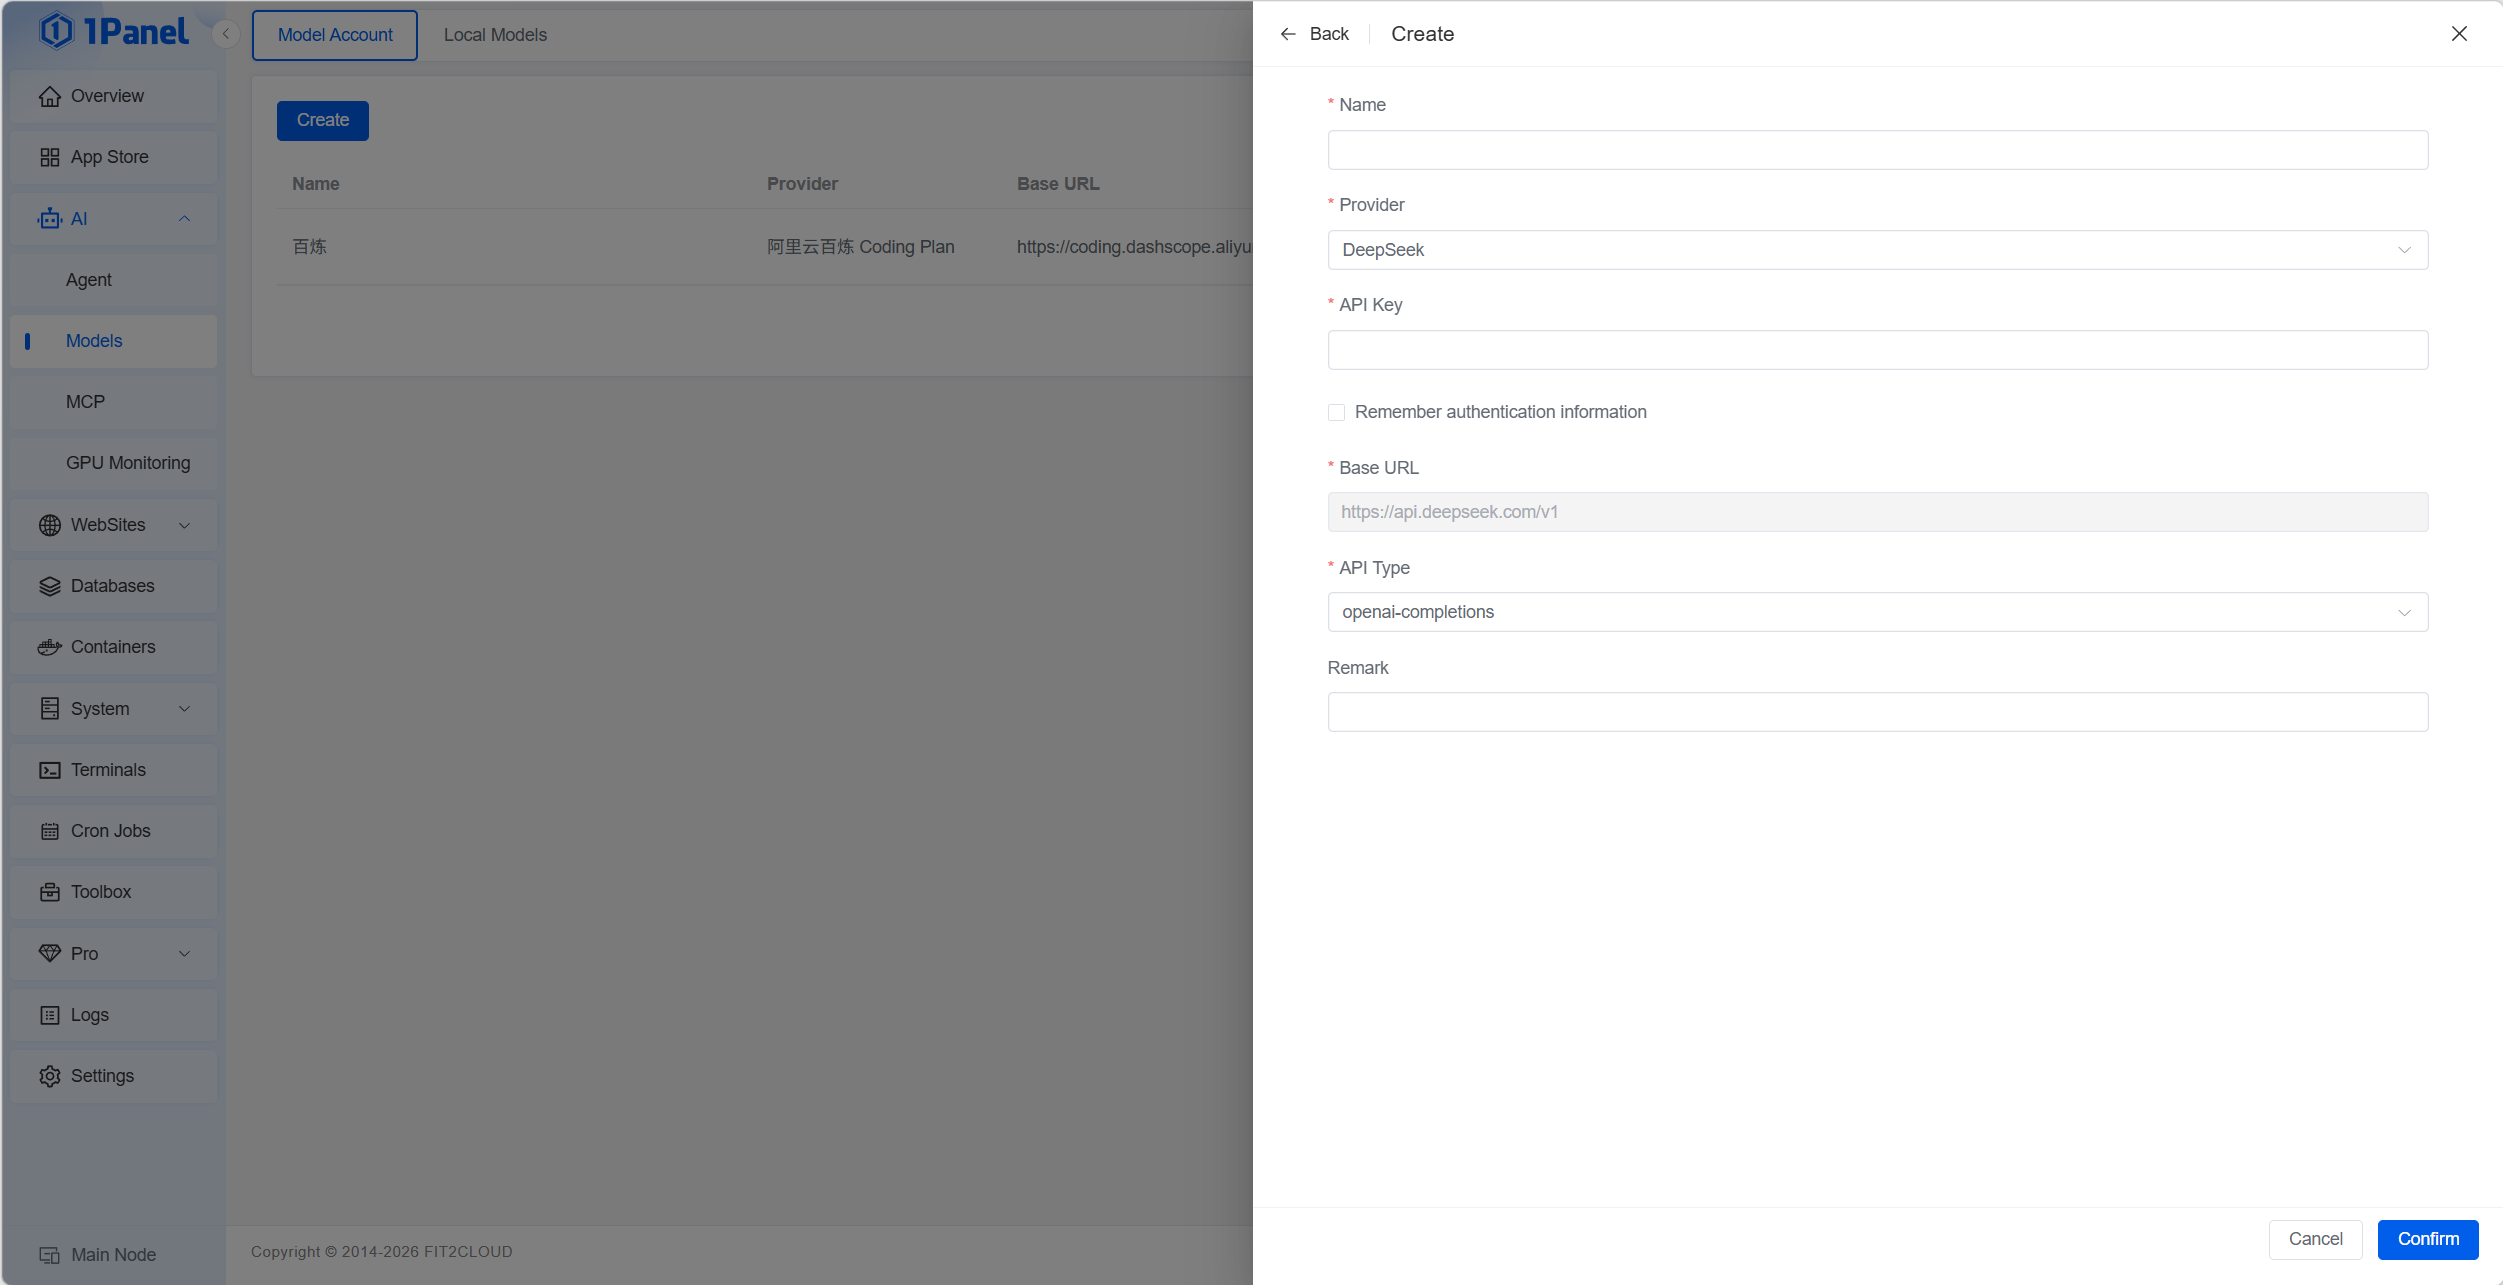
Step 1: Add a model account
- In the sidebar, open AI → Model Accounts.
- Click Add Model Account.
- Choose the model vendor you actually use, then fill in the fields that vendor requires (keys, endpoints, account names, and so on—labels differ by provider).
- Save the account.
- In the account list, confirm the new row appears and looks correct before you bind it to an agent.
If you maintain several models or accounts, you will pick the exact model account / model pair later on the Hermes Agent create screen.
Step 2: Create the Hermes Agent
- Open AI → Agents.
- Click Create.
- Set Agent Type to Hermes Agent.
Fill the deployment form. The standard fields are:
| Field | What to enter |
|---|---|
| Agent Type | Hermes Agent |
| Name | Default example is hermes-agent; you may use any name that fits your naming rules. |
| App Version | Choose the Hermes Agent version you want installed. |
| Access Port / WebUI Port | Use the page default or set ports that fit your network plan. |
| Model Provider | Pick the vendor that matches the model account you created in Step 1. |
| Model Account / Model | Pick the account and the exact model you want this instance to run. |
| Other Parameters | In most cases, leave defaults; change only when the form exposes an option you deliberately need. |
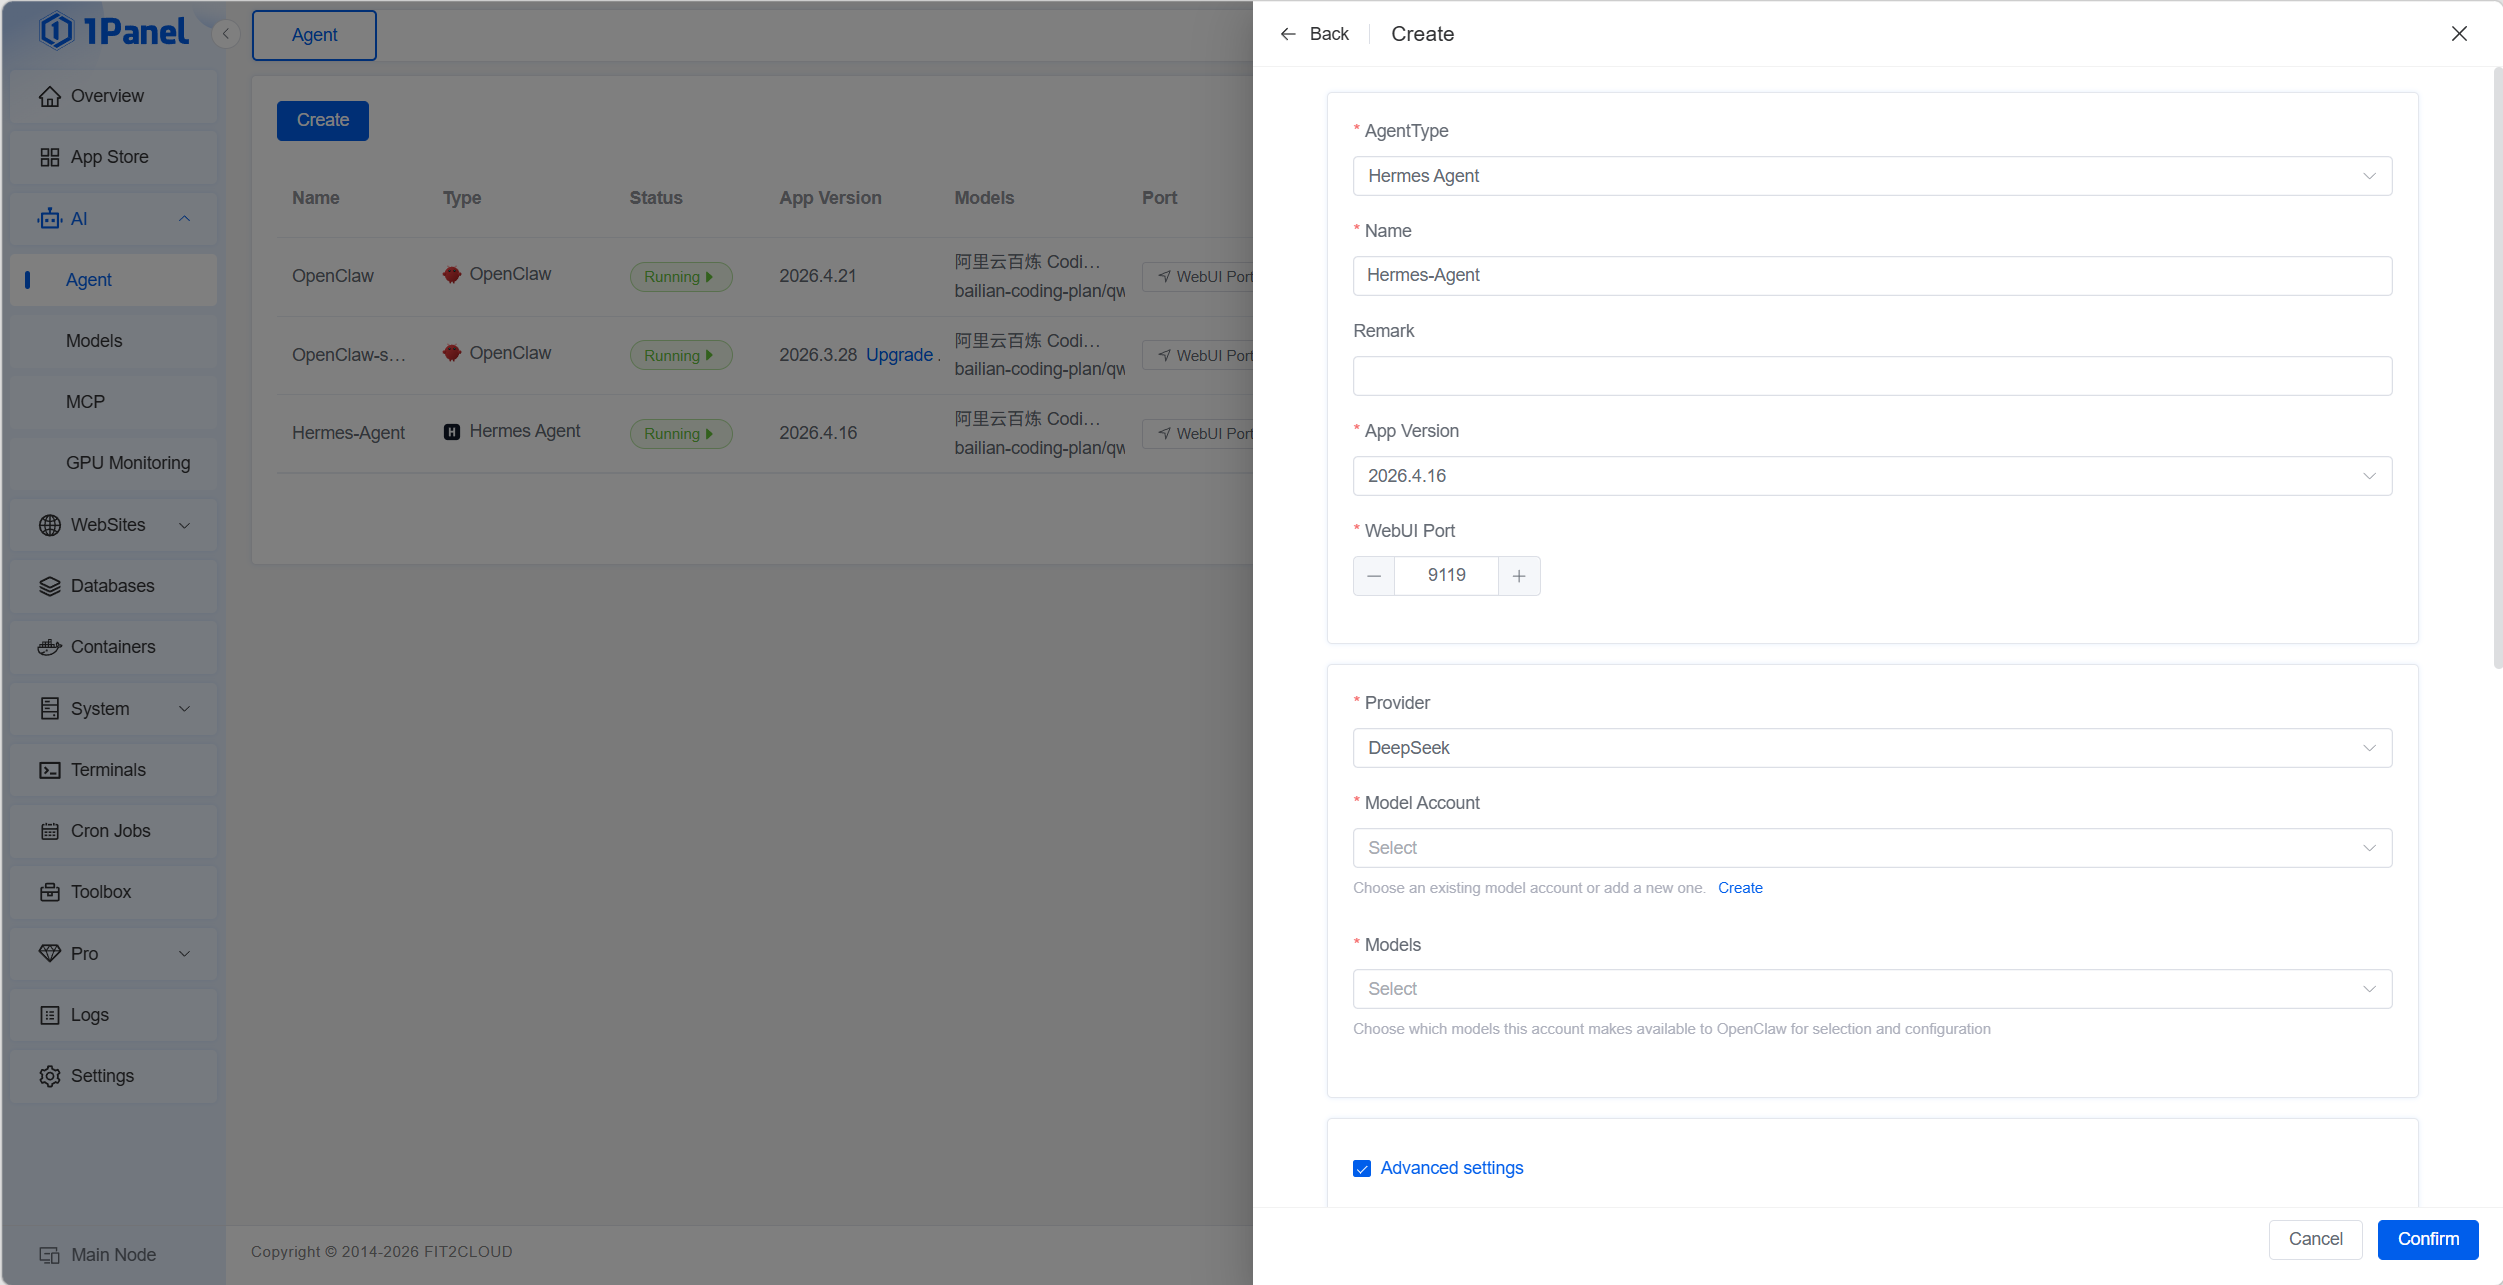
After you pick a model provider, 1Panel loads the model accounts already saved for that vendor—choose the right row when you have more than one.
If you have multiple models configured, select the right model on this page. If the form shows extra options, follow the on-page hints.
Before you submit, re-check name, app version, ports, and model so the first install lands where you expect.
Step 3: Install and wait until it finishes
When every field looks right, click Confirm to start installation.
Watch the status on the page while the task runs; wait until the UI clearly shows that installation completed. When the page reports success, Hermes Agent is deployed on the host.
If something fails, use the error text the panel shows (pull errors, port conflicts, auth failures, disk, and so on), fix the root cause, and run the install again.
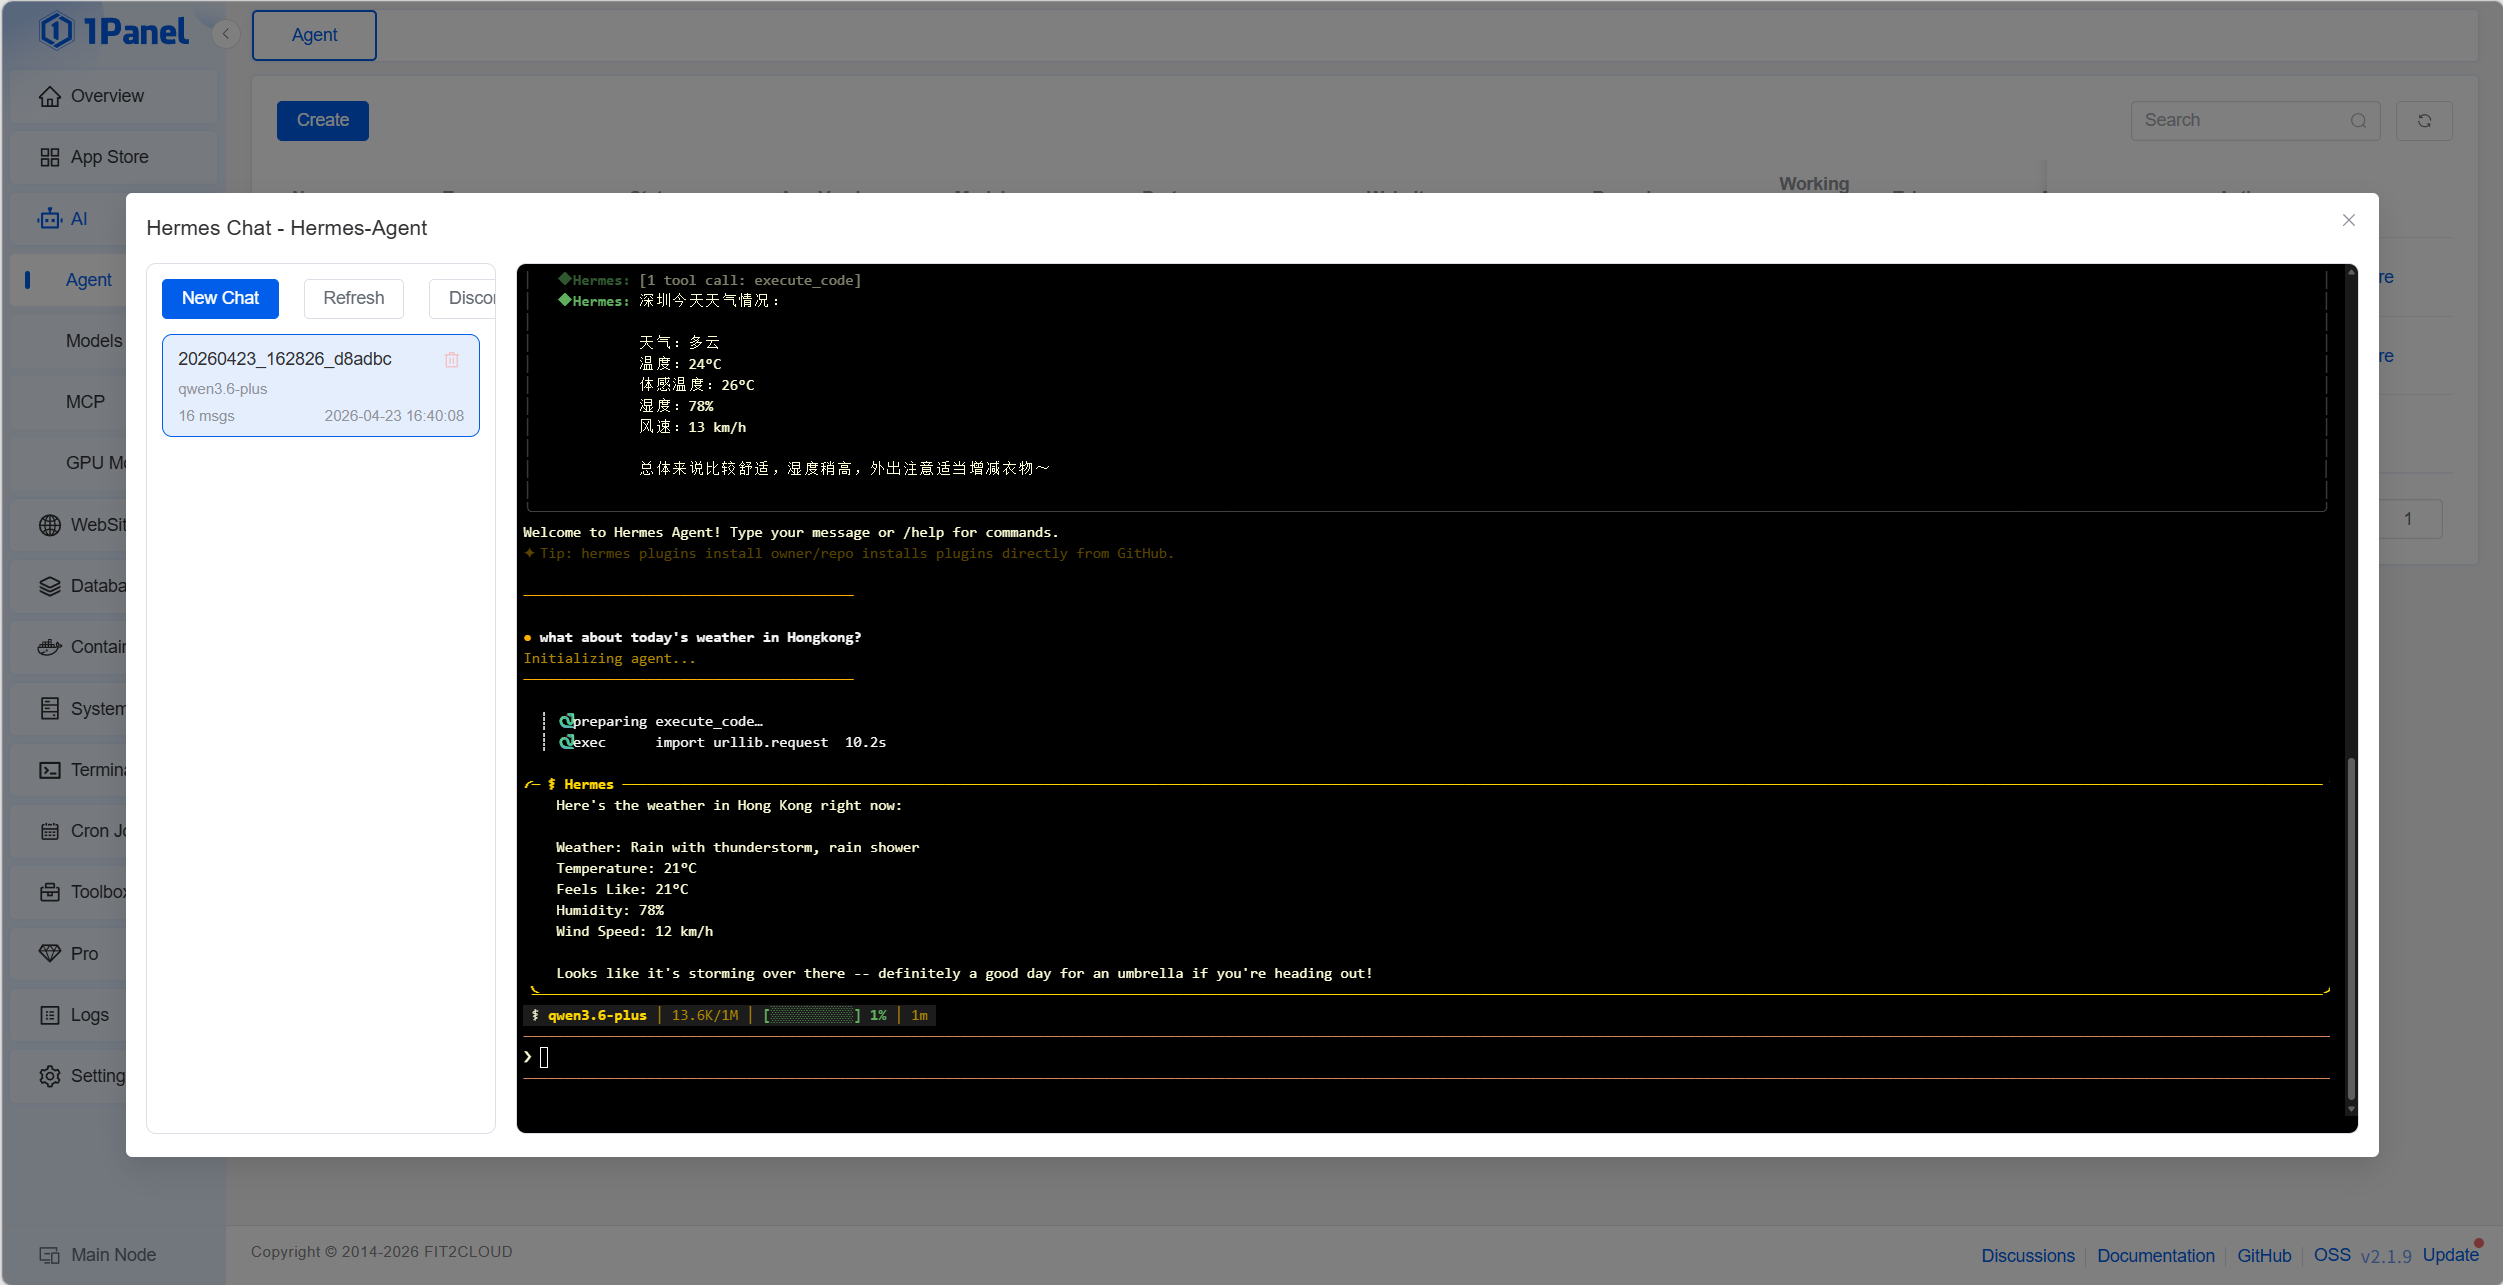
Step 4: Open Hermes Agent WebUI or Chat with TUI
Go back to the Agents list, find your Hermes Agent entry, and click WebUI to open it in the browser.
On the first open, the page may still be initializing. Wait a little, then refresh once or twice rather than assuming the service is down.
From WebUI you can keep managing settings, keys, and session-oriented views alongside what you see in the panel.
Or you can click the Chat button to chat with Hermes Agent through the TUI.
Step 5: Follow-up configuration inside 1Panel
After the first successful deploy, you can keep adjusting Hermes Agent inside 1Panel to match real workloads: change the model or account binding, tighten how people reach the service (internal-only vs public hostname), and tune other runtime parameters the form or WebUI exposes.
Pair any internet-facing surface with your usual controls: firewall scope, HTTPS where users type a domain, and careful handling of API keys in tickets, logs, and screenshots.
Quick verification checklist
- WebUI opens cleanly after the short first-load window.
- A smoke test hits the model you meant to select.
- Ports do not collide with other listeners on the same machine.
- You have backup or snapshot coverage if policy requires it for this class of workload.
Summary
Hermes Agent is a long-running, skill-aware agent runtime you can host yourself. On 1Panel the path is: Model Accounts → Agents → Create (Hermes Agent) → Confirm install → WebUI from the list → then iterate model, access, and parameters as production needs evolve.
If you are new to the panel, start at 1panel.pro.