How to Manage MongoDB on Your VPS with 1Panel
Step-by-step MongoDB operations in 1Panel: App Store install, database creation, connection details, built-in mongosh terminal, backup/restore, and remote instance management.
MongoDB management on a self-hosted VPS usually means jumping between CLI, scripts, and backup jobs. In 1Panel, you can run the full MongoDB workflow from one dashboard: install, create databases and users, connect, query, back up, and restore.
This article walks through the practical path in order.
What You Can Do with MongoDB in 1Panel
- Install MongoDB from the App Store
- Create databases and users with permissions
- Open a built-in mongosh terminal in the browser
- View connection info for app integration
- Back up, restore, and schedule recurring backup tasks
- Register and manage remote MongoDB instances
Prerequisites
Before you start:
- 1Panel is installed and accessible
- Your server has enough available memory for your selected MongoDB setup
- The server can access the internet to pull required images
Step 1: Install MongoDB from App Store
In 1Panel, open App Store, filter by Database, find MongoDB, and click Install.
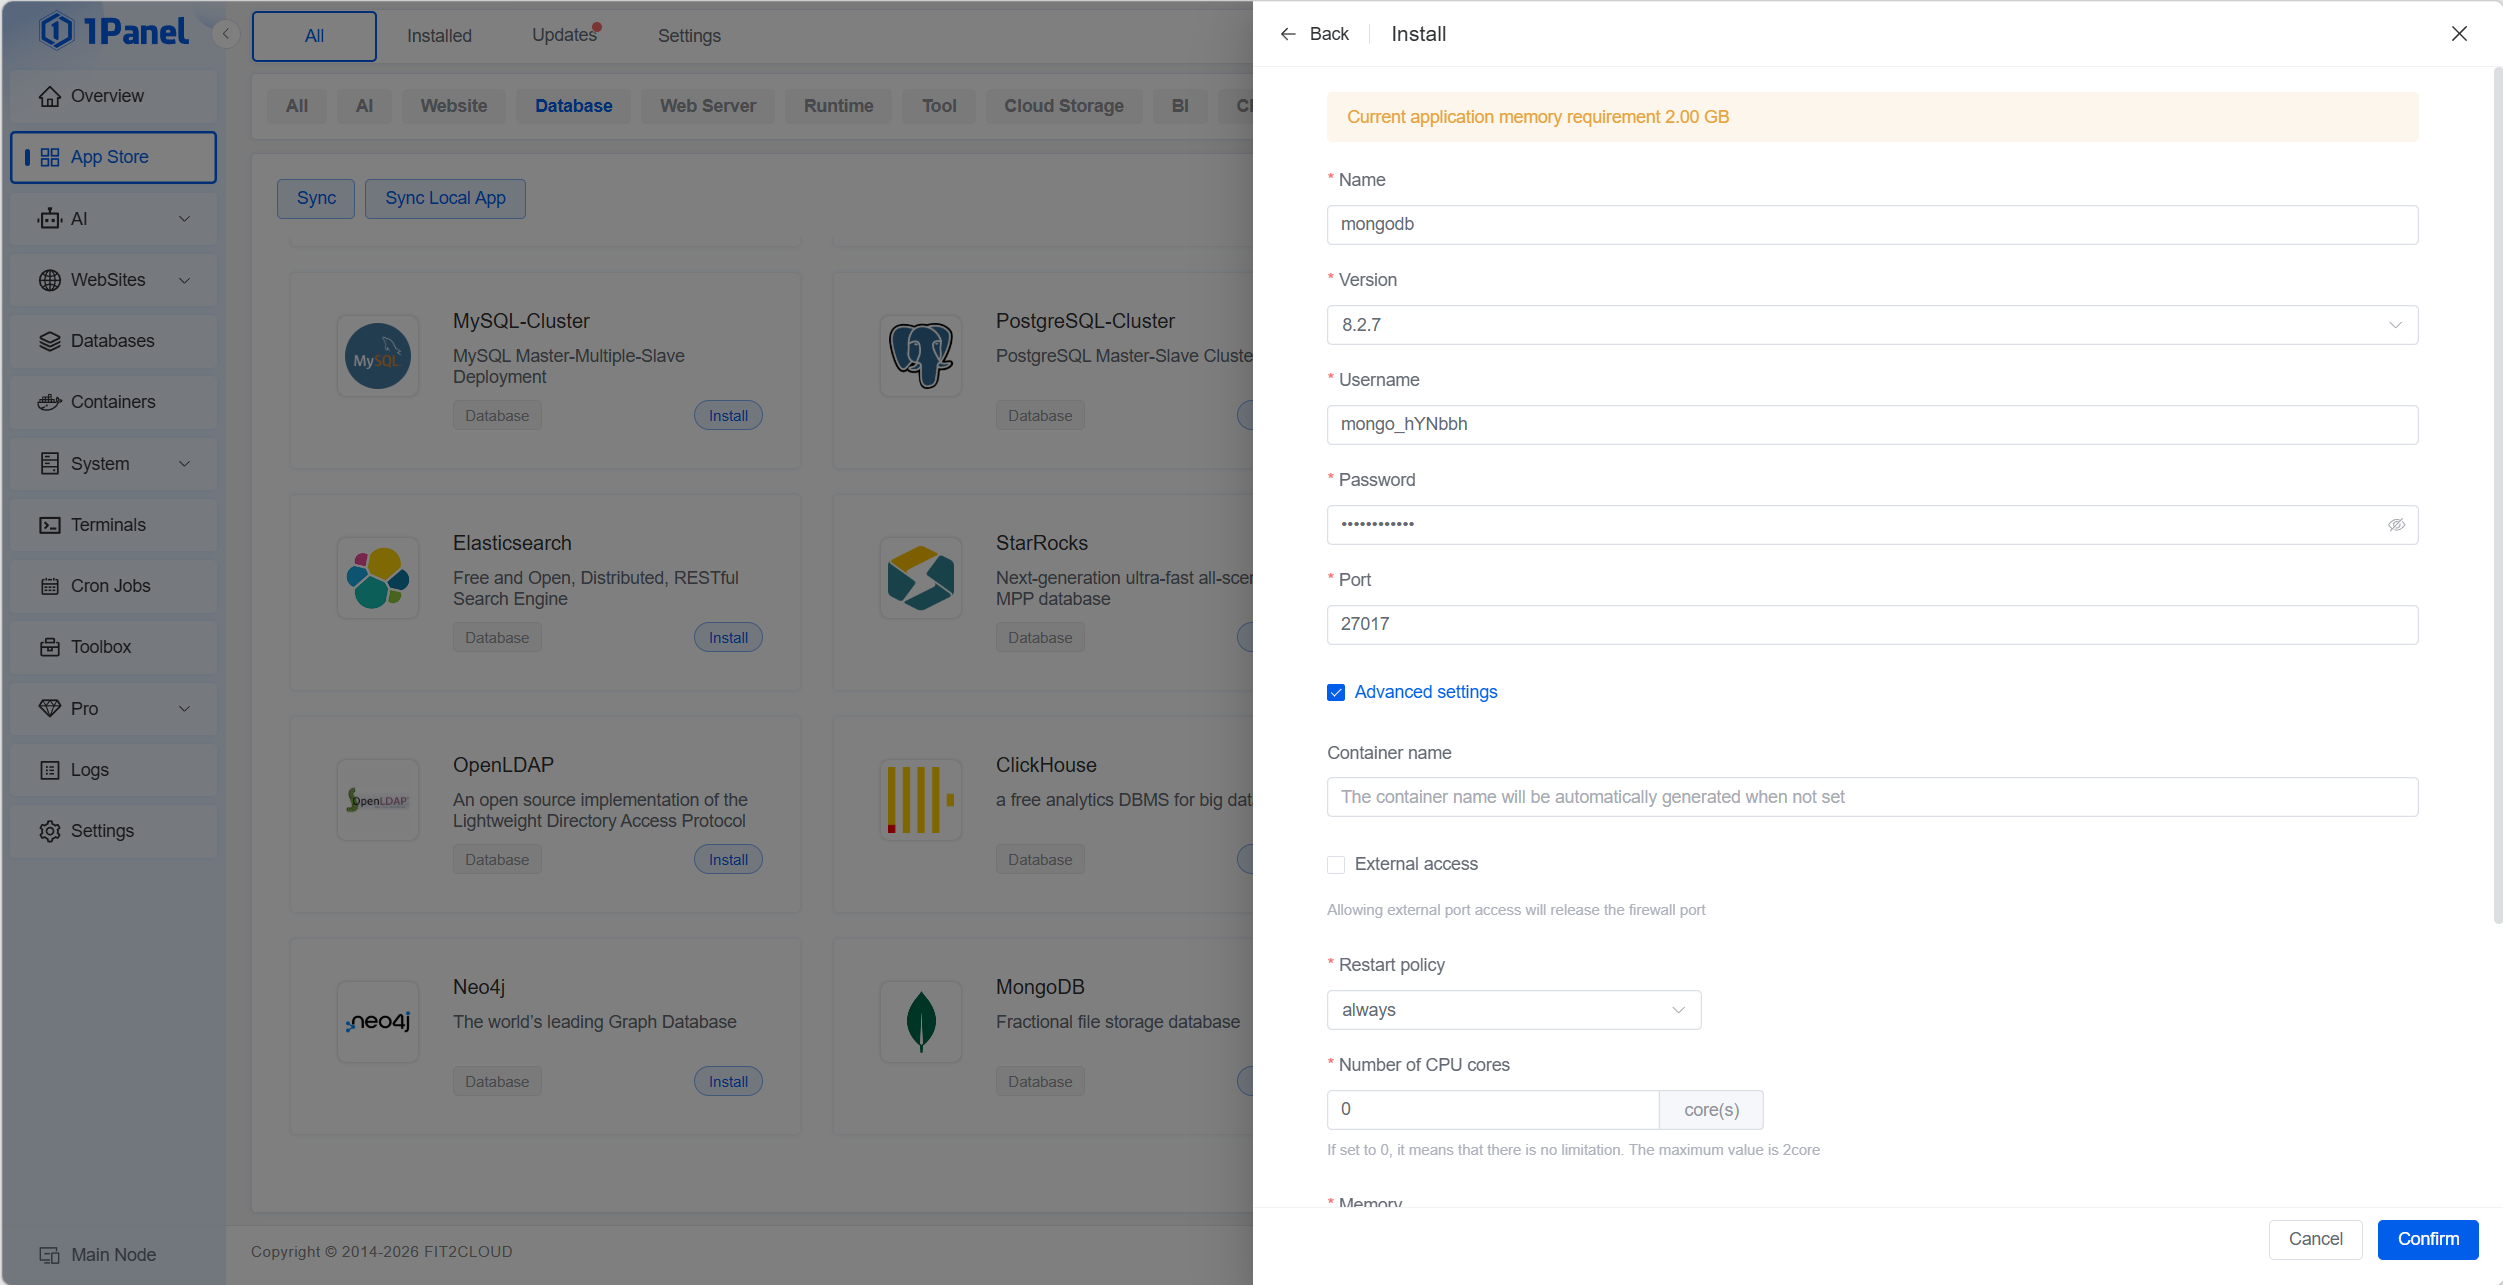
On the install panel, confirm the core fields:
| Field | Guidance |
|---|---|
| Name | Instance identifier (default mongodb) |
| Version | Select the MongoDB version to deploy |
| Username / Password | Initial credentials (auto-generated by default) |
| Port | Default 27017 unless you have a conflict |
| External Access | Keep off unless you explicitly need public access |
| Restart Policy | always is typical for production use |
Click Confirm to start deployment.
Step 2: Create a MongoDB Database
After installation, go to Databases -> MongoDB, then click Create.
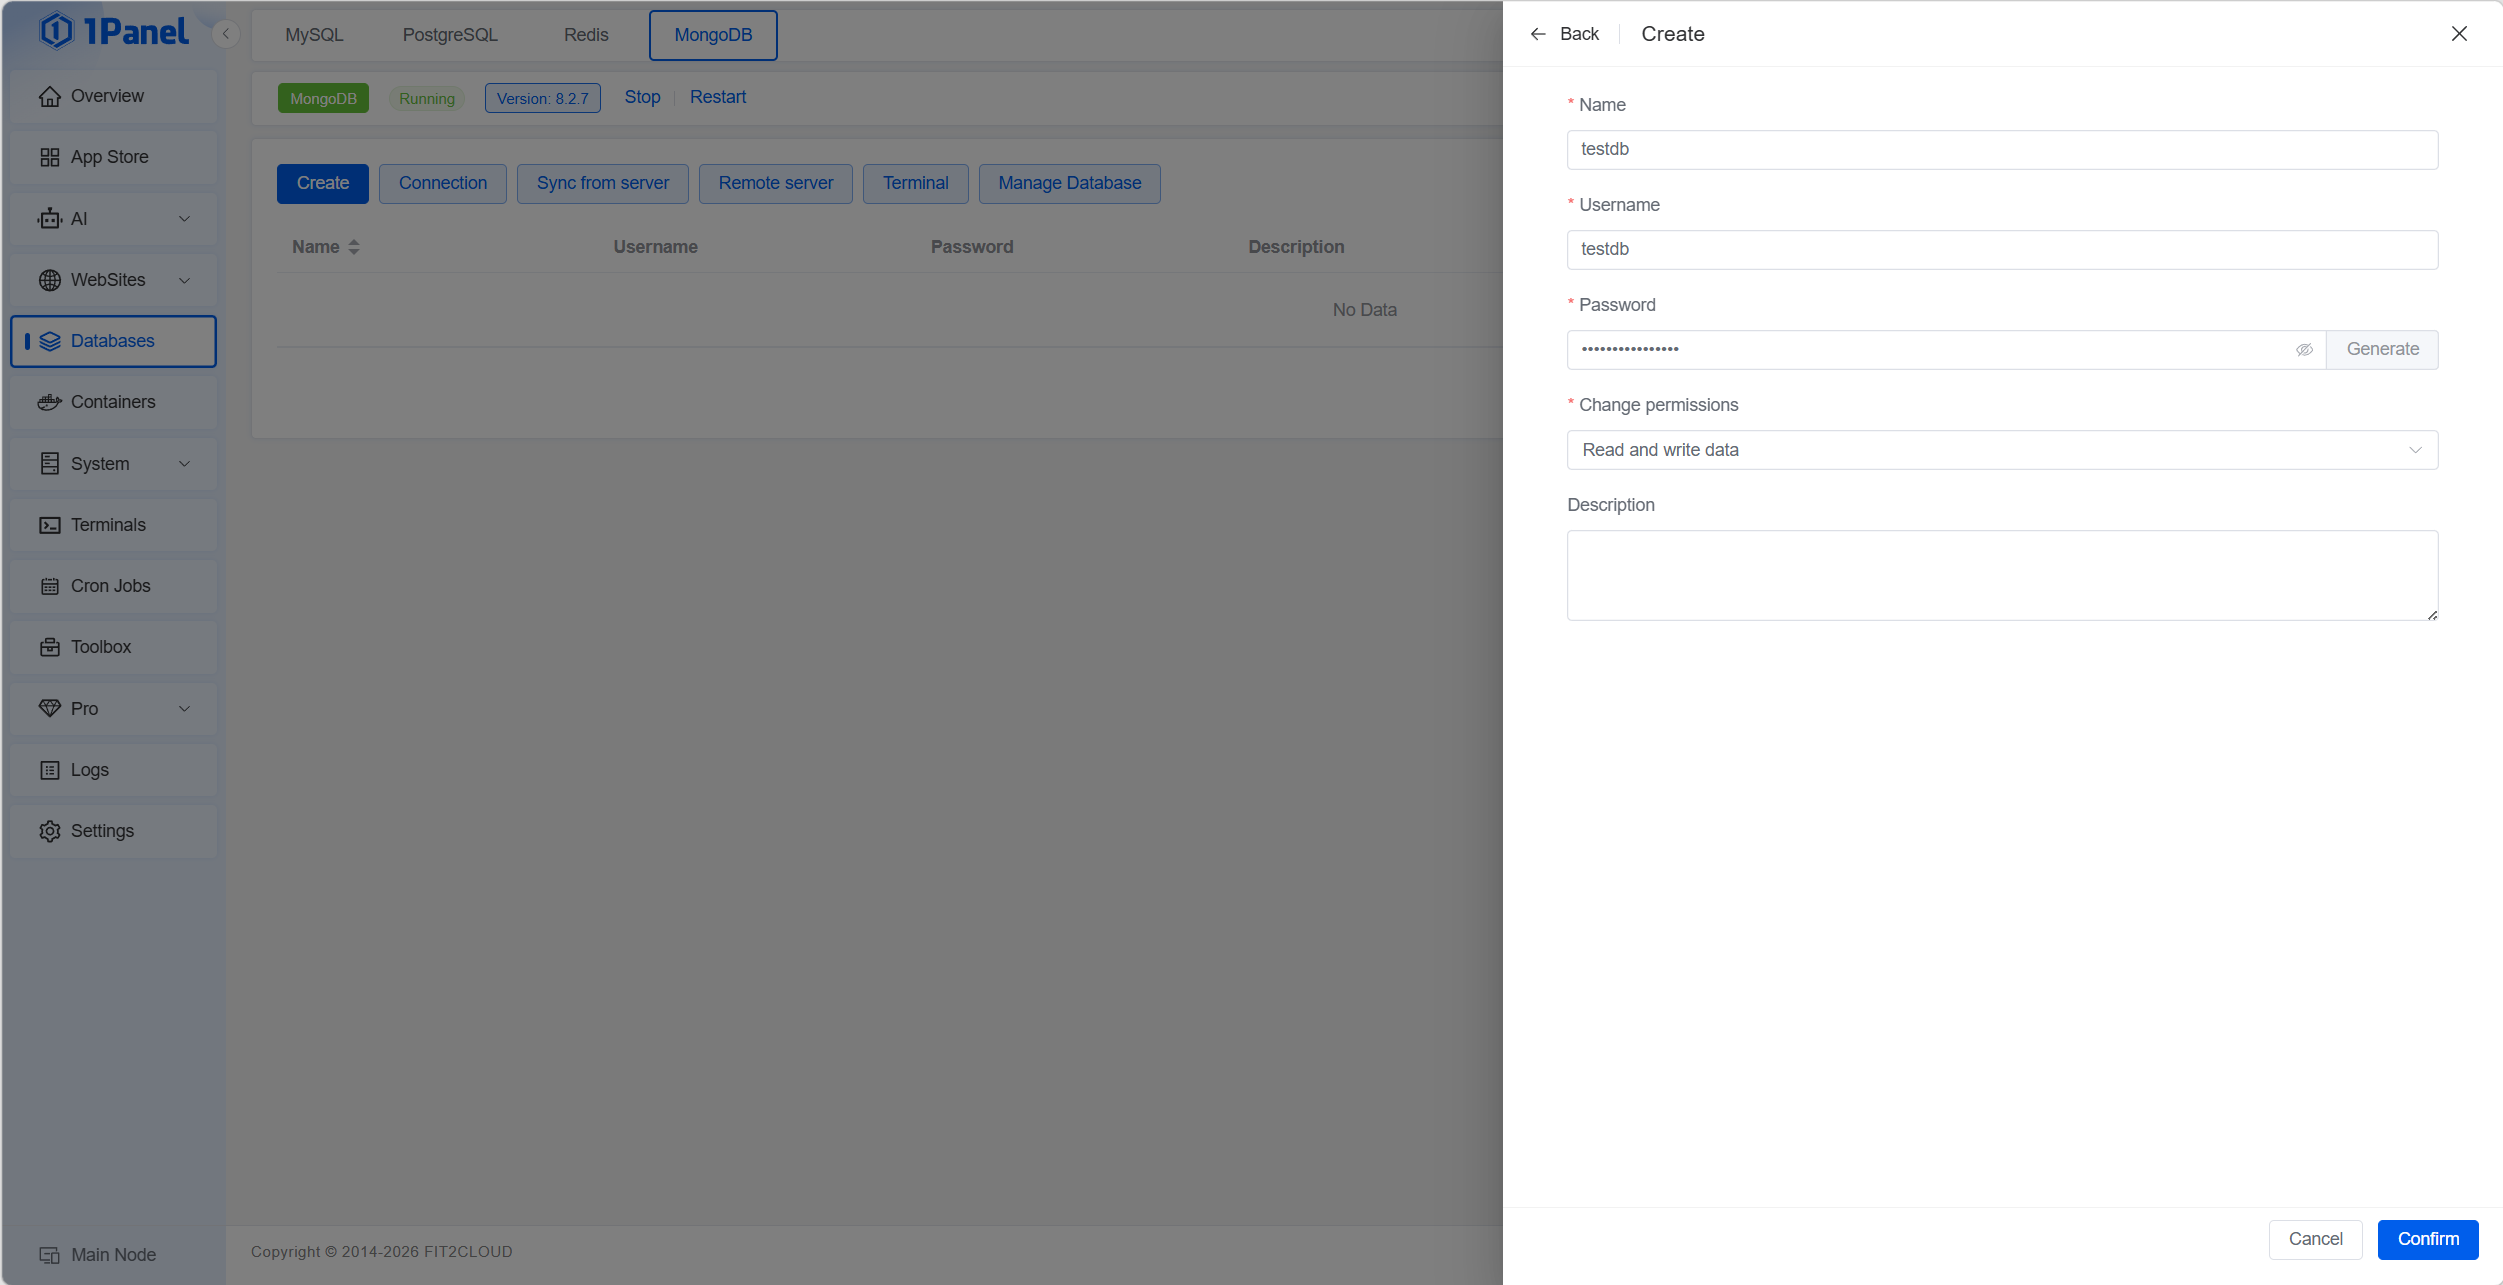
Fill in:
- Name: target database name
- Username: dedicated account for this database
- Password: generated or custom strong password
- Change Permissions: read/write or stricter mode based on use case
- Description: optional notes
Click Confirm to finish.
Step 3: View Connection Information
Click Connection in the toolbar to view host, port, and credentials.
Typical URI format:
mongodb://username:password@host:27017/databasename
Use an internal address for same-host workloads, and only expose public access when required by your network policy.
Step 4: Use the Built-in Terminal
Click Terminal to open an in-panel mongosh session.

Useful commands:
show databases
use testdb
show collections
db.users.find({ active: true }).limit(10)
db.adminCommand({ serverStatus: 1 })
This is useful for daily inspection without opening a separate SSH session.
Step 5: Backup and Restore
In the database list, click the backup action to open backup management.
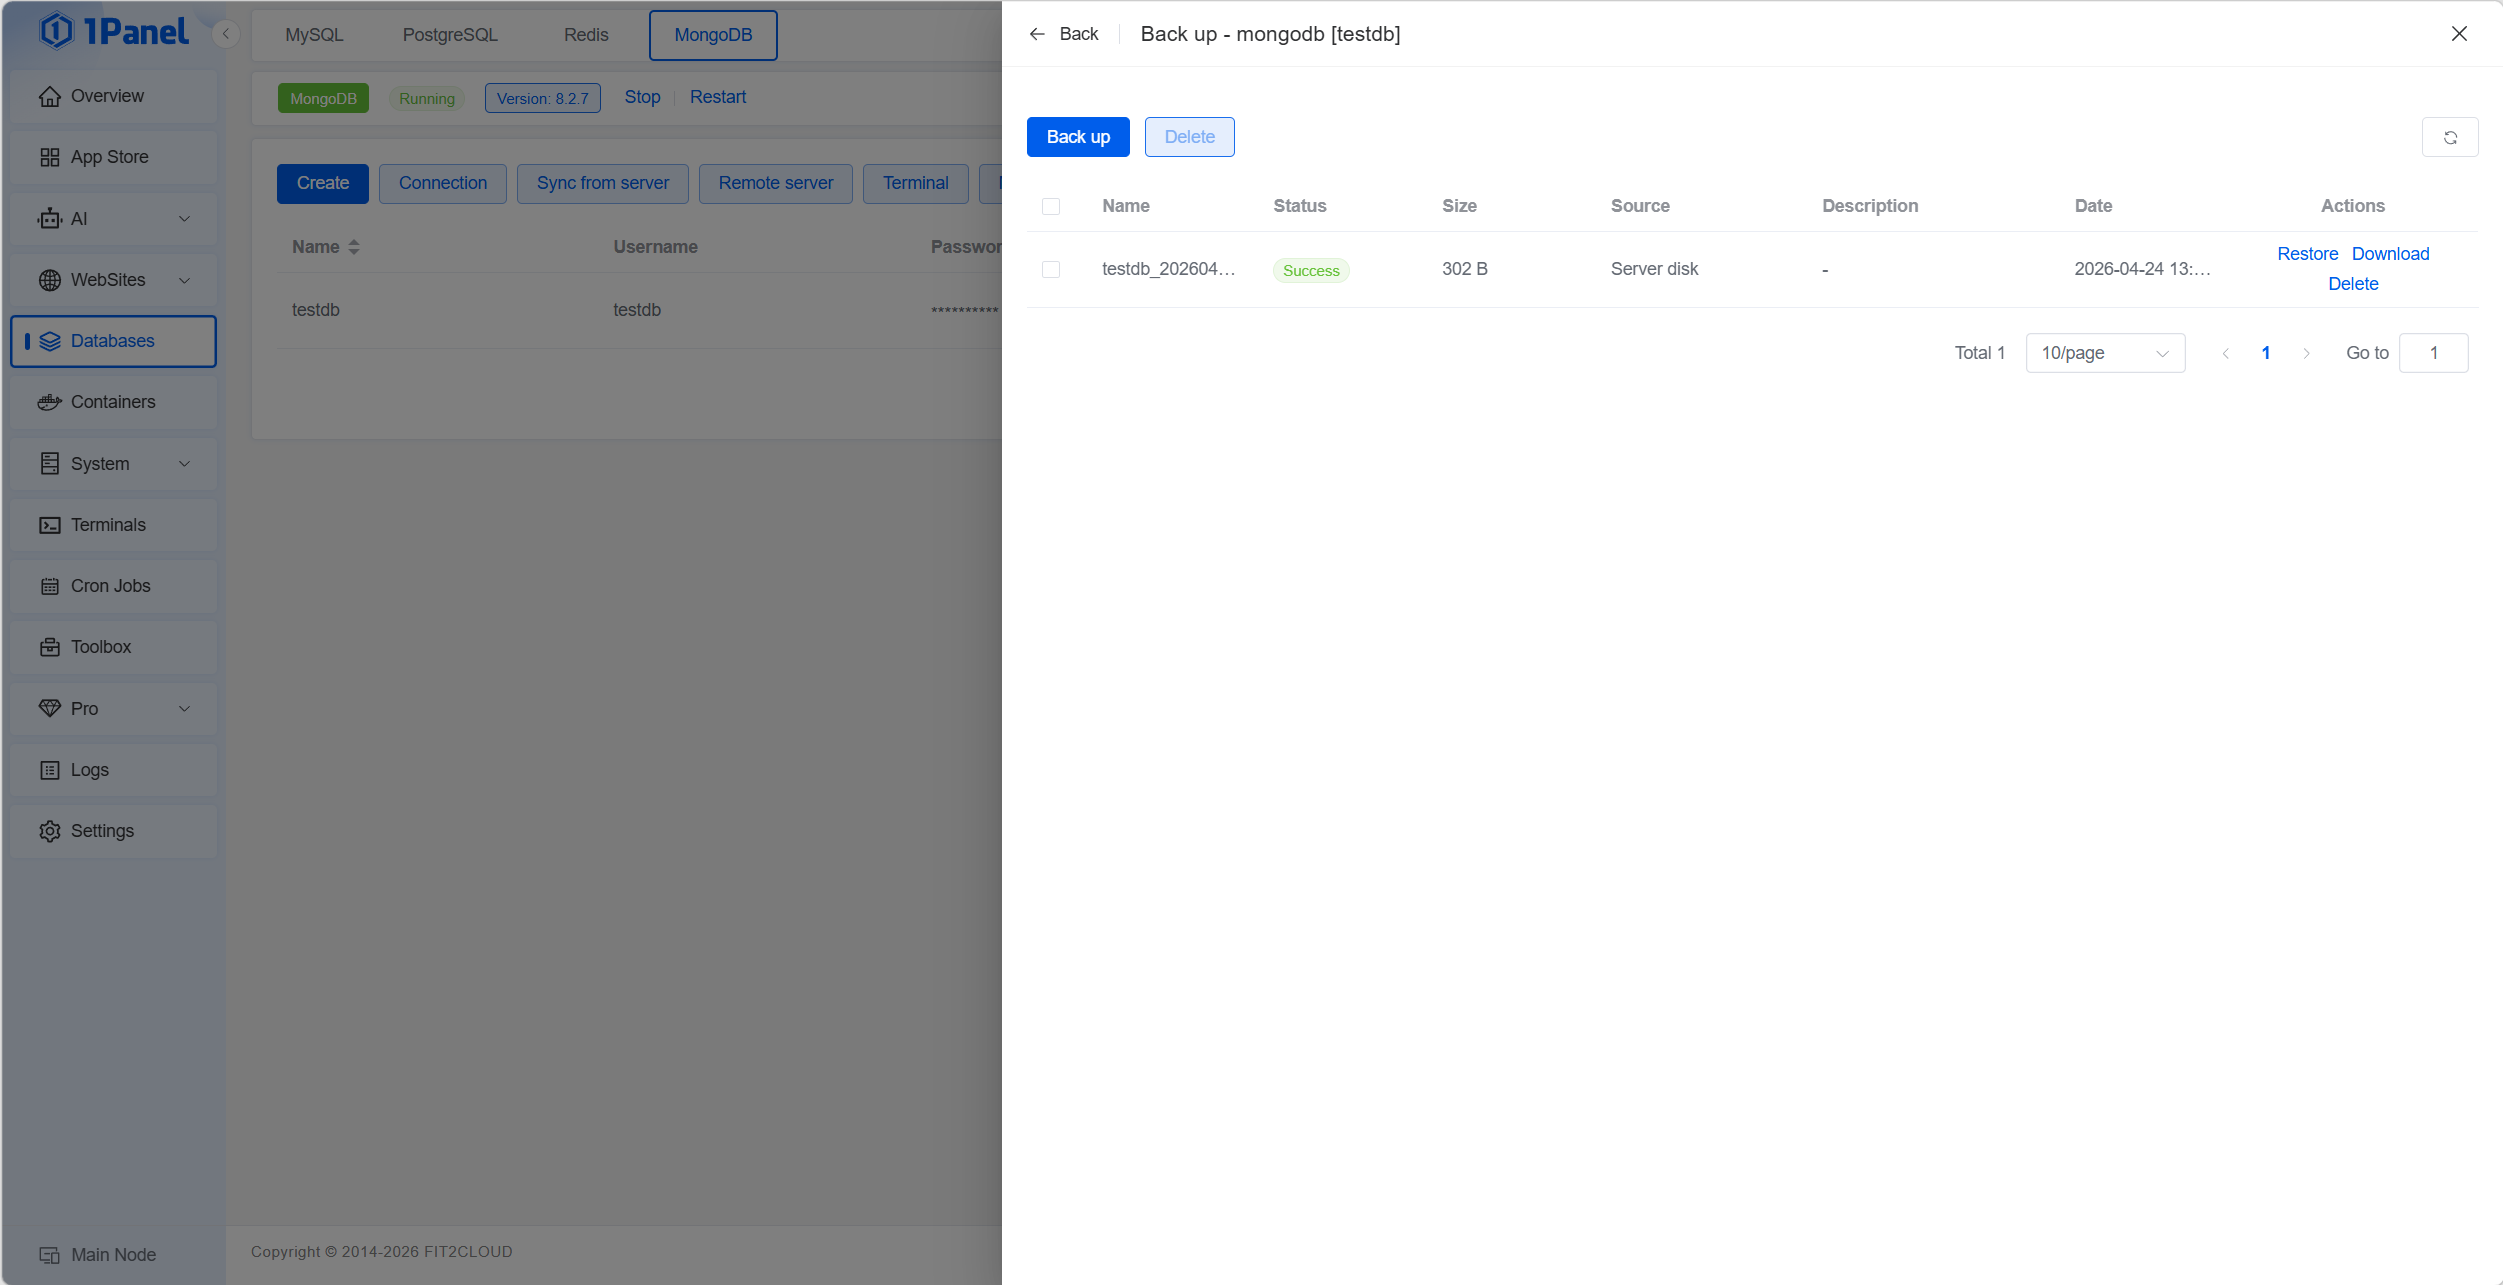
Create Backup
Click Back up to generate a snapshot for the selected database.
Restore Backup
Use Restore on the target backup record to recover database state.
Add Cloud Backup Destinations
In Settings -> Backup Accounts, configure supported storage destinations and route MongoDB backups there.
Schedule Automatic Backup
Use Cron Jobs to create recurring backup tasks and retention policies.
Step 6: Manage Remote MongoDB Servers
Use Remote server in the toolbar to add external MongoDB instances with connection details and credentials.
When external changes happen outside panel workflows, use Sync from server to refresh UI state.
Security Recommendations
For production:
- Keep direct public MongoDB exposure minimal
- Restrict inbound rules to known sources
- Prefer private network access paths (for example, VPN or tunnel-based access)
- Rotate credentials and keep backup copies off-site
MongoDB Operations Checklist
- Instance is running and healthy in
Databases -> MongoDB - Application connection URI is validated
- Backup is tested with at least one restore drill
- Remote access controls match your security baseline
Conclusion
1Panel gives you an end-to-end MongoDB management path on VPS: install, create, connect, query, protect, and recover from one interface.
New to 1Panel? Start at 1panel.pro.