Deploy WordPress with the 1Panel PHP Runtime
Learn how to install OpenResty and MySQL, create a PHP runtime, deploy WordPress, point your domain, and enable HTTPS with ACME on 1Panel.
This tutorial walks you through deploying a WordPress site using 1Panel’s PHP runtime—including OpenResty, MySQL, domain setup, and HTTPS. 1Panel is a modern Linux server panel that gives you a complete workflow for hosting PHP applications.
With PHP runtime management in 1Panel you get:
- Multiple PHP versions — PHP 5.6, 7.x, 8.0–8.3 (and newer as supported), so you can match your app’s requirements.
- Extension management — Install and configure common extensions (e.g. mysqli, gd, curl, zip, mbstring) from the UI.
- Visual tuning — Adjust upload limits, memory limits, execution time, disabled functions, and more without editing
php.iniby hand.
Prerequisites
Before you start, make sure you have:
- A Linux server with a public IP (e.g. a cloud VPS).
- 1Panel installed and reachable in the browser.
- A domain you control (for DNS records).
- Firewall rules allowing HTTP (80) and HTTPS (443).
Step 1 — Install the runtime stack
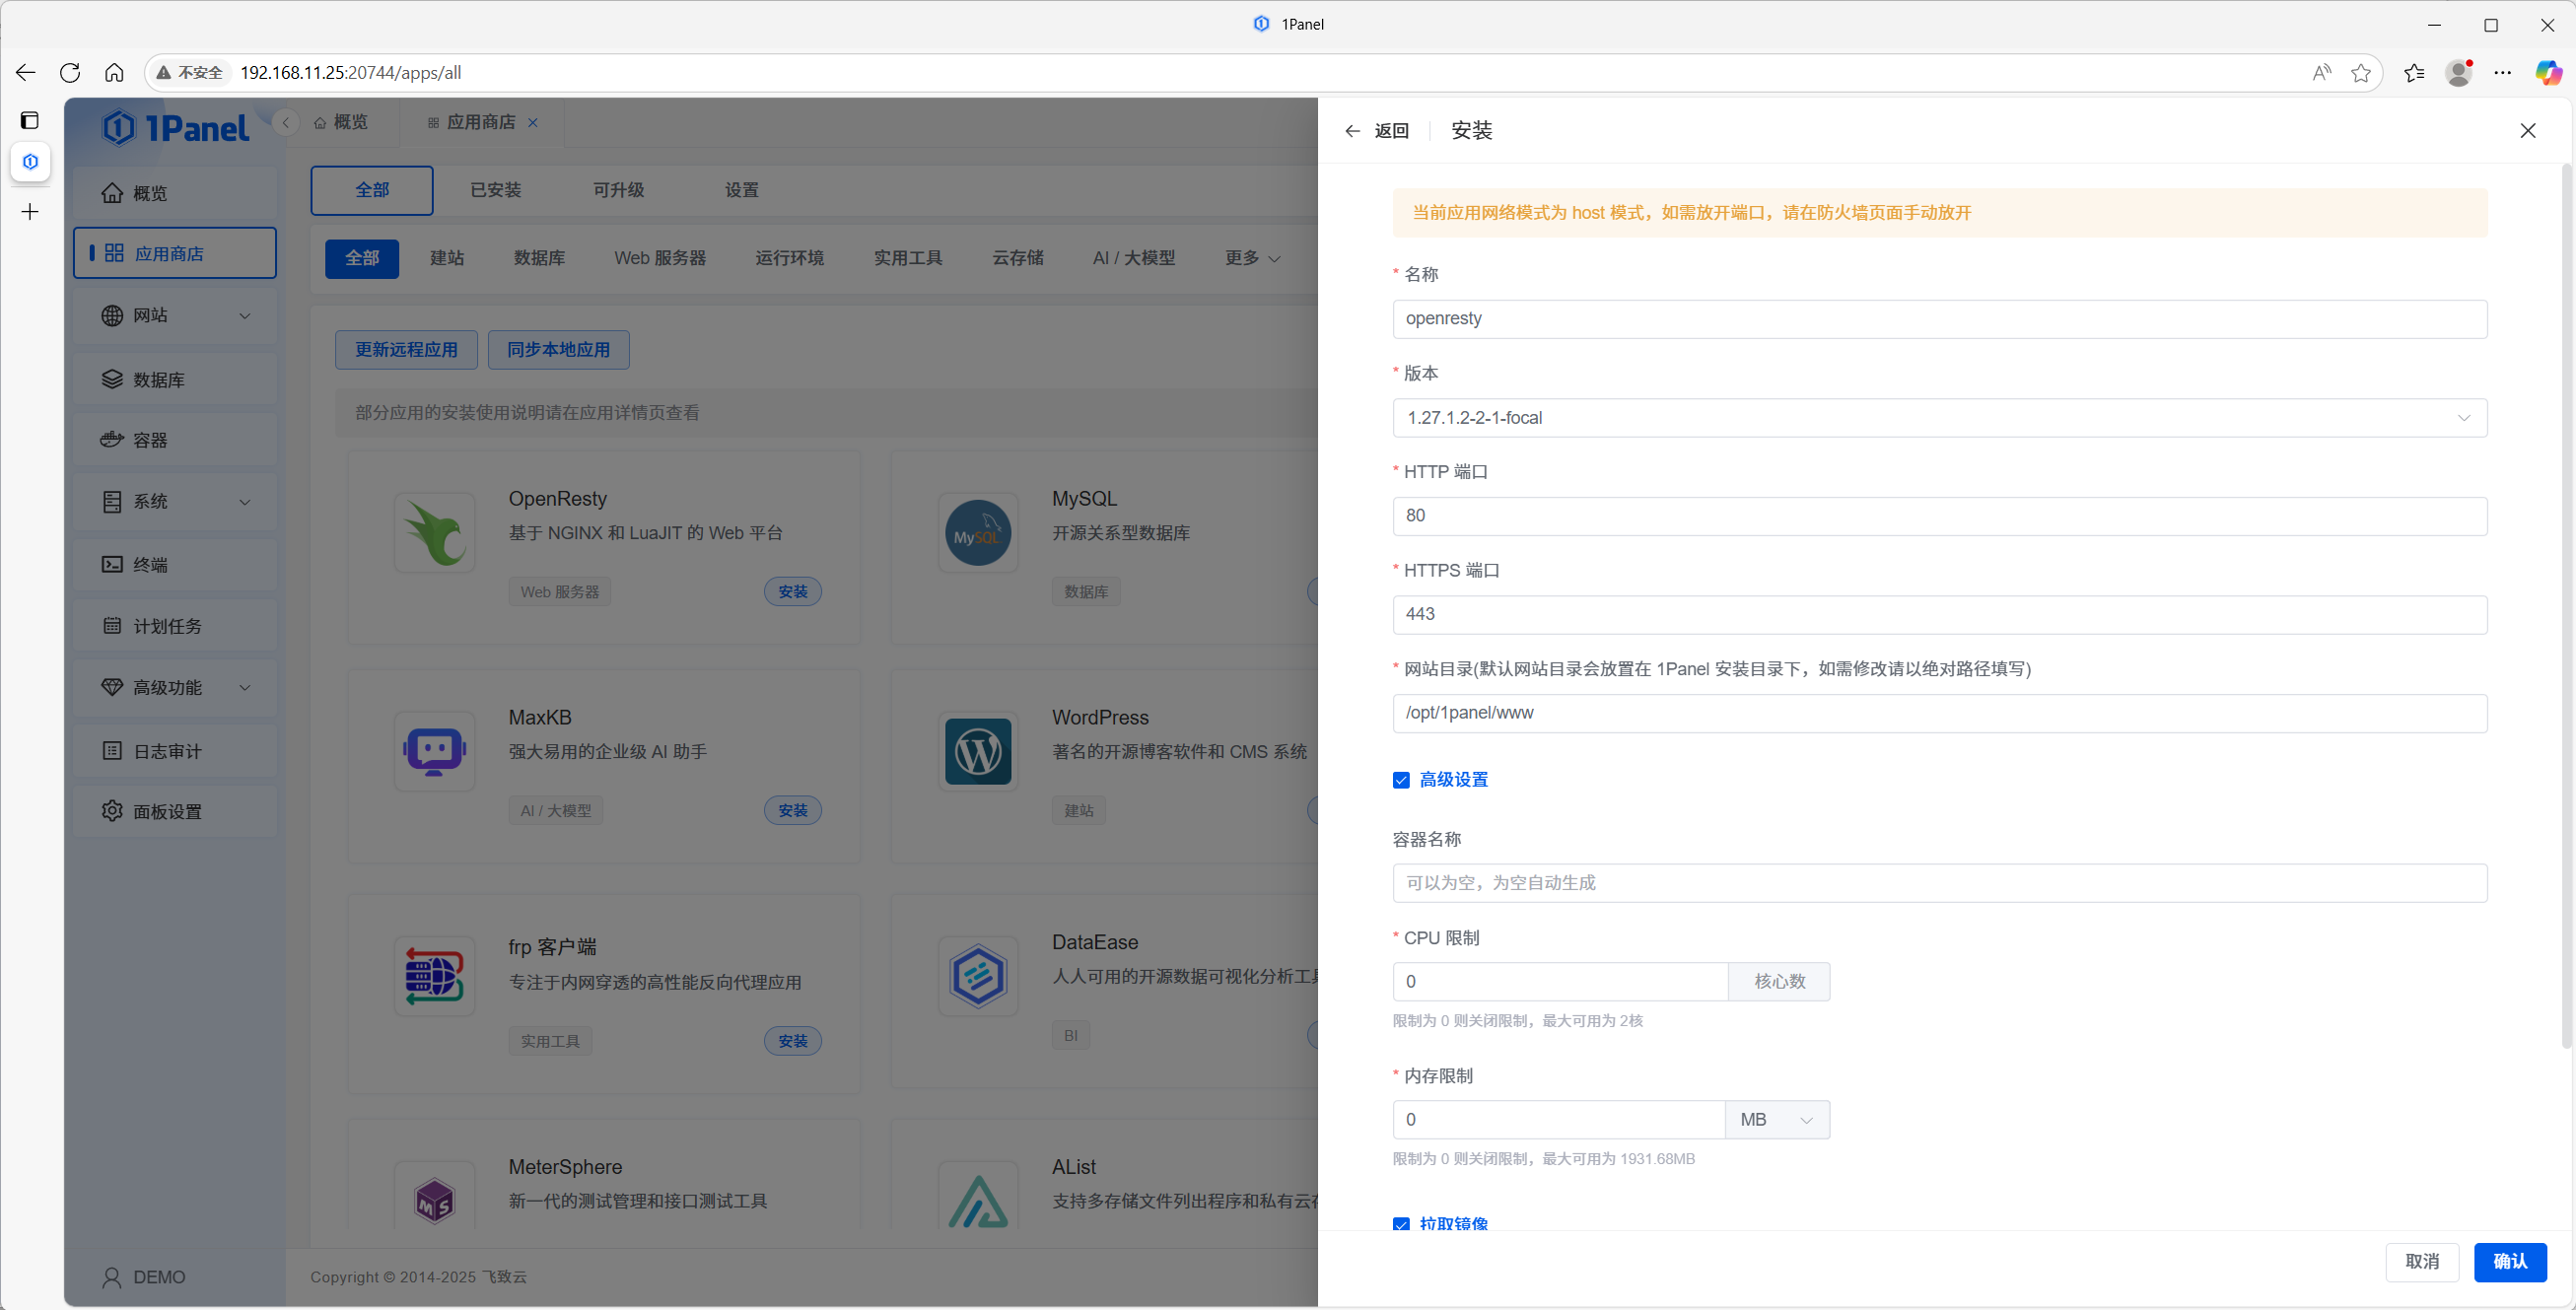
1.1 Install OpenResty
OpenResty is the web platform 1Panel uses for site management. It builds on Nginx with Lua and extra modules.
- Sign in to 1Panel.
- Open App Store.
- Find OpenResty, keep the default options, and install.
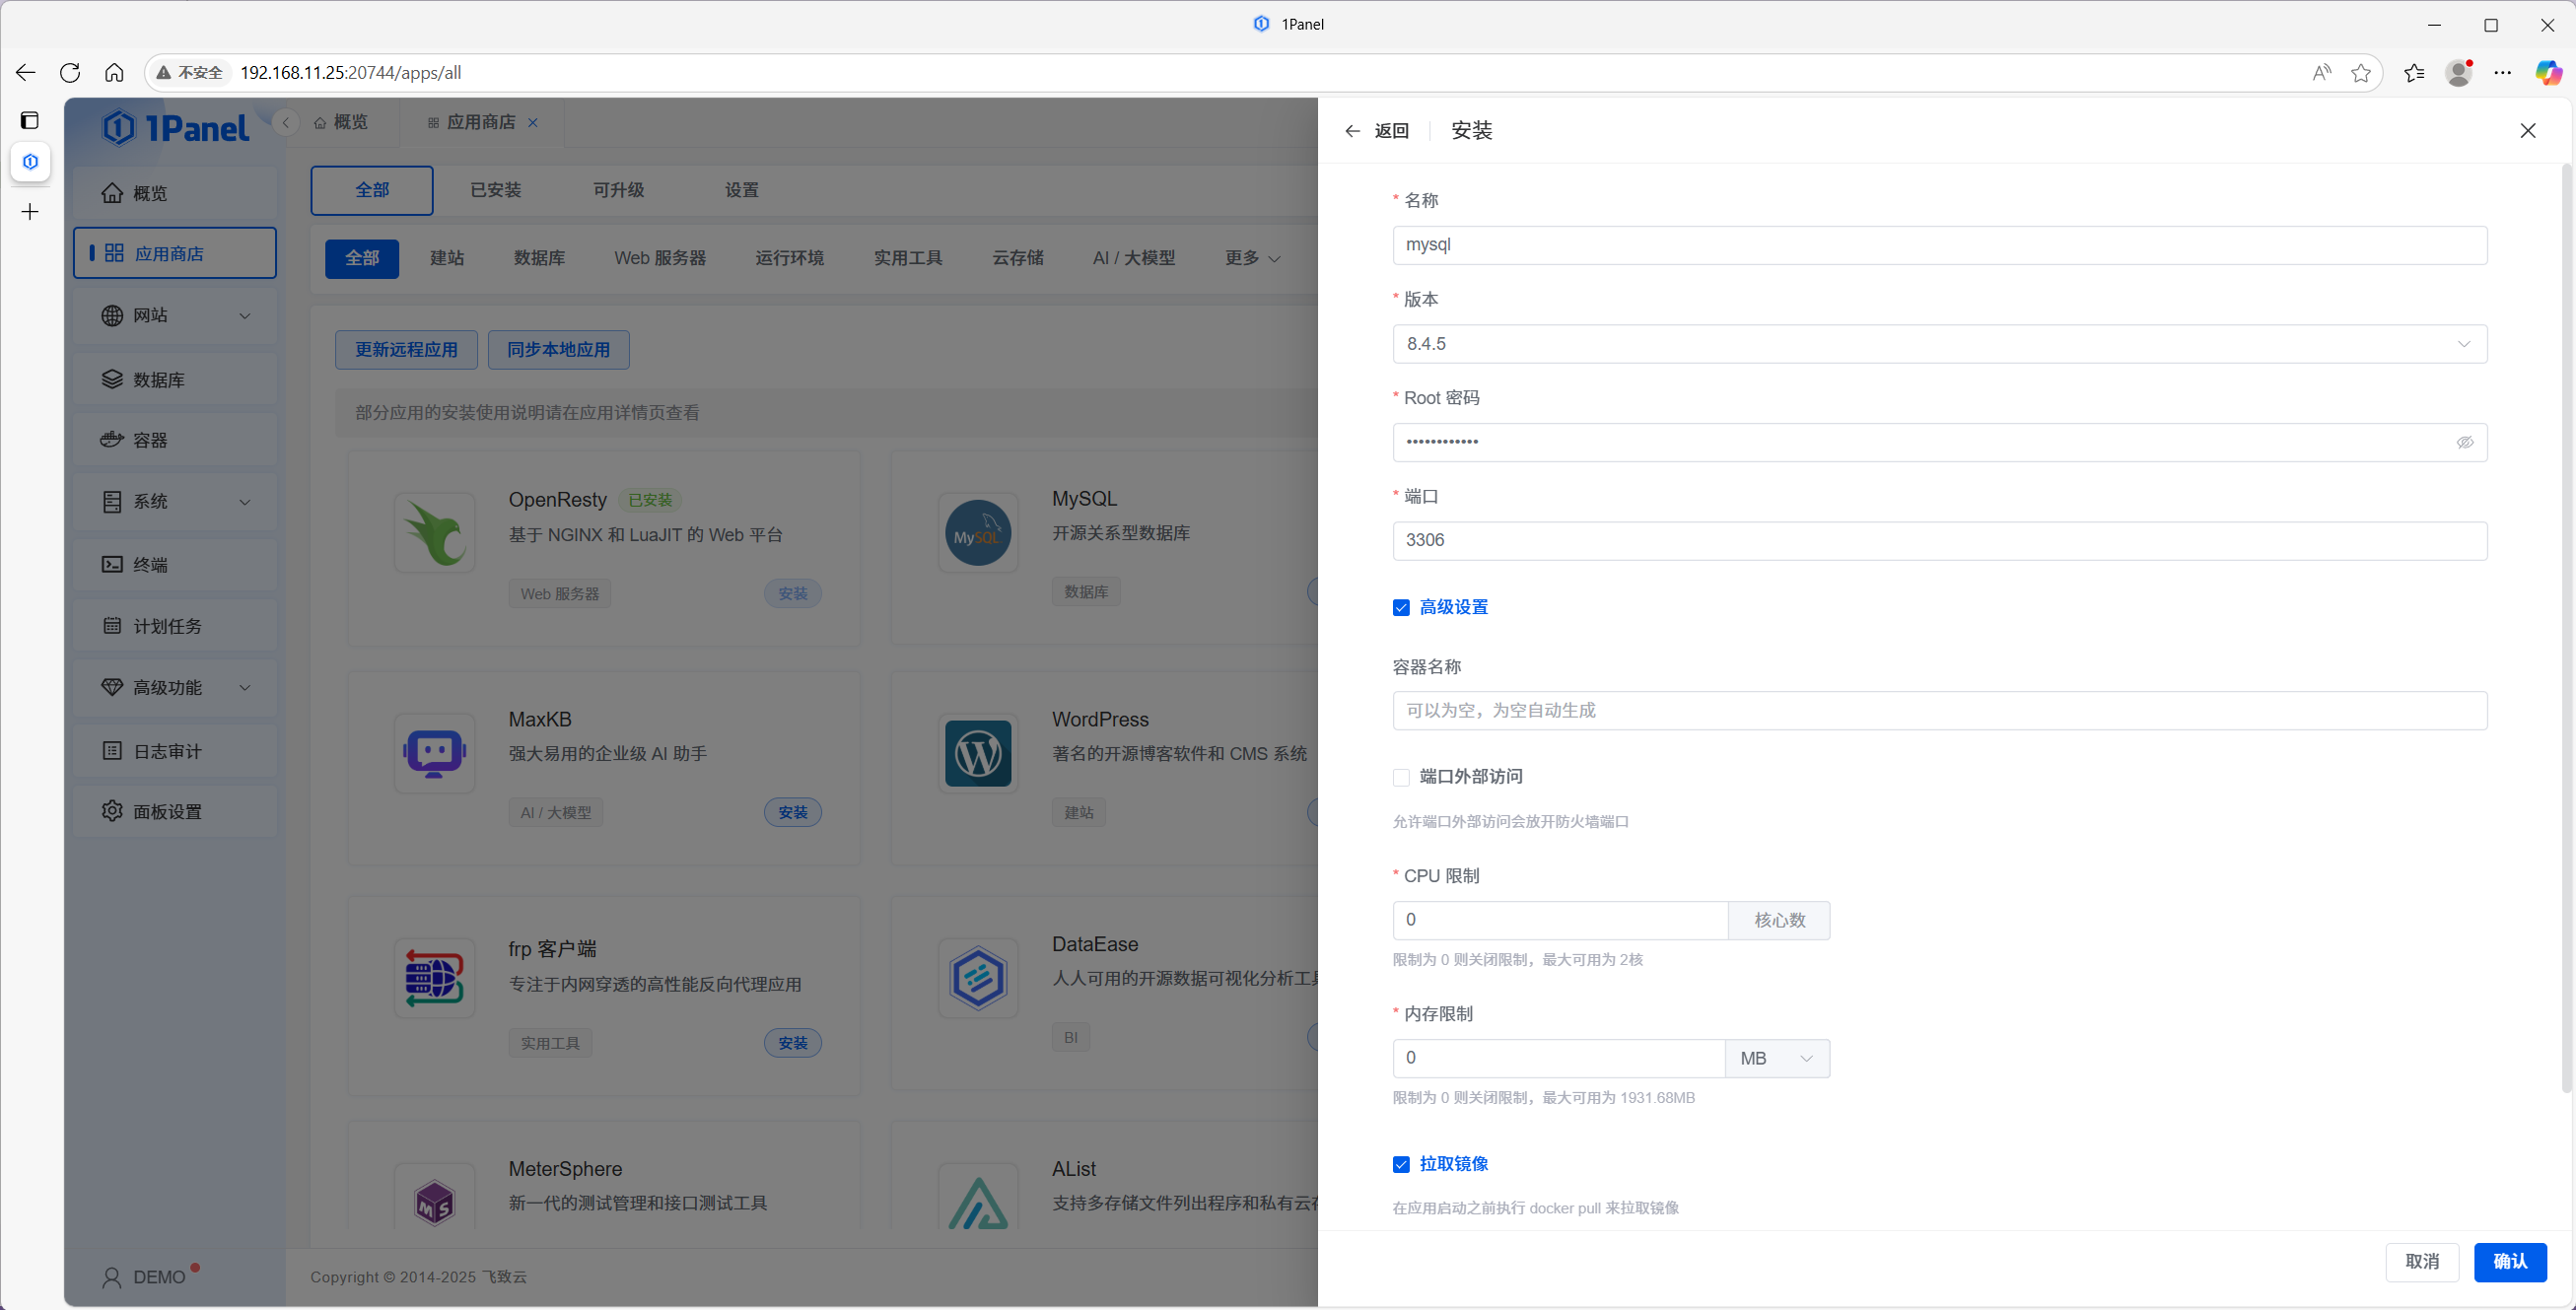
1.2 Install MySQL
WordPress needs a database; MySQL is a common choice.
- In App Store, find MySQL.
- Install with the defaults and wait until it finishes.
1.3 Create a PHP runtime
WordPress runs on PHP, so you create a dedicated runtime:
- Go to Websites → PHP runtime.
- Choose PHP and click Create runtime.
- Set a name, pick a PHP version (this example uses a recent PHP 8.4 build).
- For extension template, choose WordPress to pull in typical extensions; add any others your theme or plugins need.
- Confirm and wait until the runtime is ready.

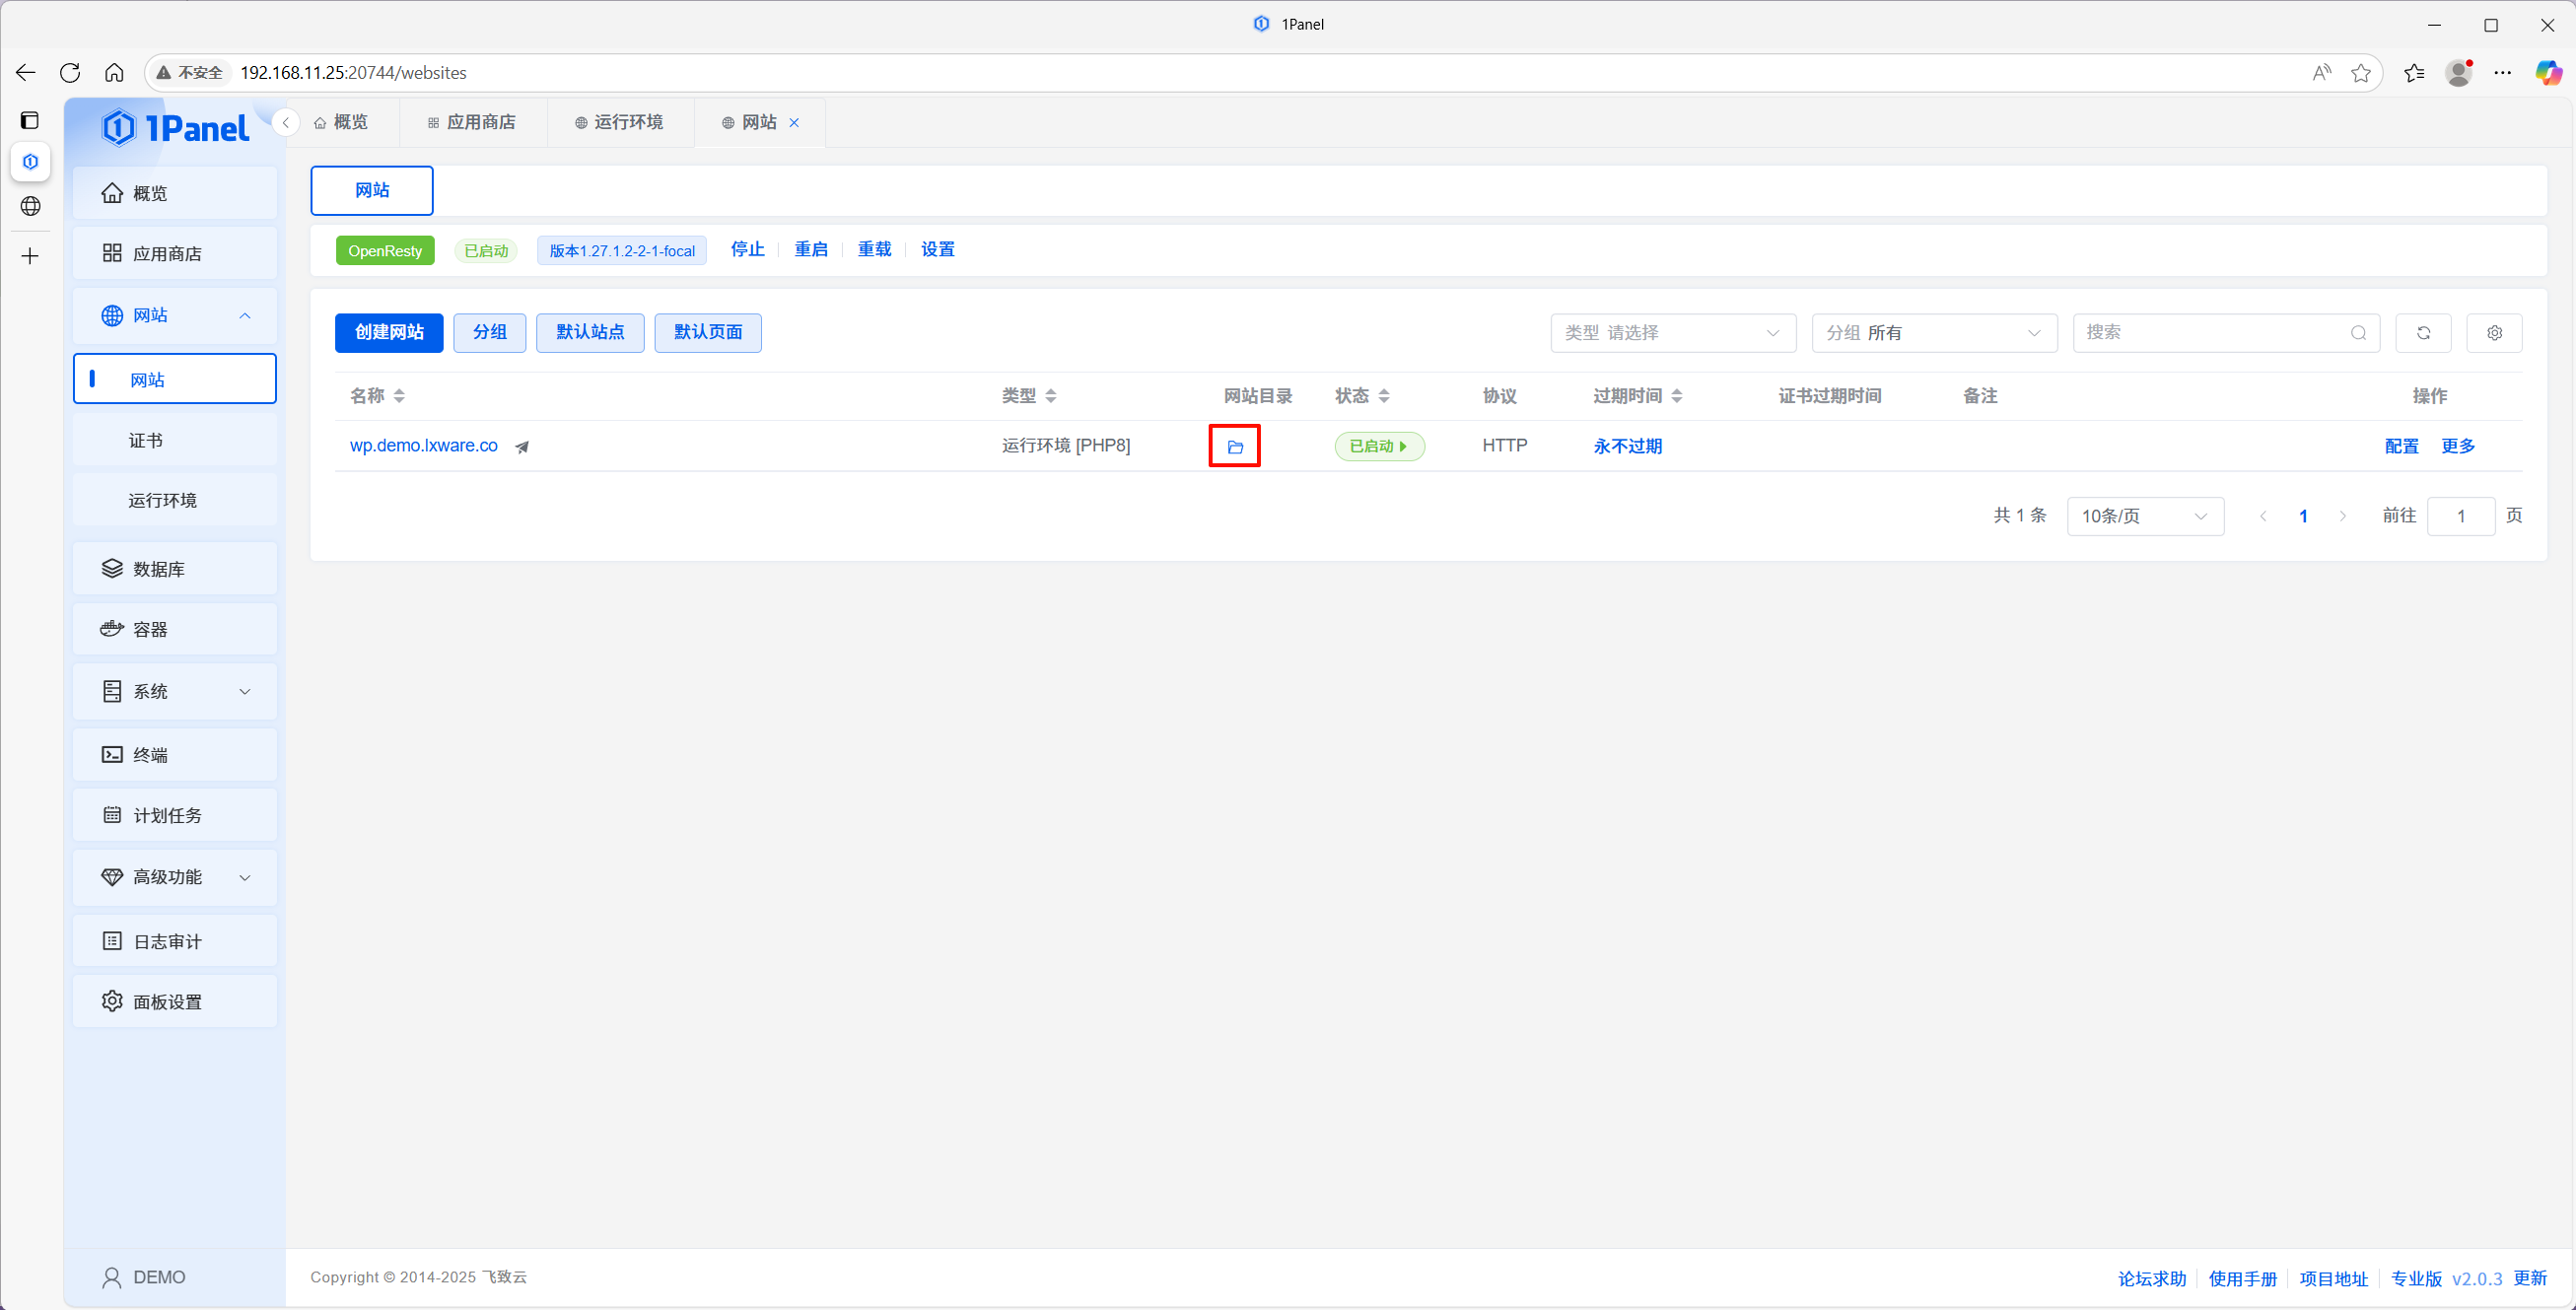
Step 2 — Create the website
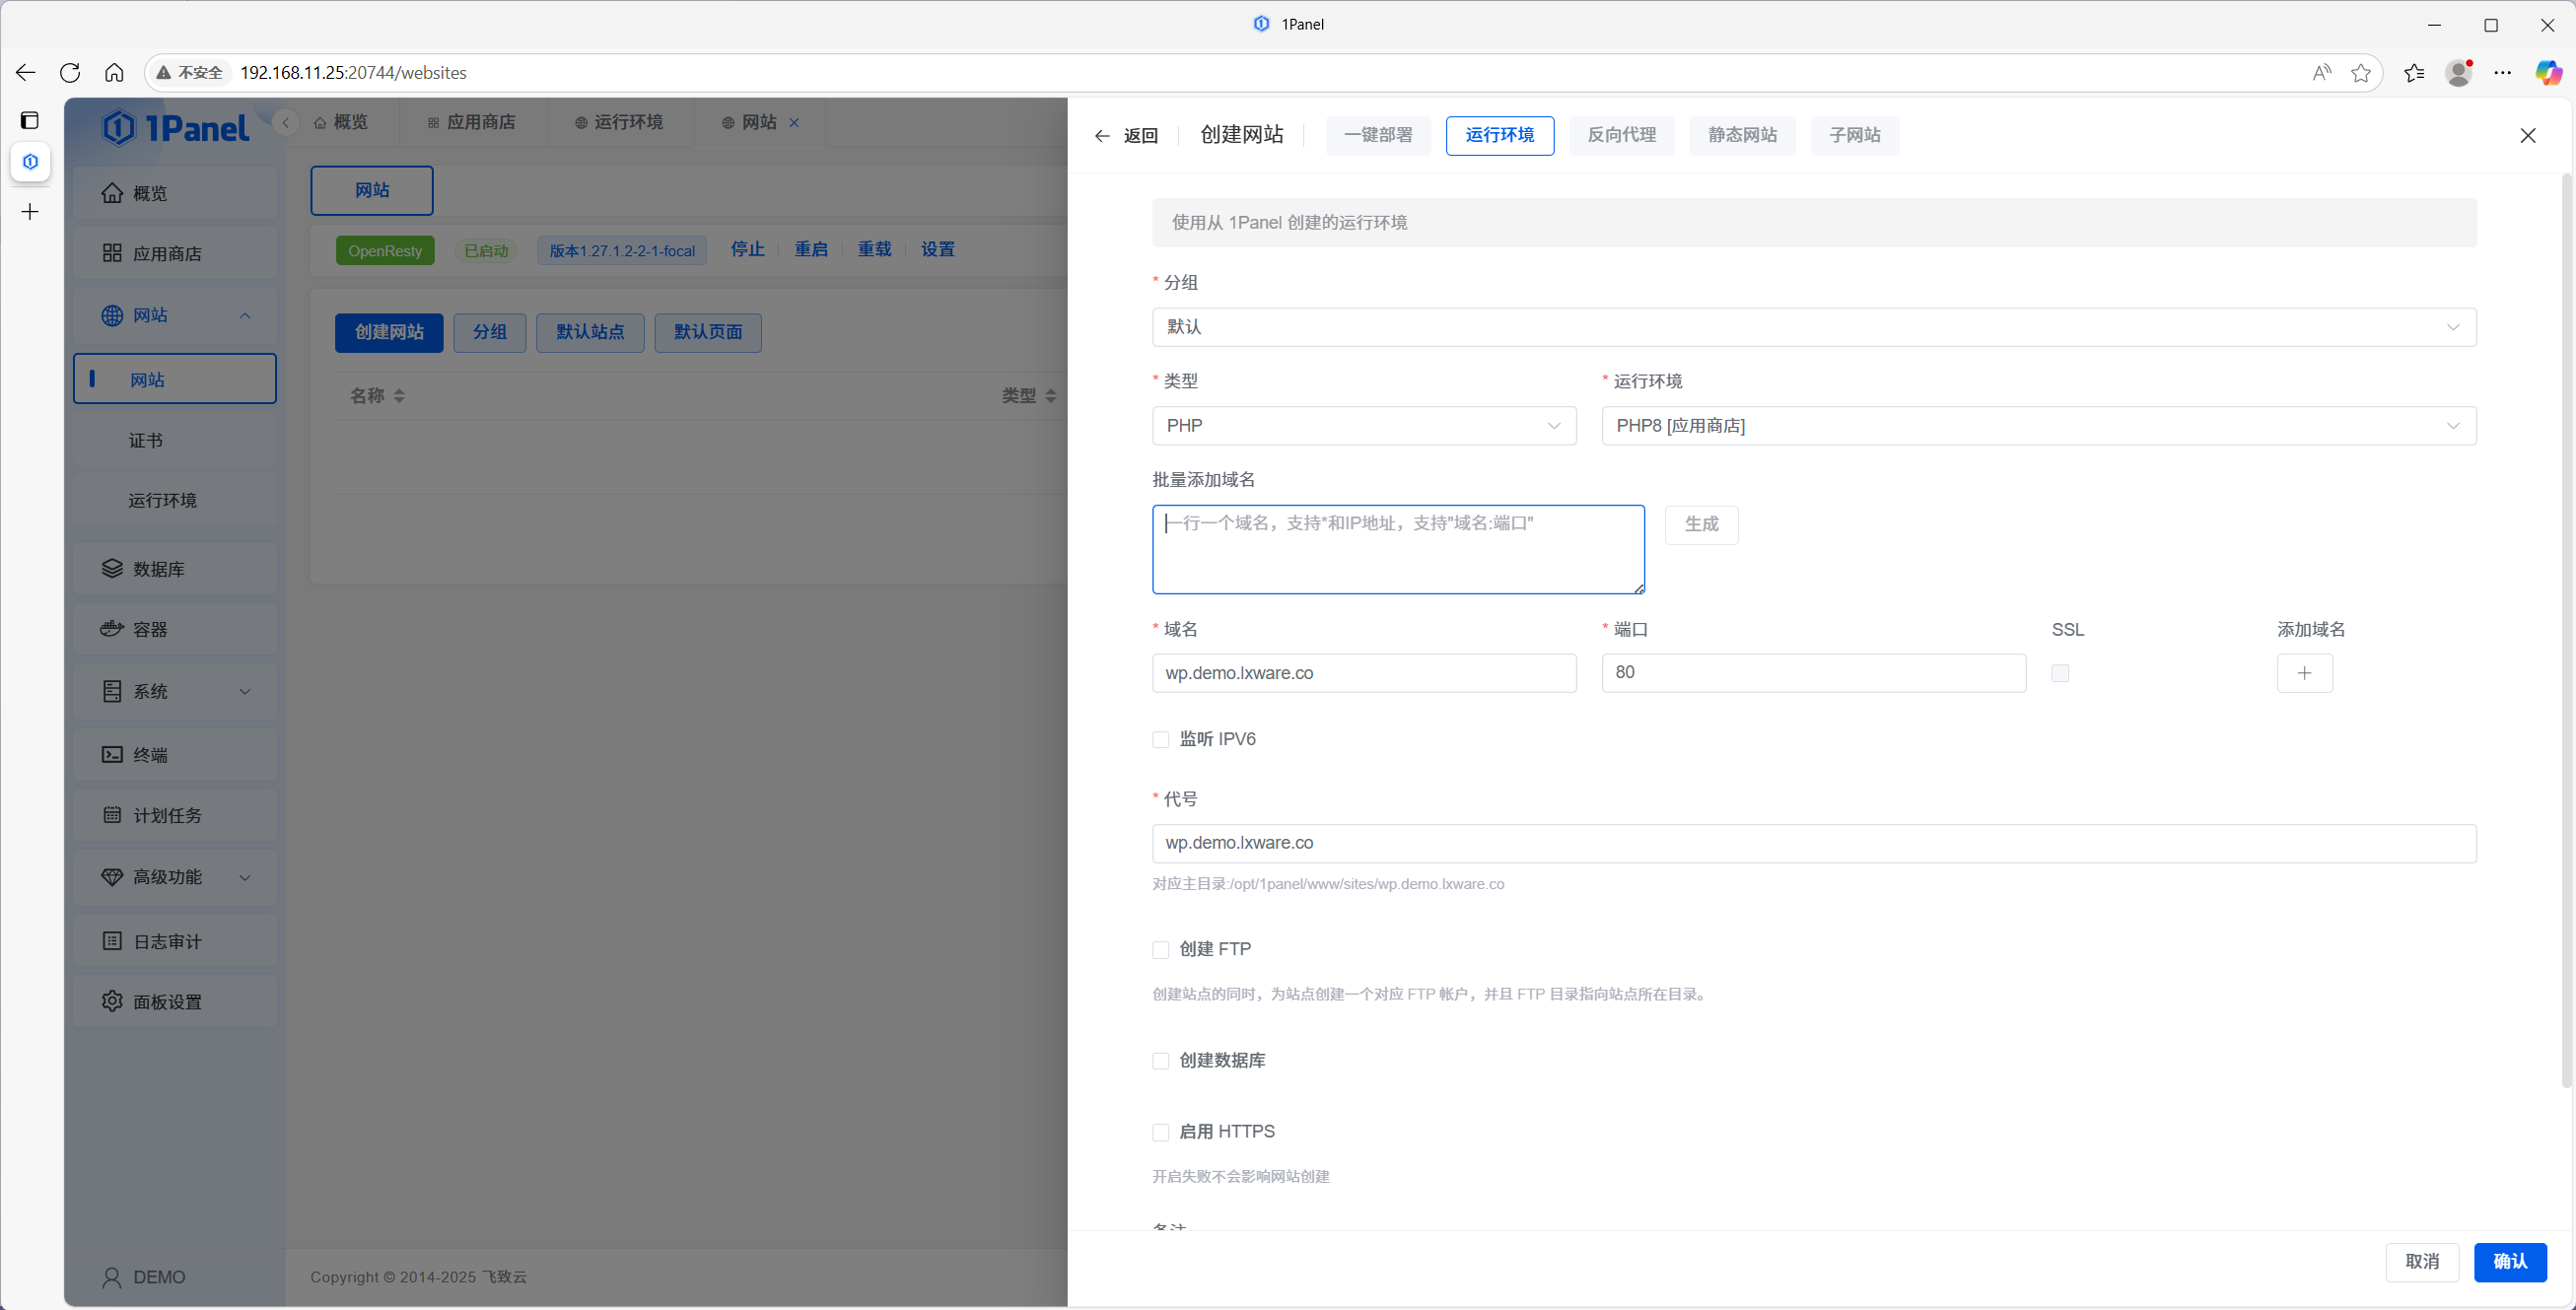
2.1 Create a site bound to the PHP runtime
- Open Websites → Create website.
- Choose Runtime and select the PHP runtime you just created.
- Fill in:
- Name — display name for the site.
- Primary domain — e.g.
www.example.com. - Alias — directory name (often the same as the domain).
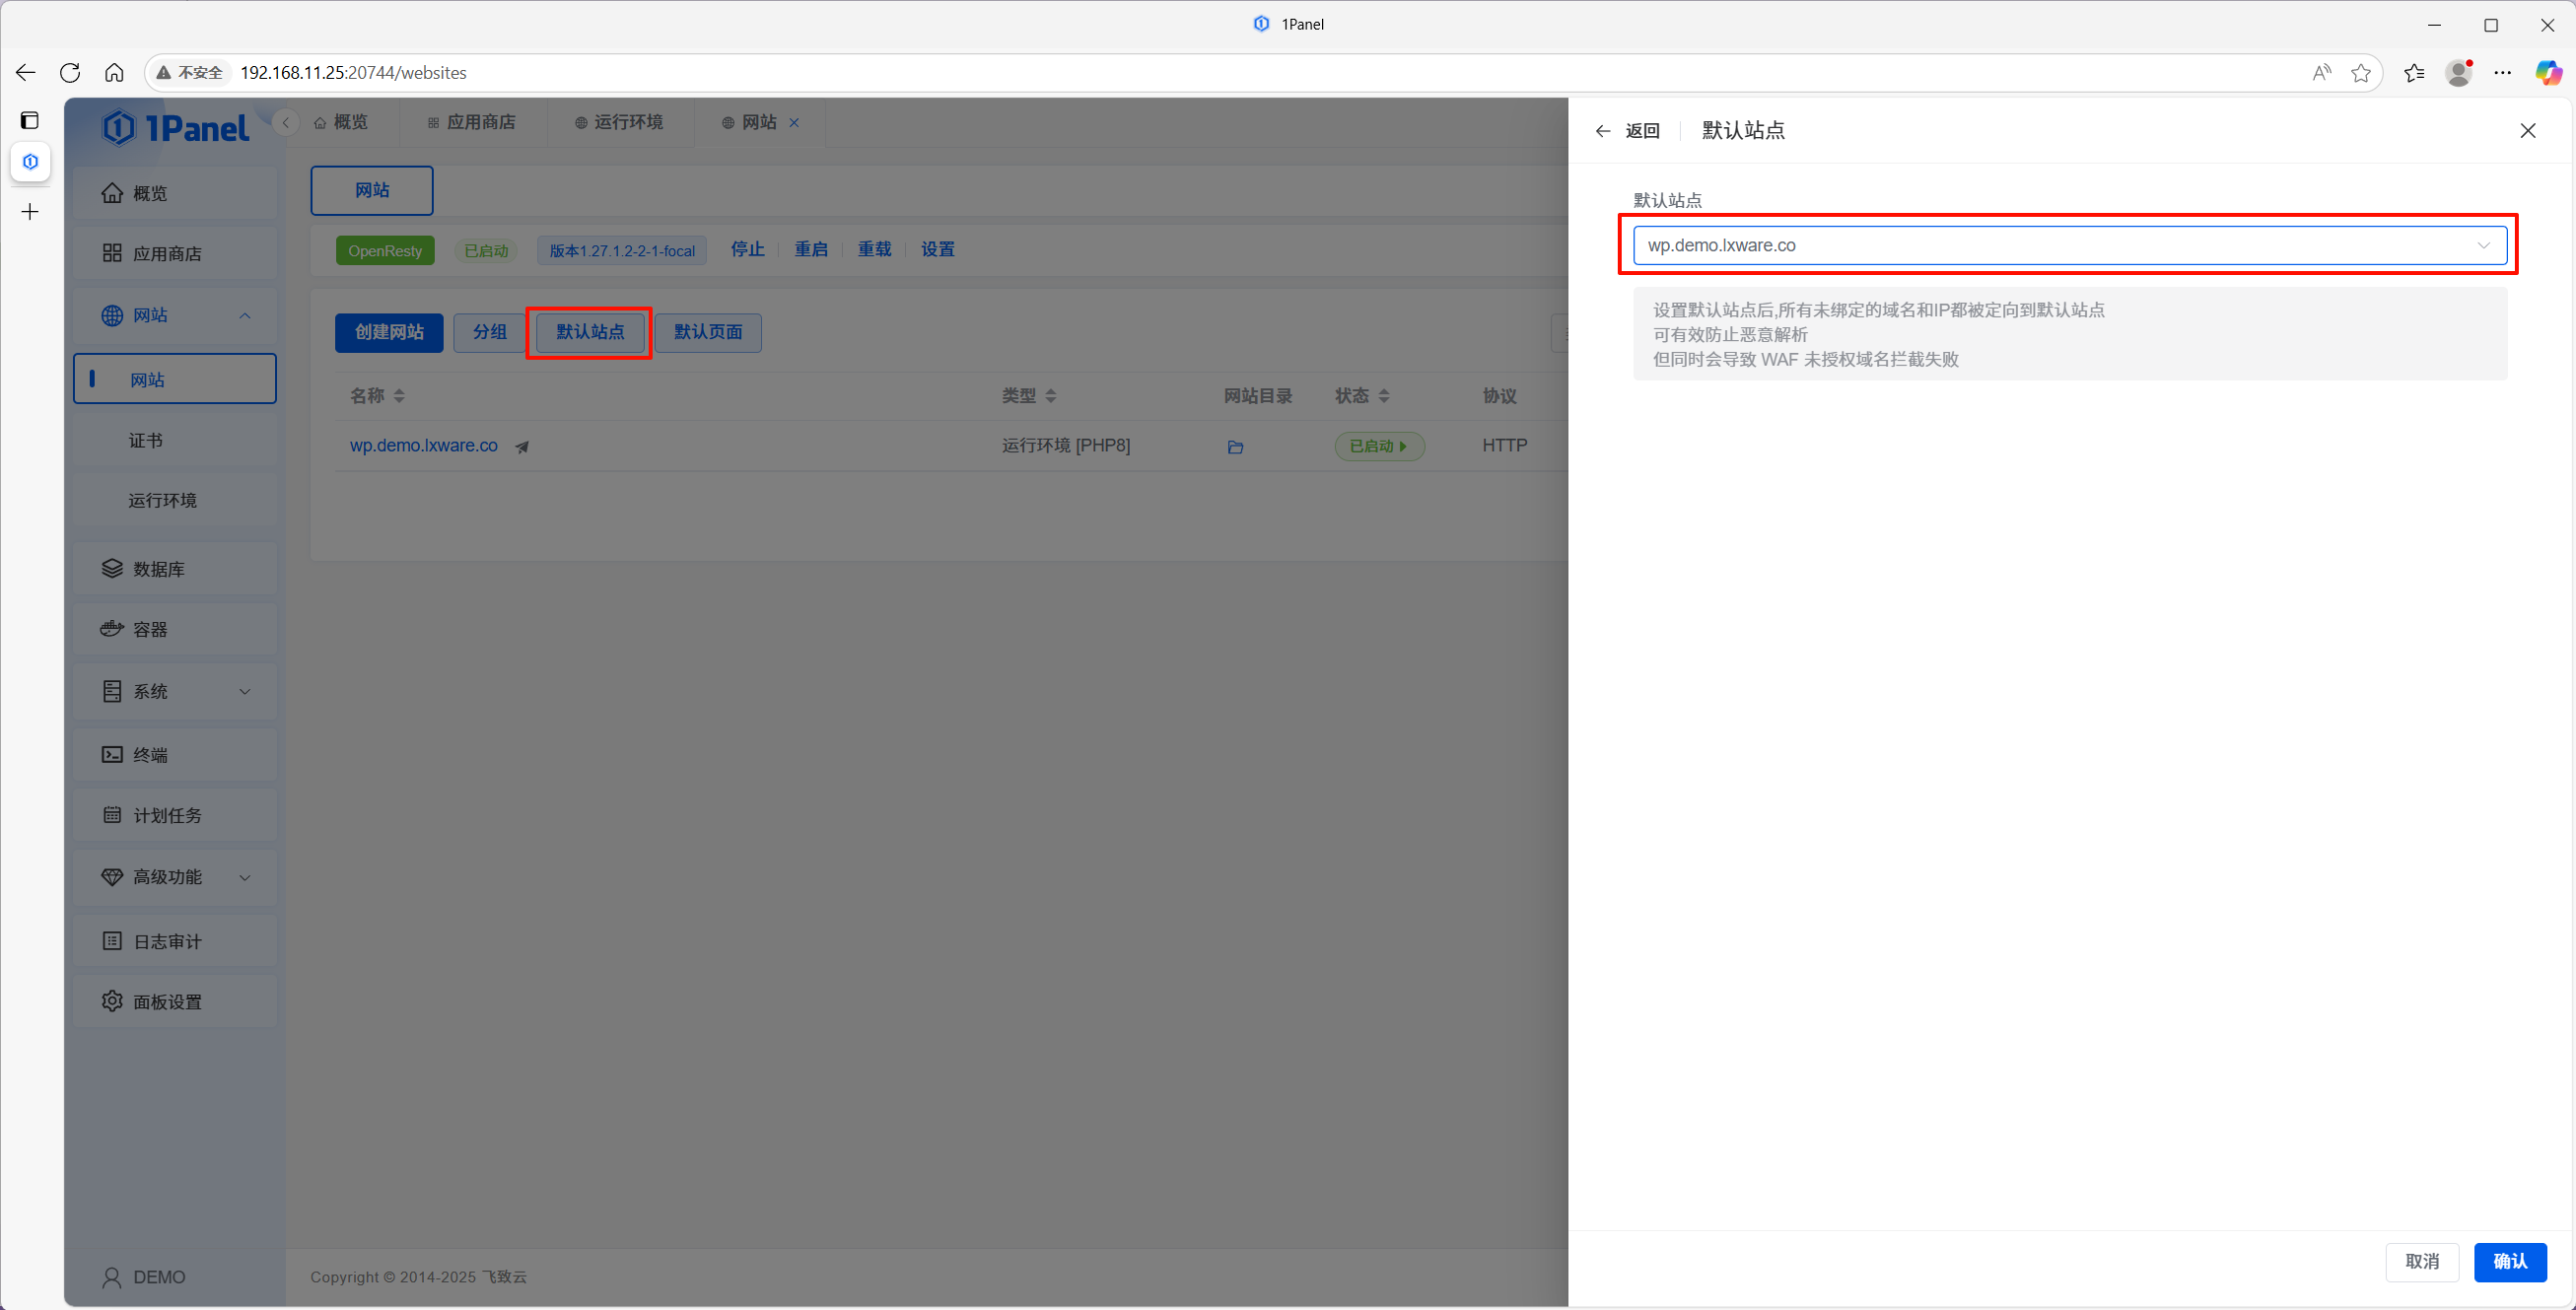
- Optionally set this site as the default site for that IP.
2.2 Smoke-test the site
Visit the server IP in a browser. If you see PHP environment information, the site and runtime are wired correctly.

Step 3 — Deploy WordPress
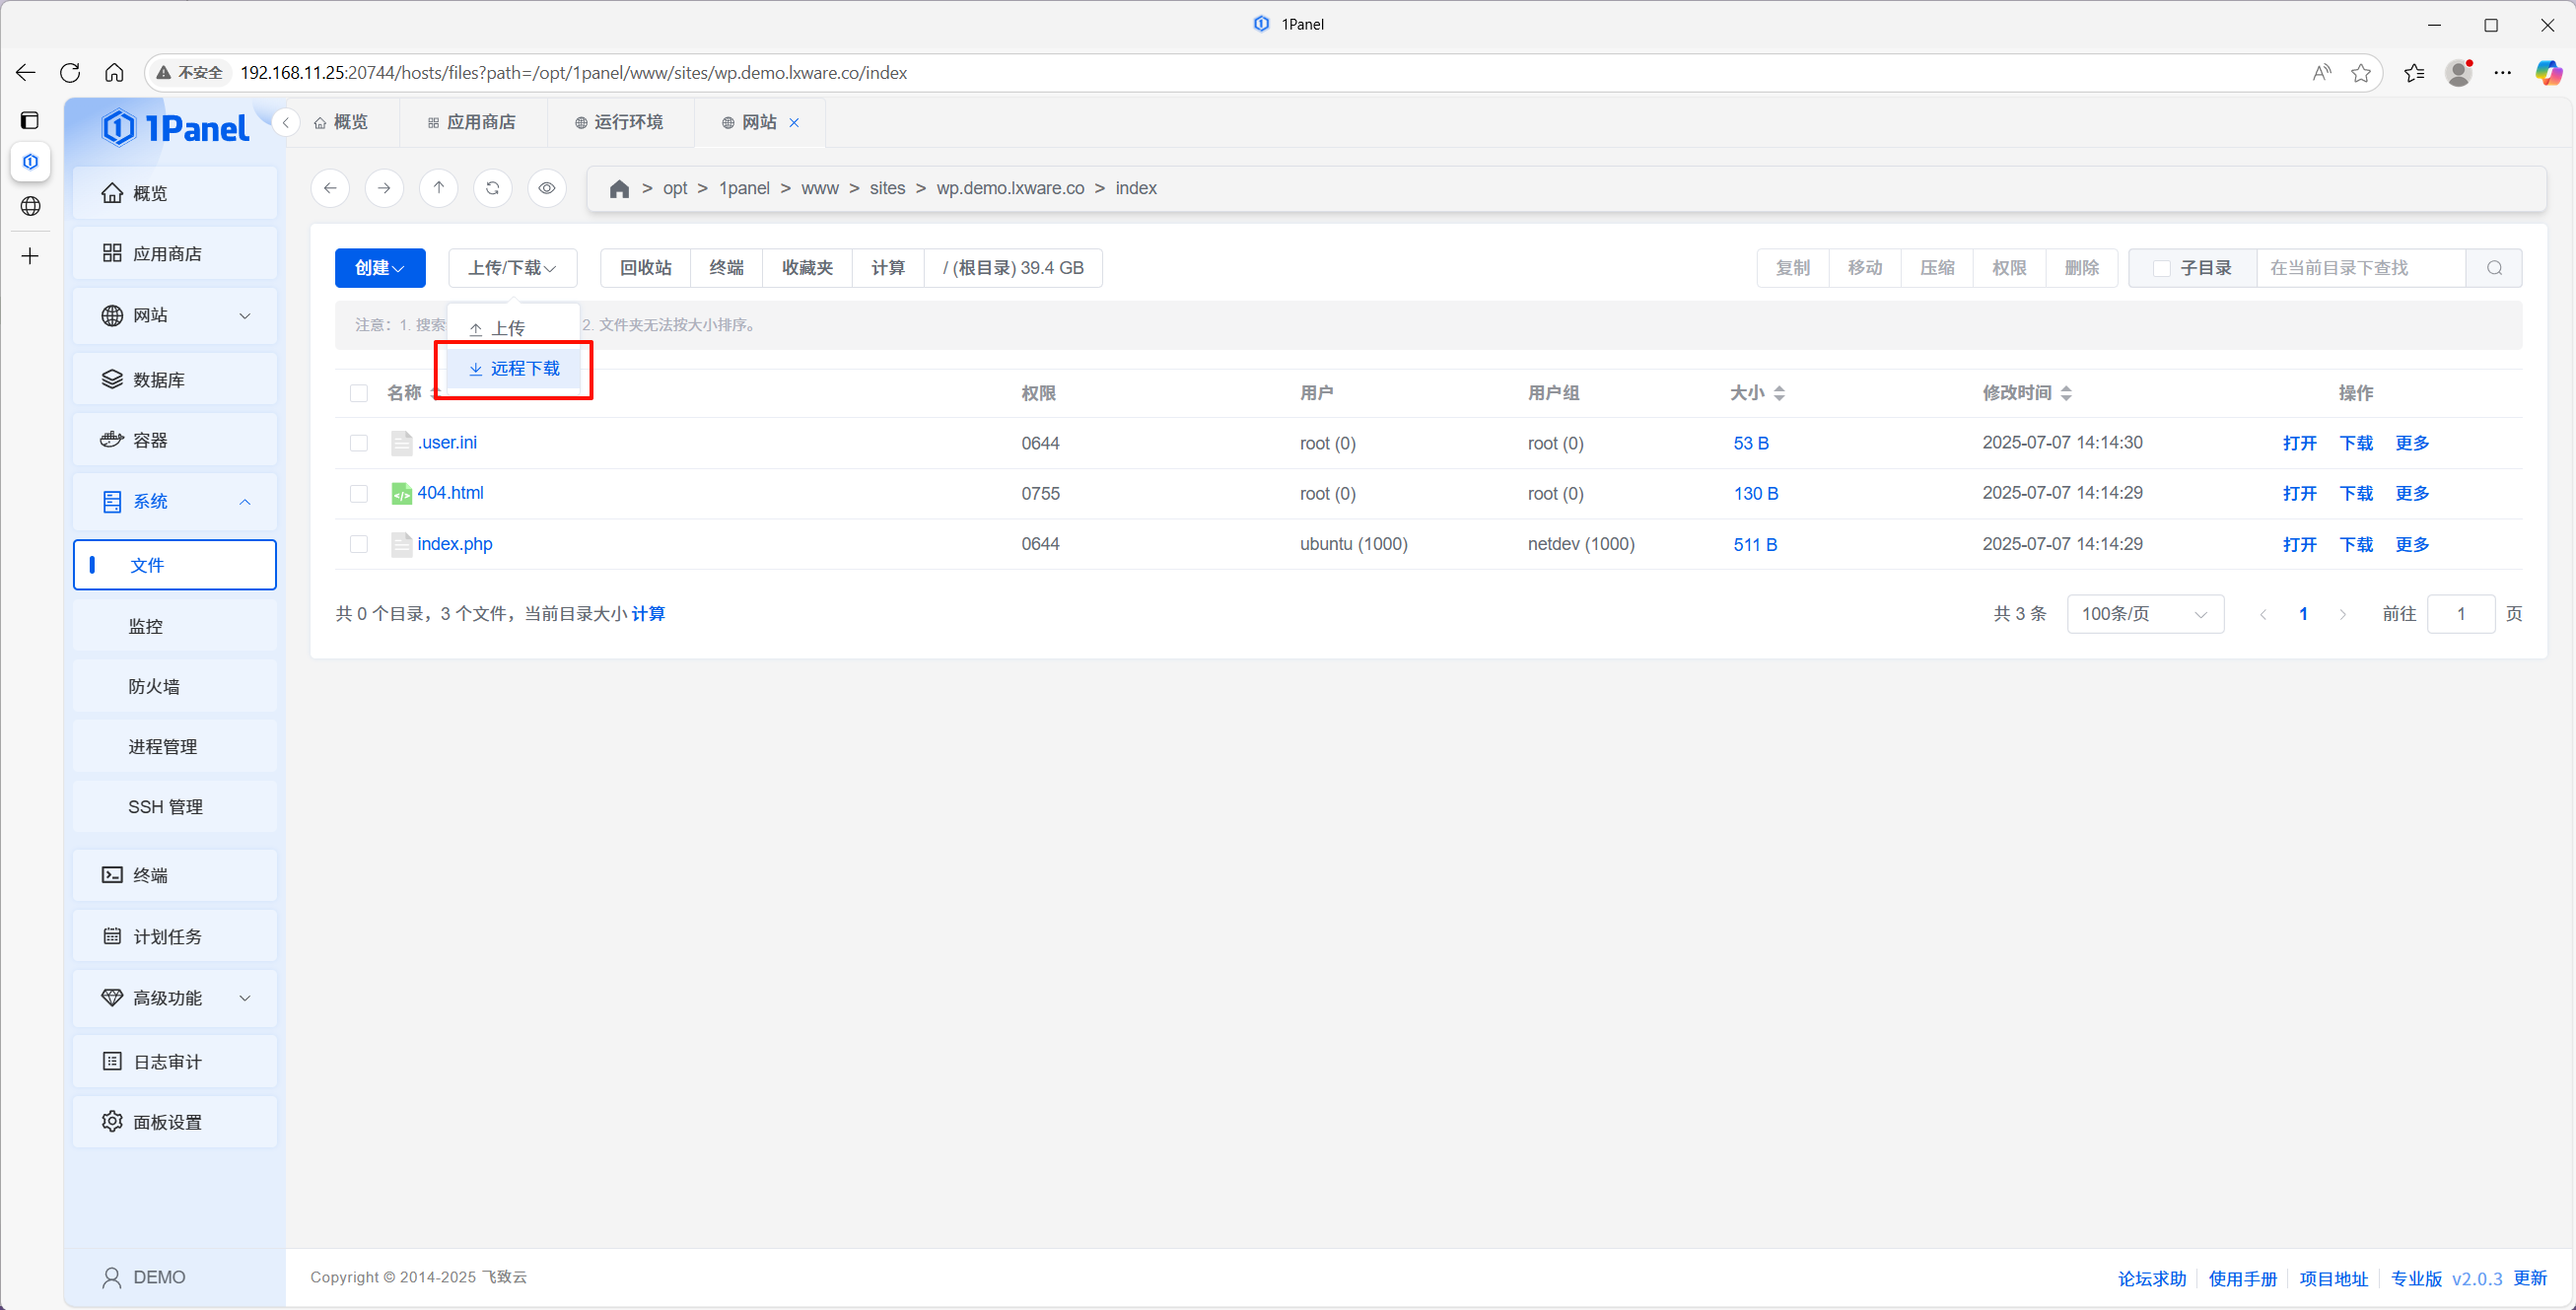
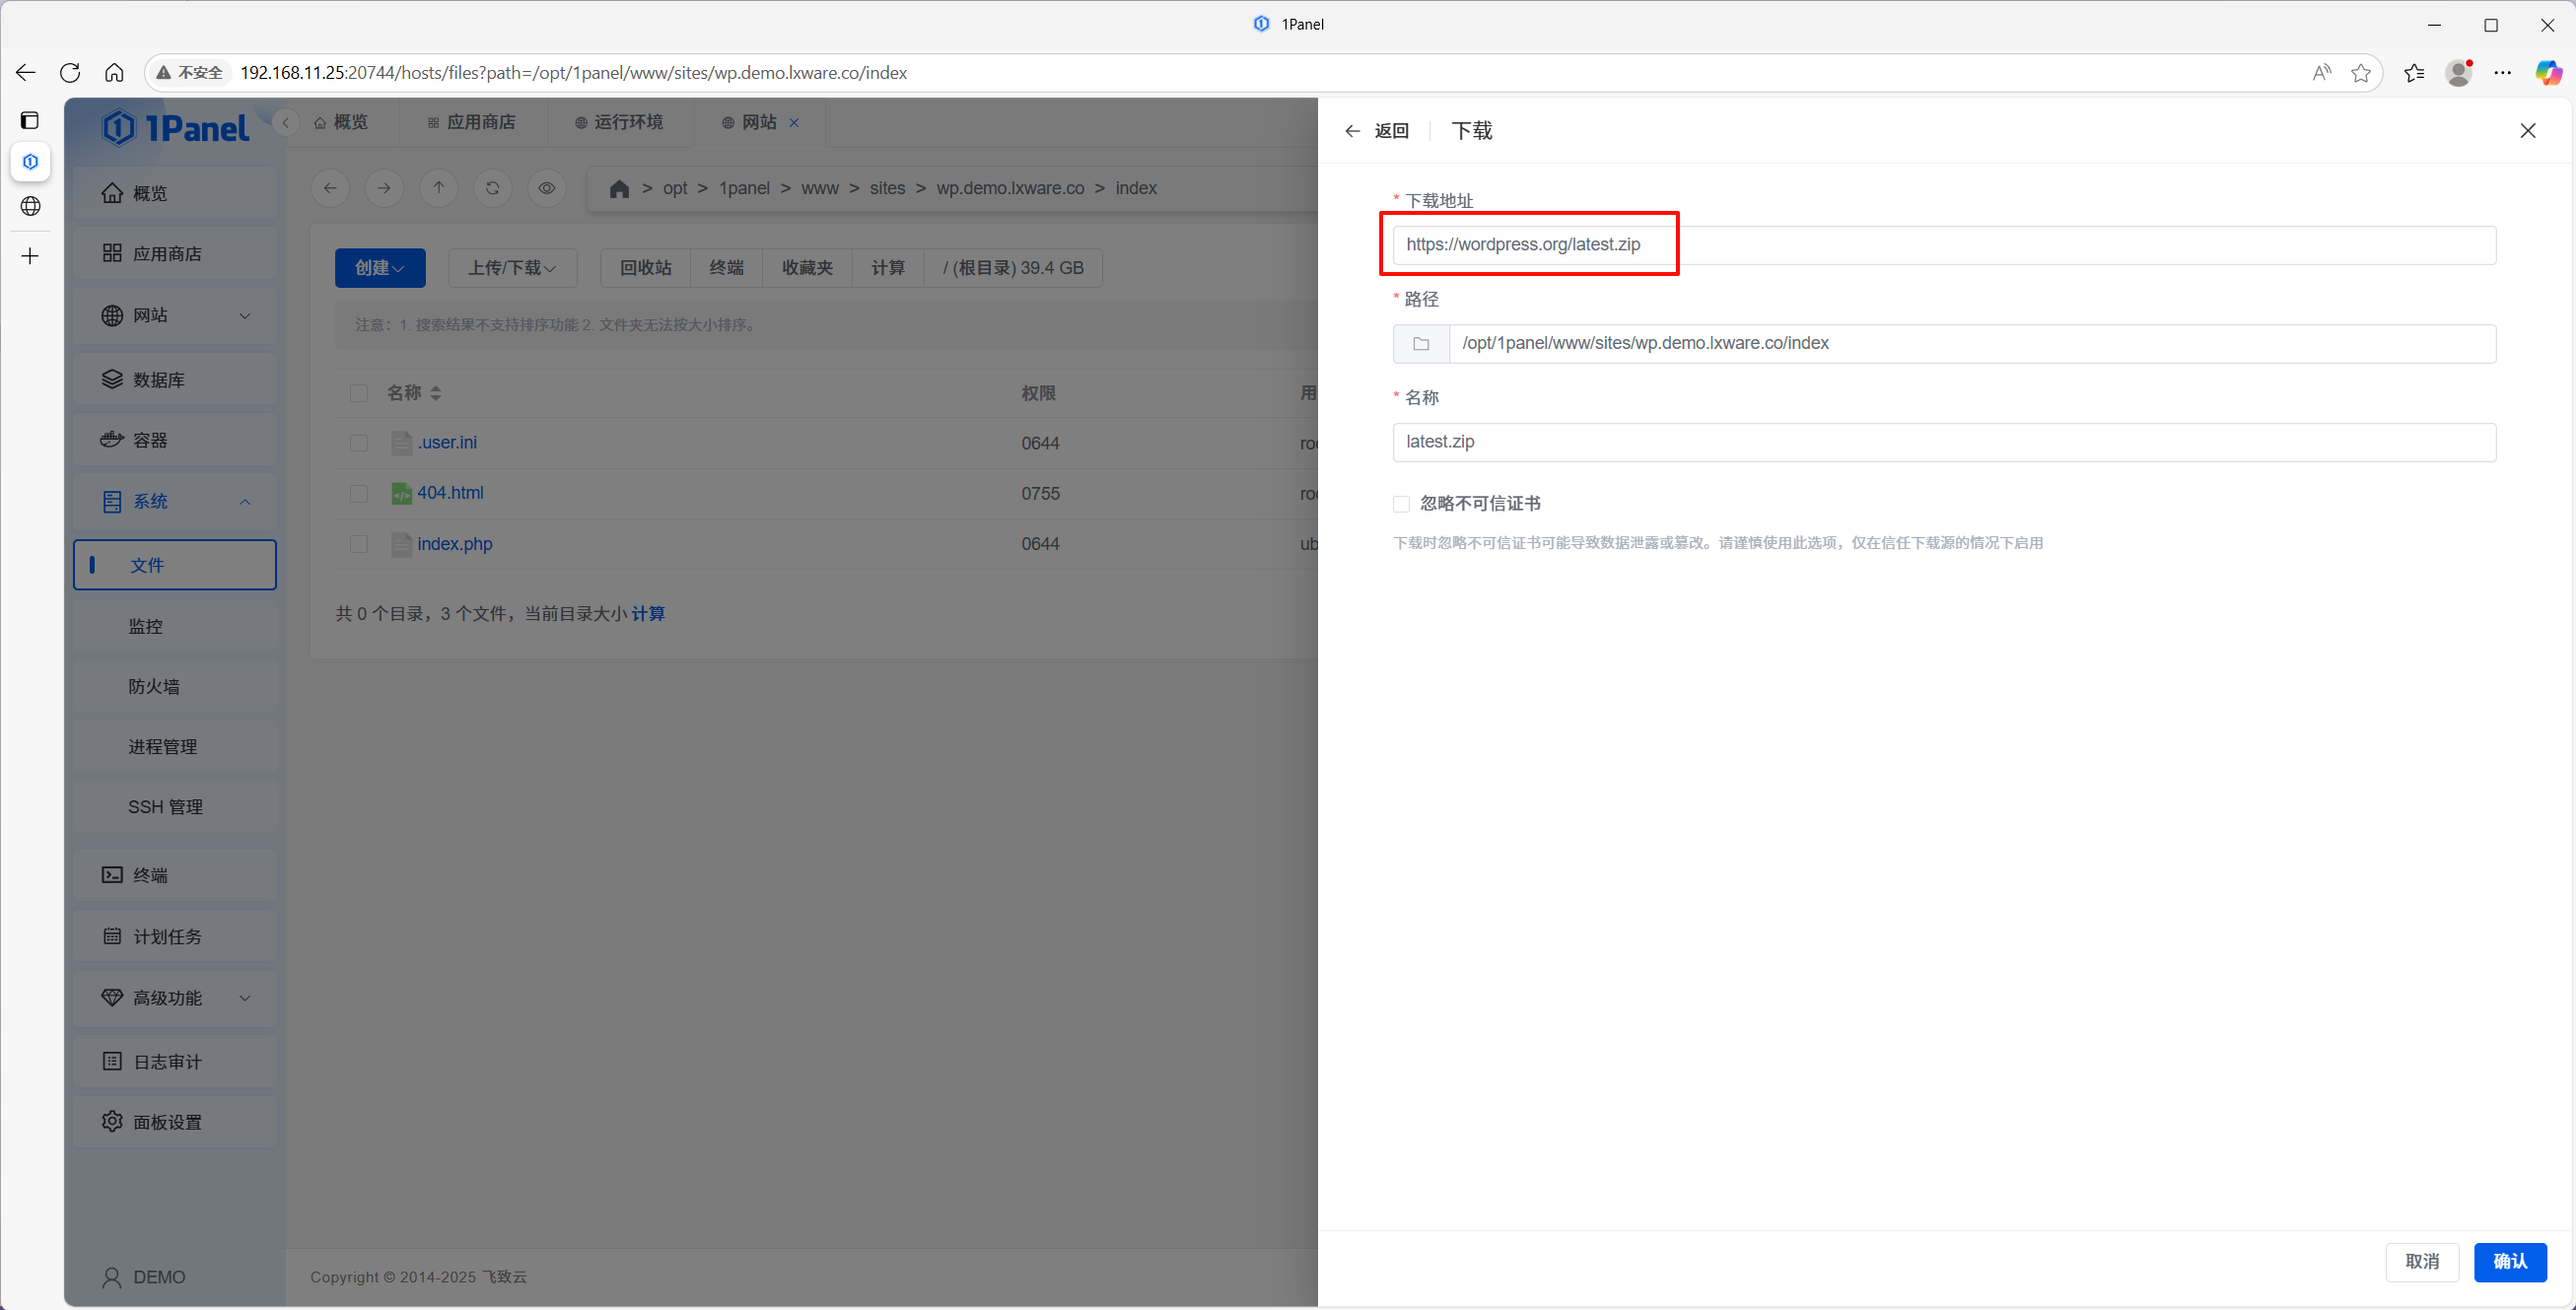
3.1 Download and extract WordPress
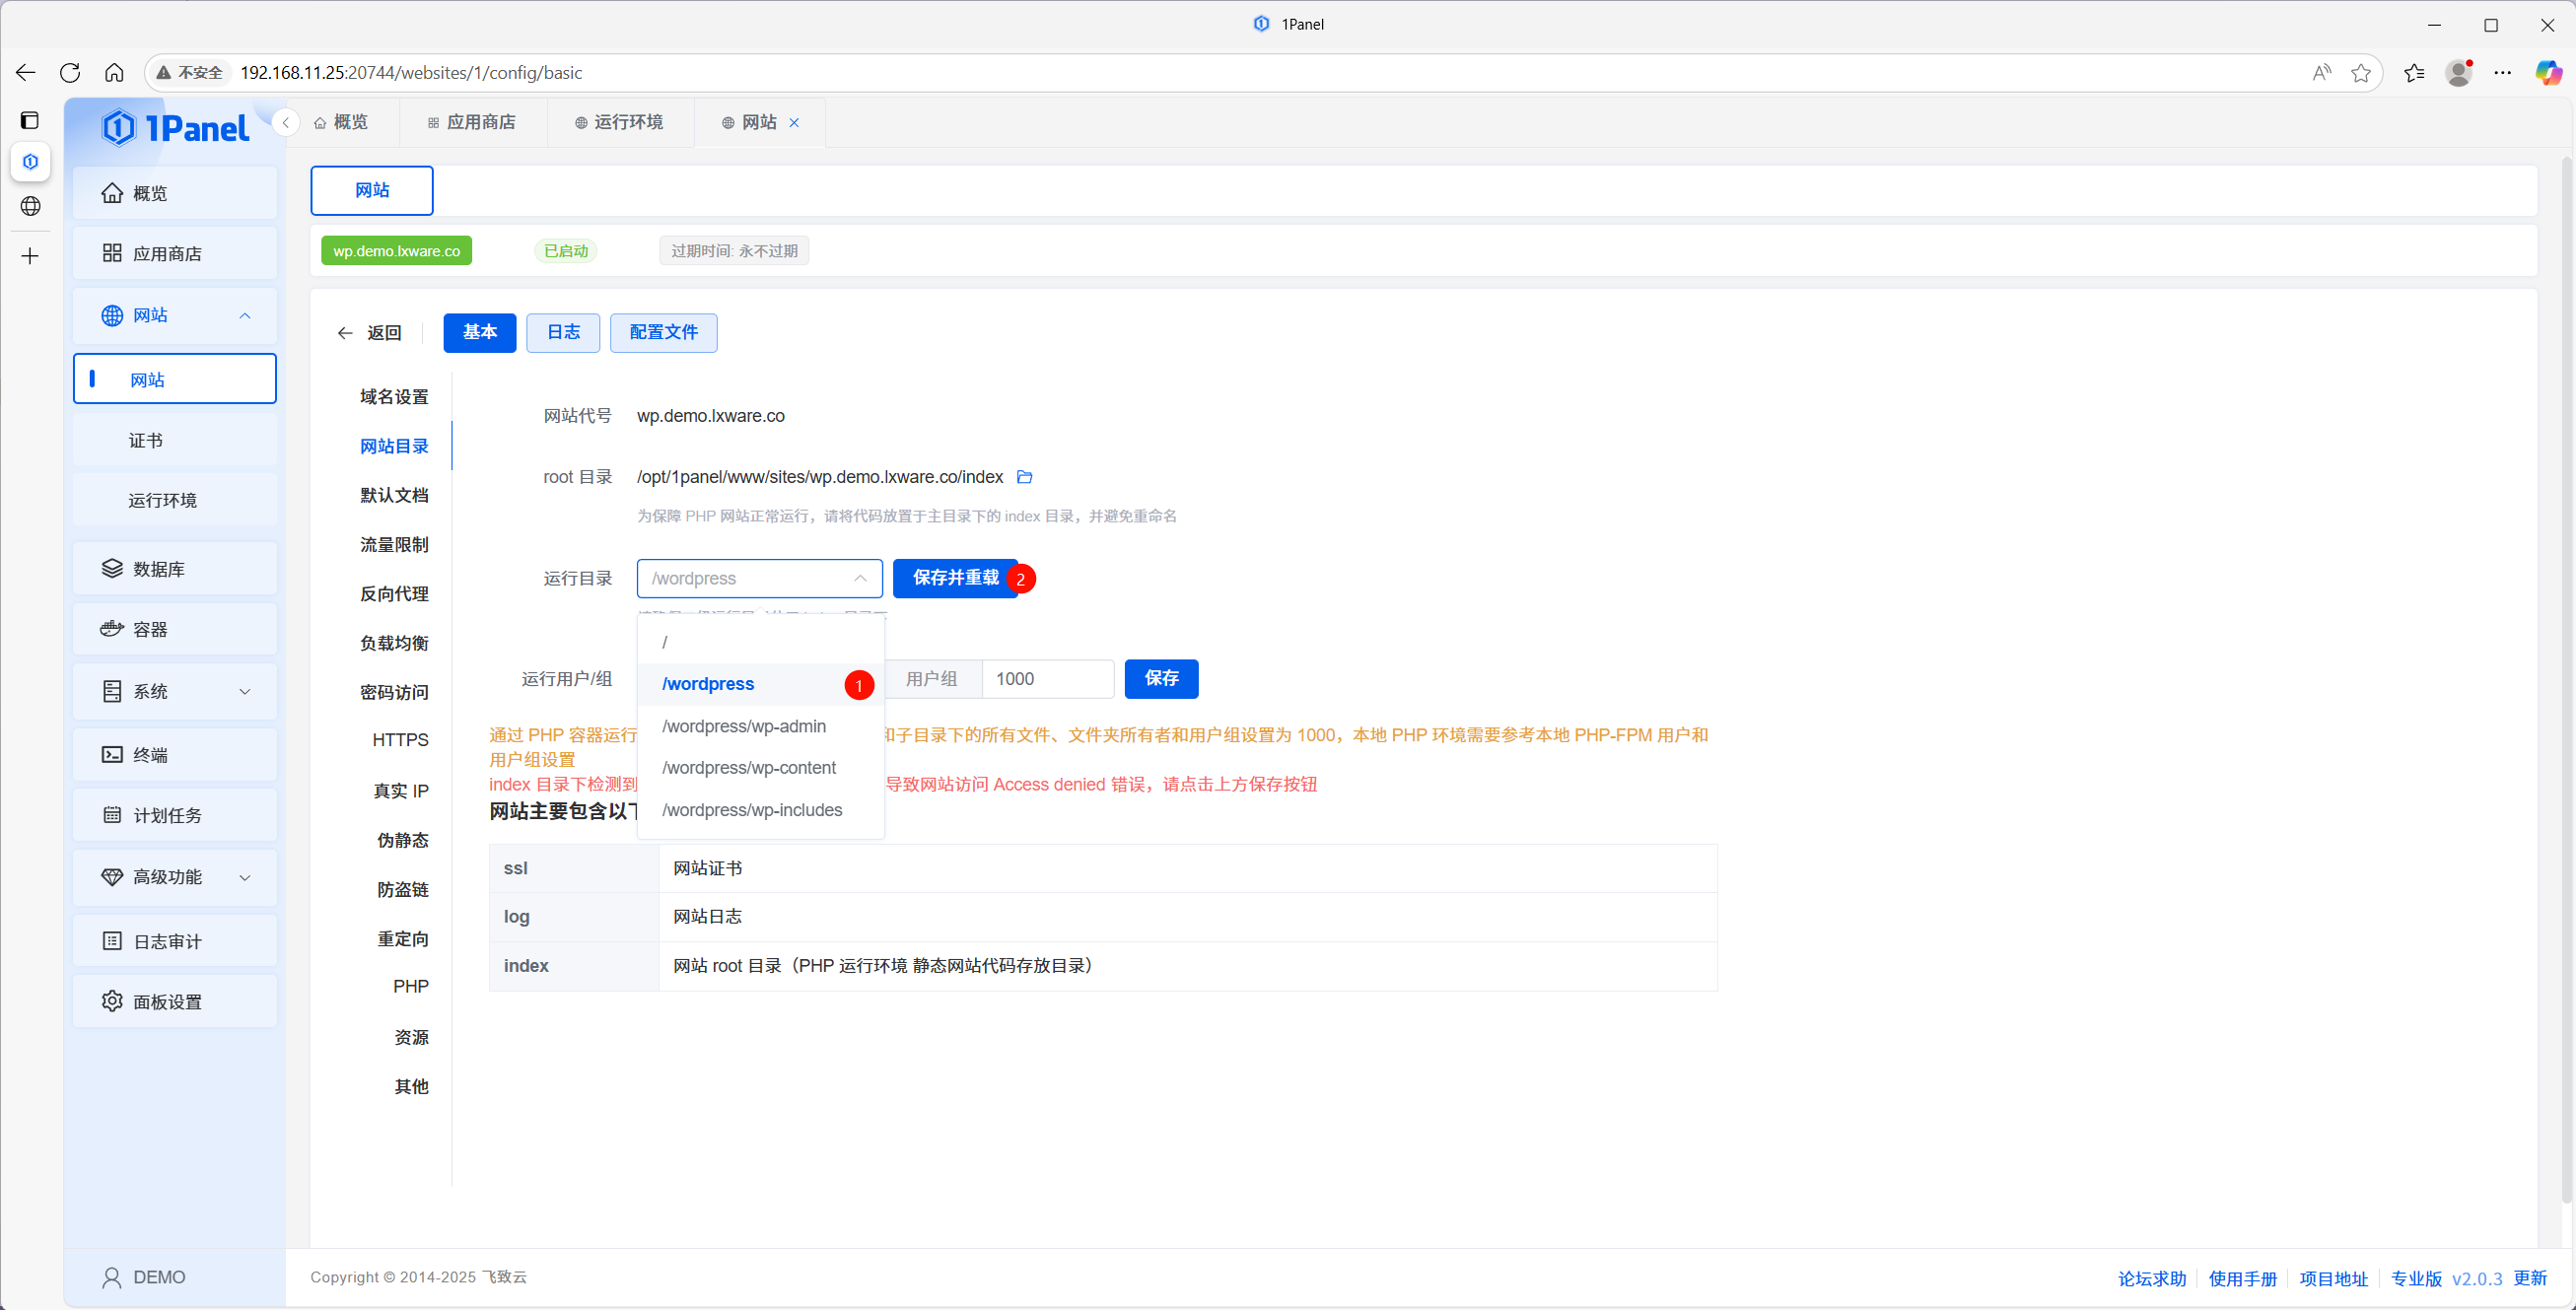
- Open the site’s document root from the UI.
- Use remote download to fetch the latest package from
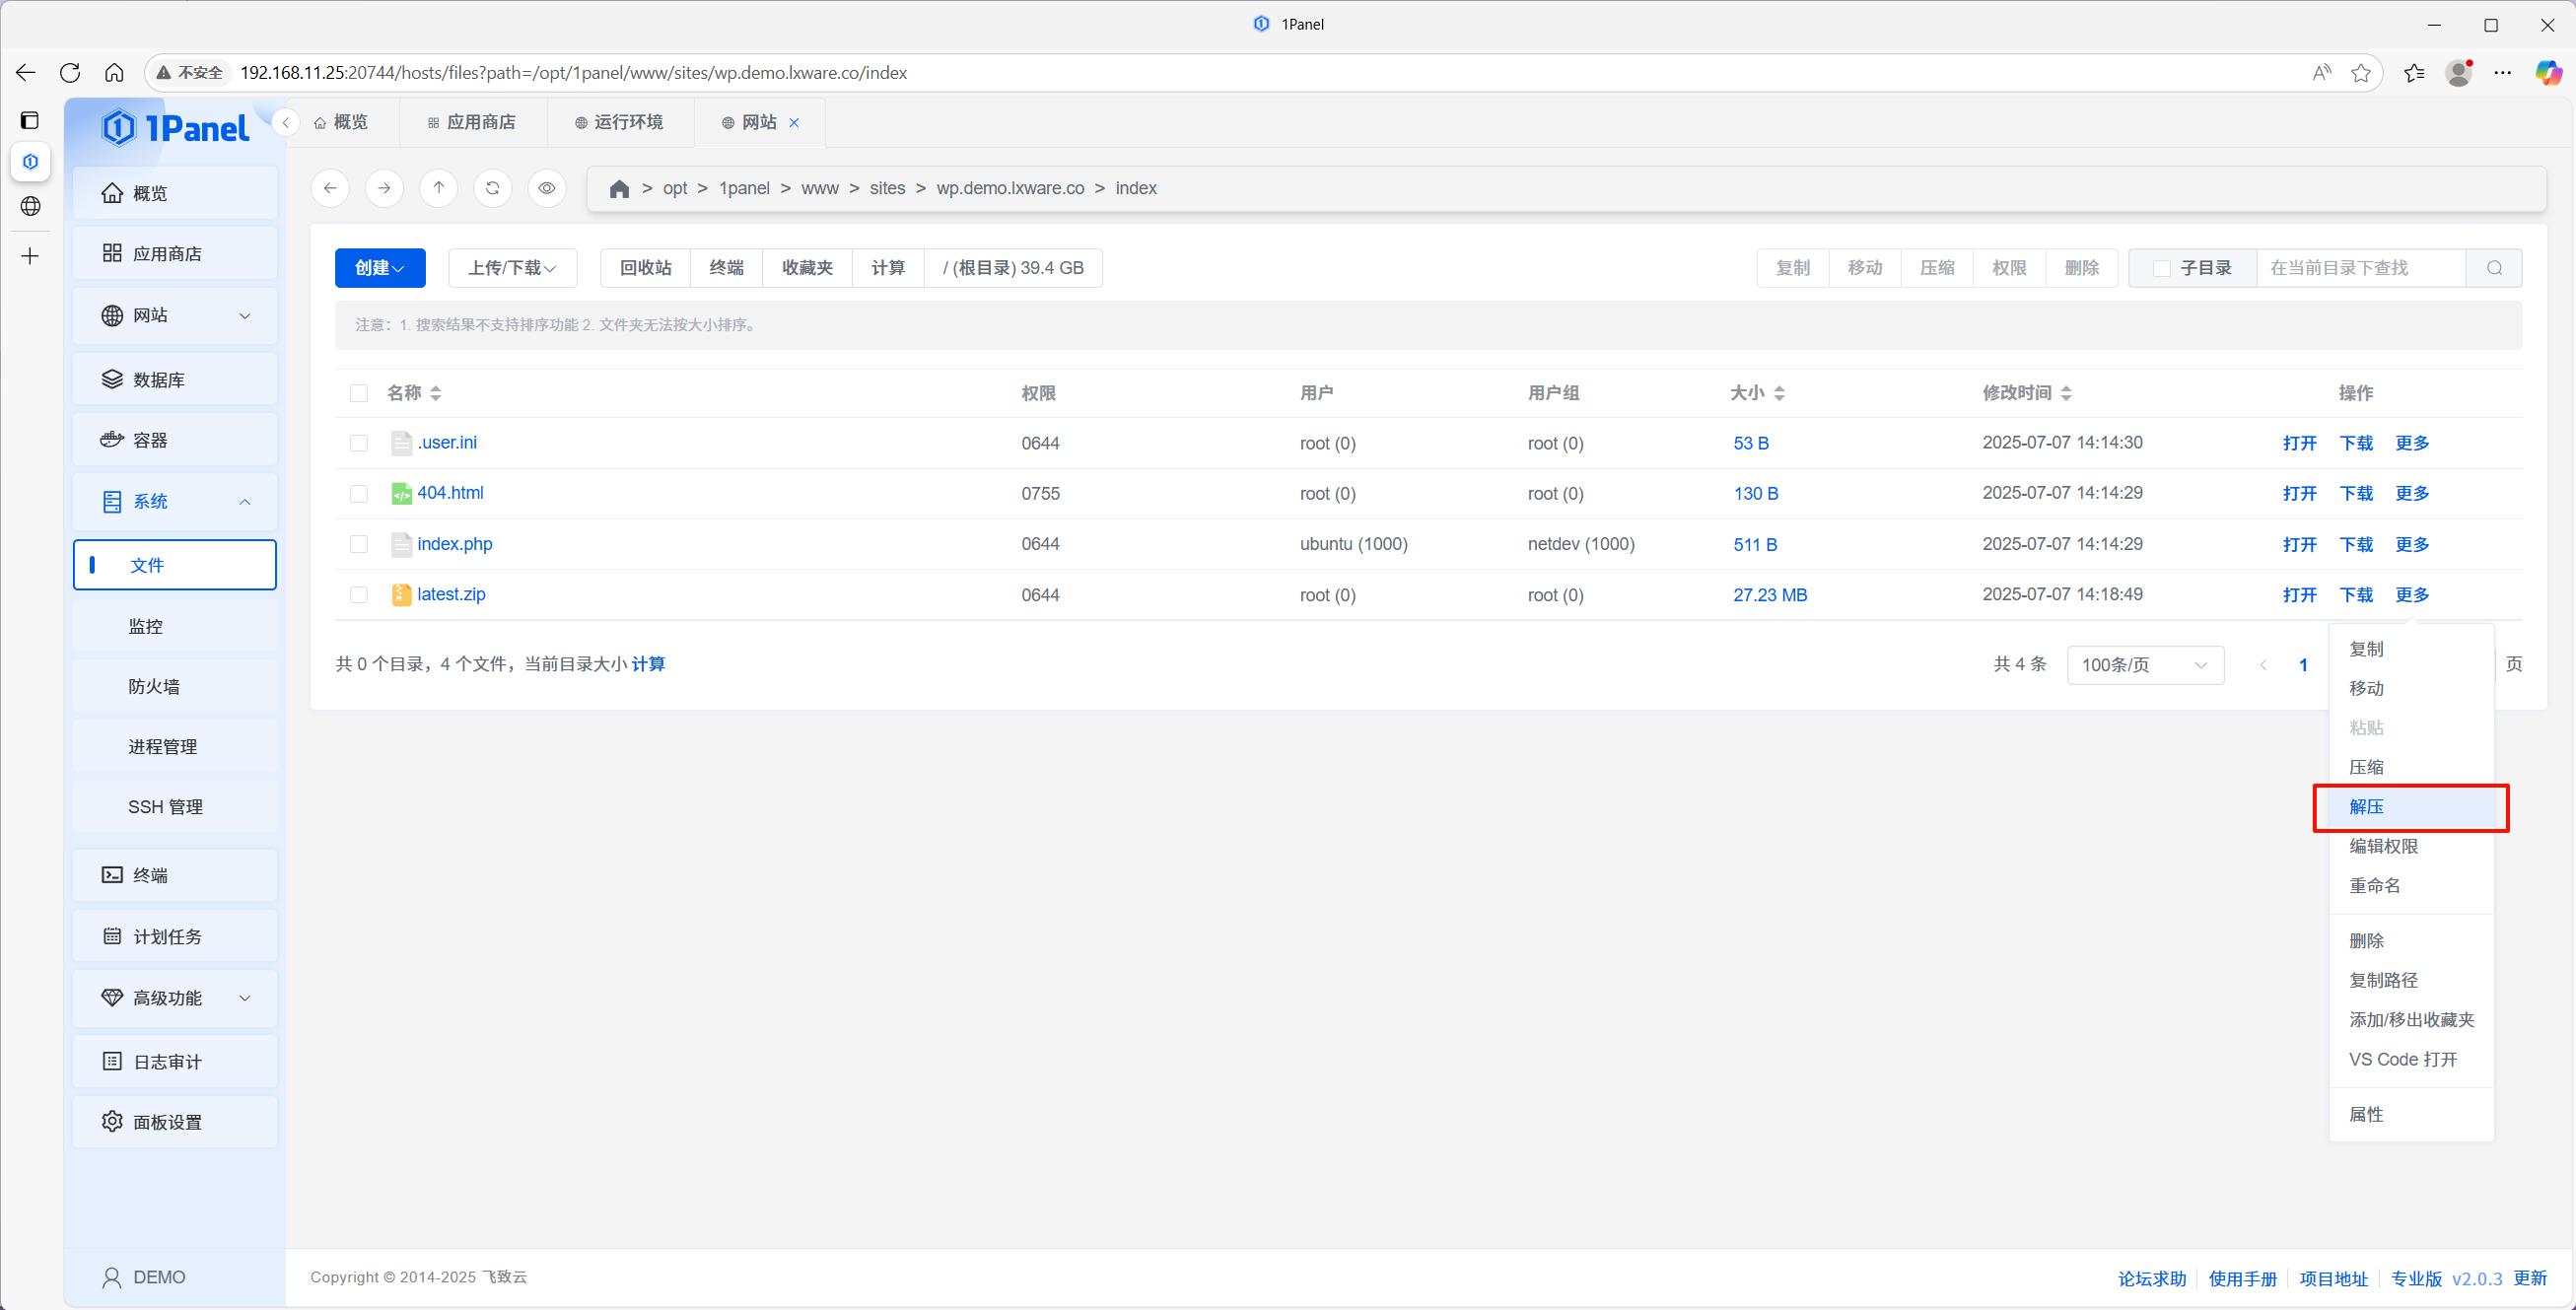
https://wordpress.org/latest.zip. - Unzip it in the root. Files usually land in a
wordpresssubdirectory. - In the site settings, set the runtime directory to
wordpress, then Save and reload.
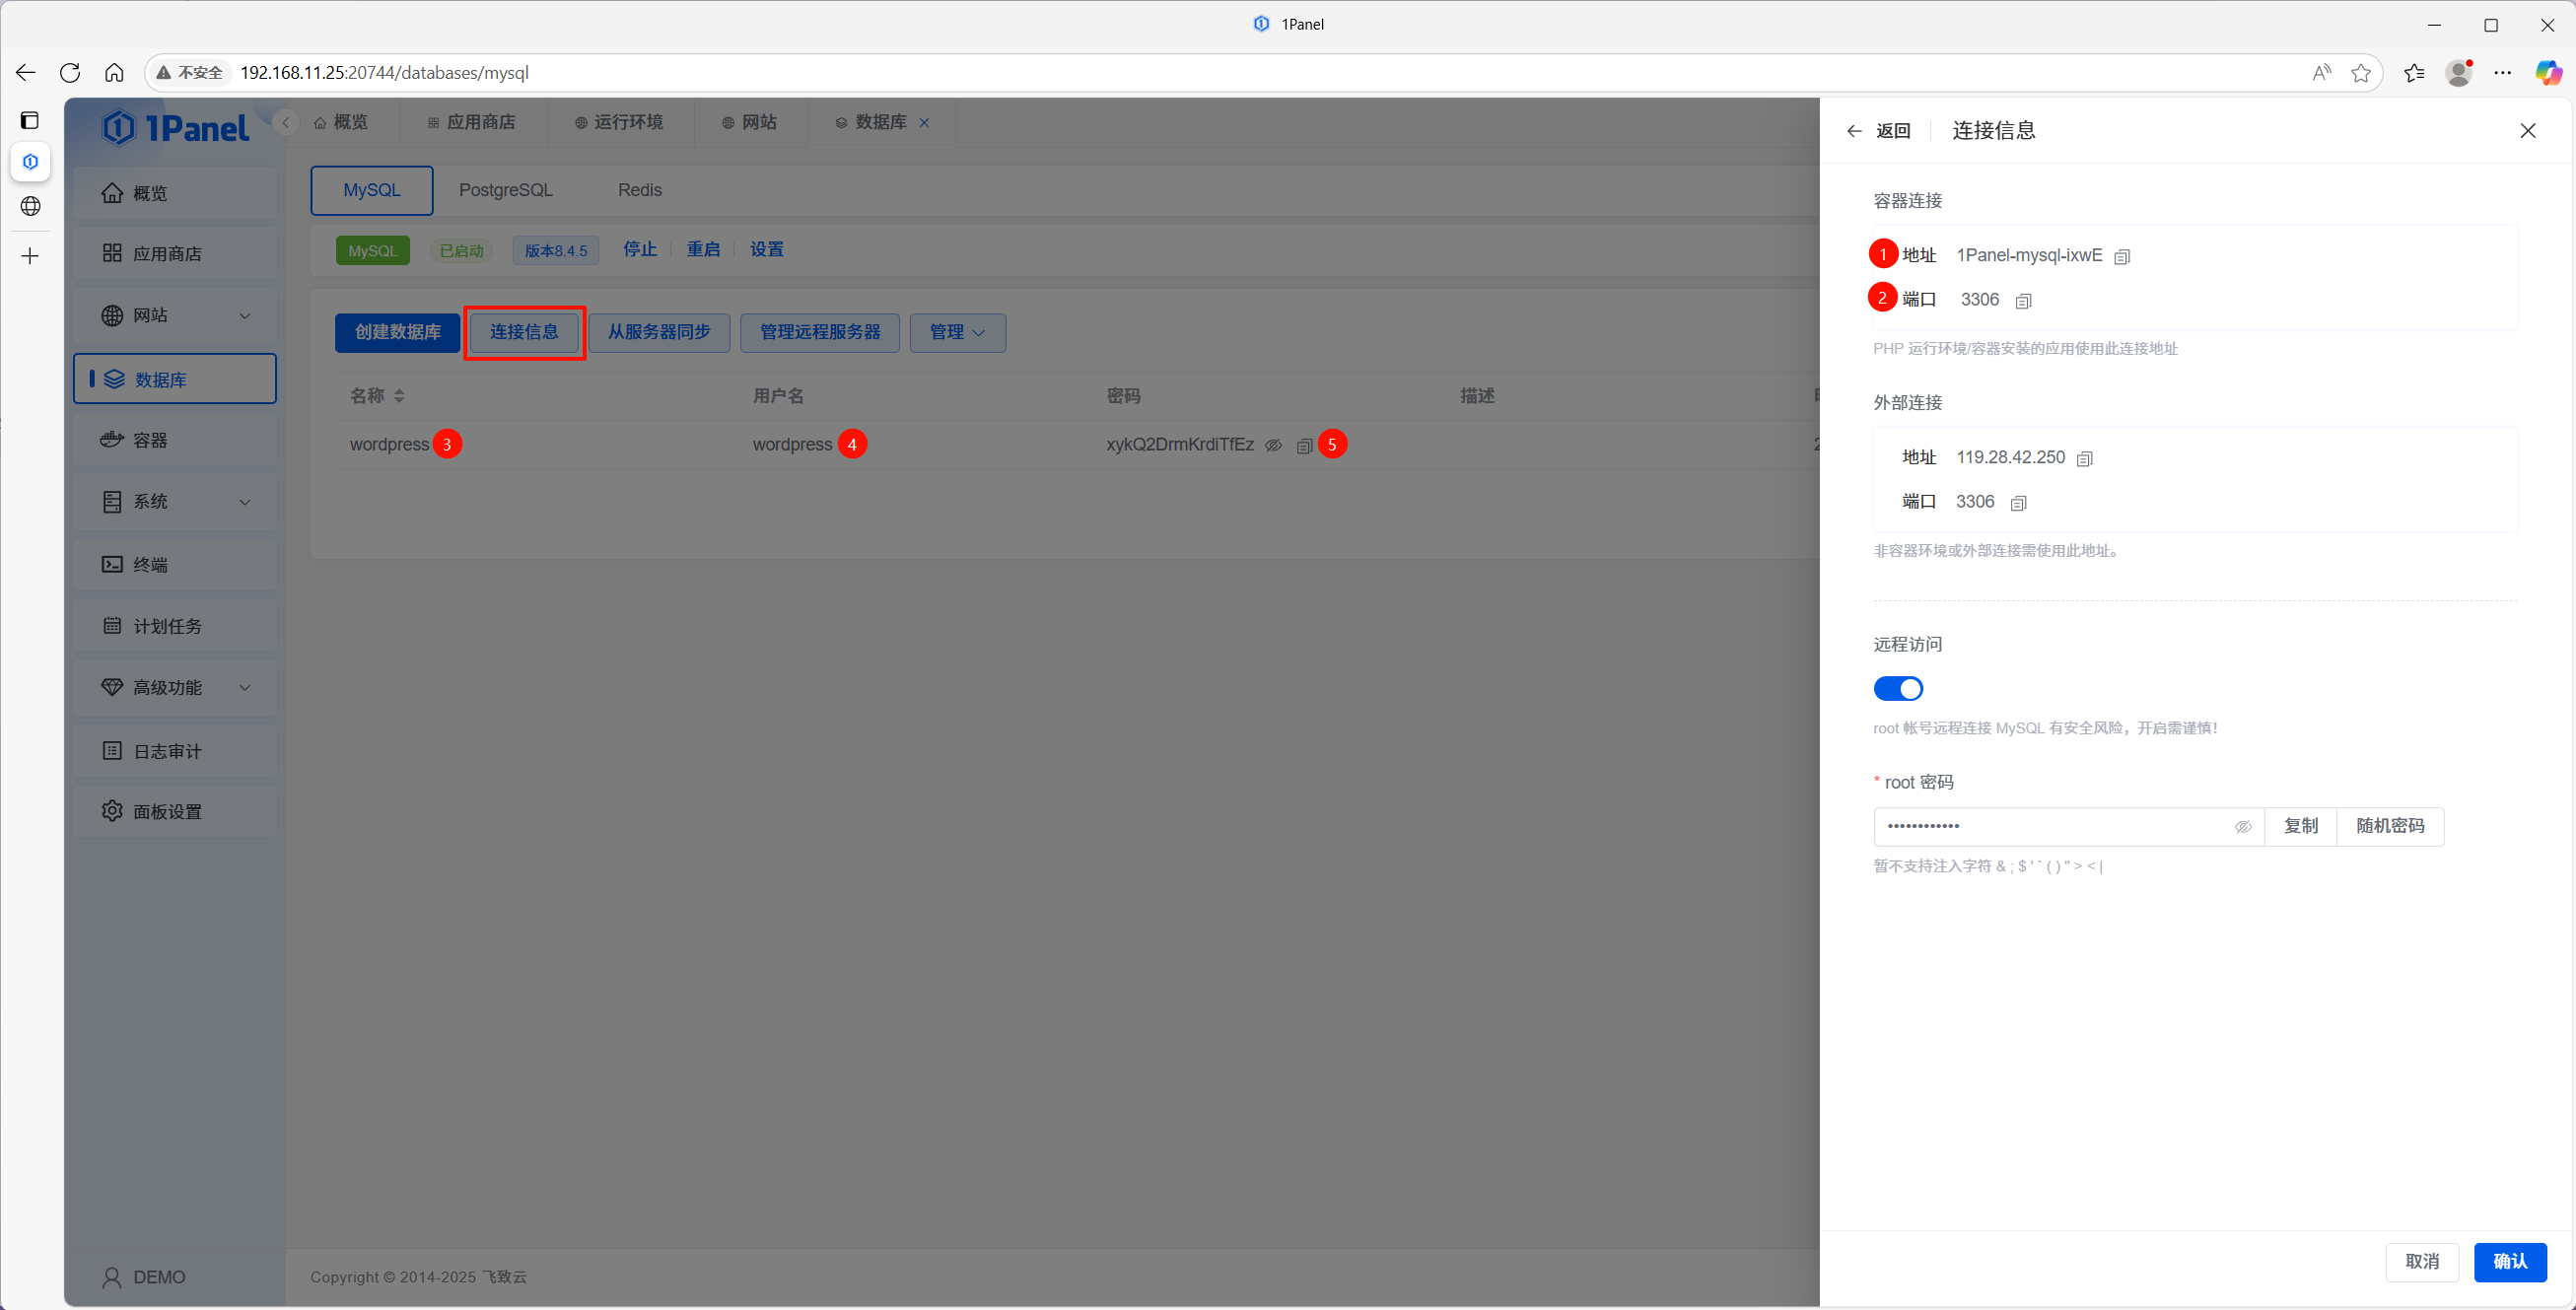
3.2 Create a database
- Open Databases.
- Under MySQL, click Create database.
- Set database name, username, and password (save the password).
- After creation, open Connection info and note host, port, database name, user, and password for the WordPress installer.

3.3 Run the WordPress installer
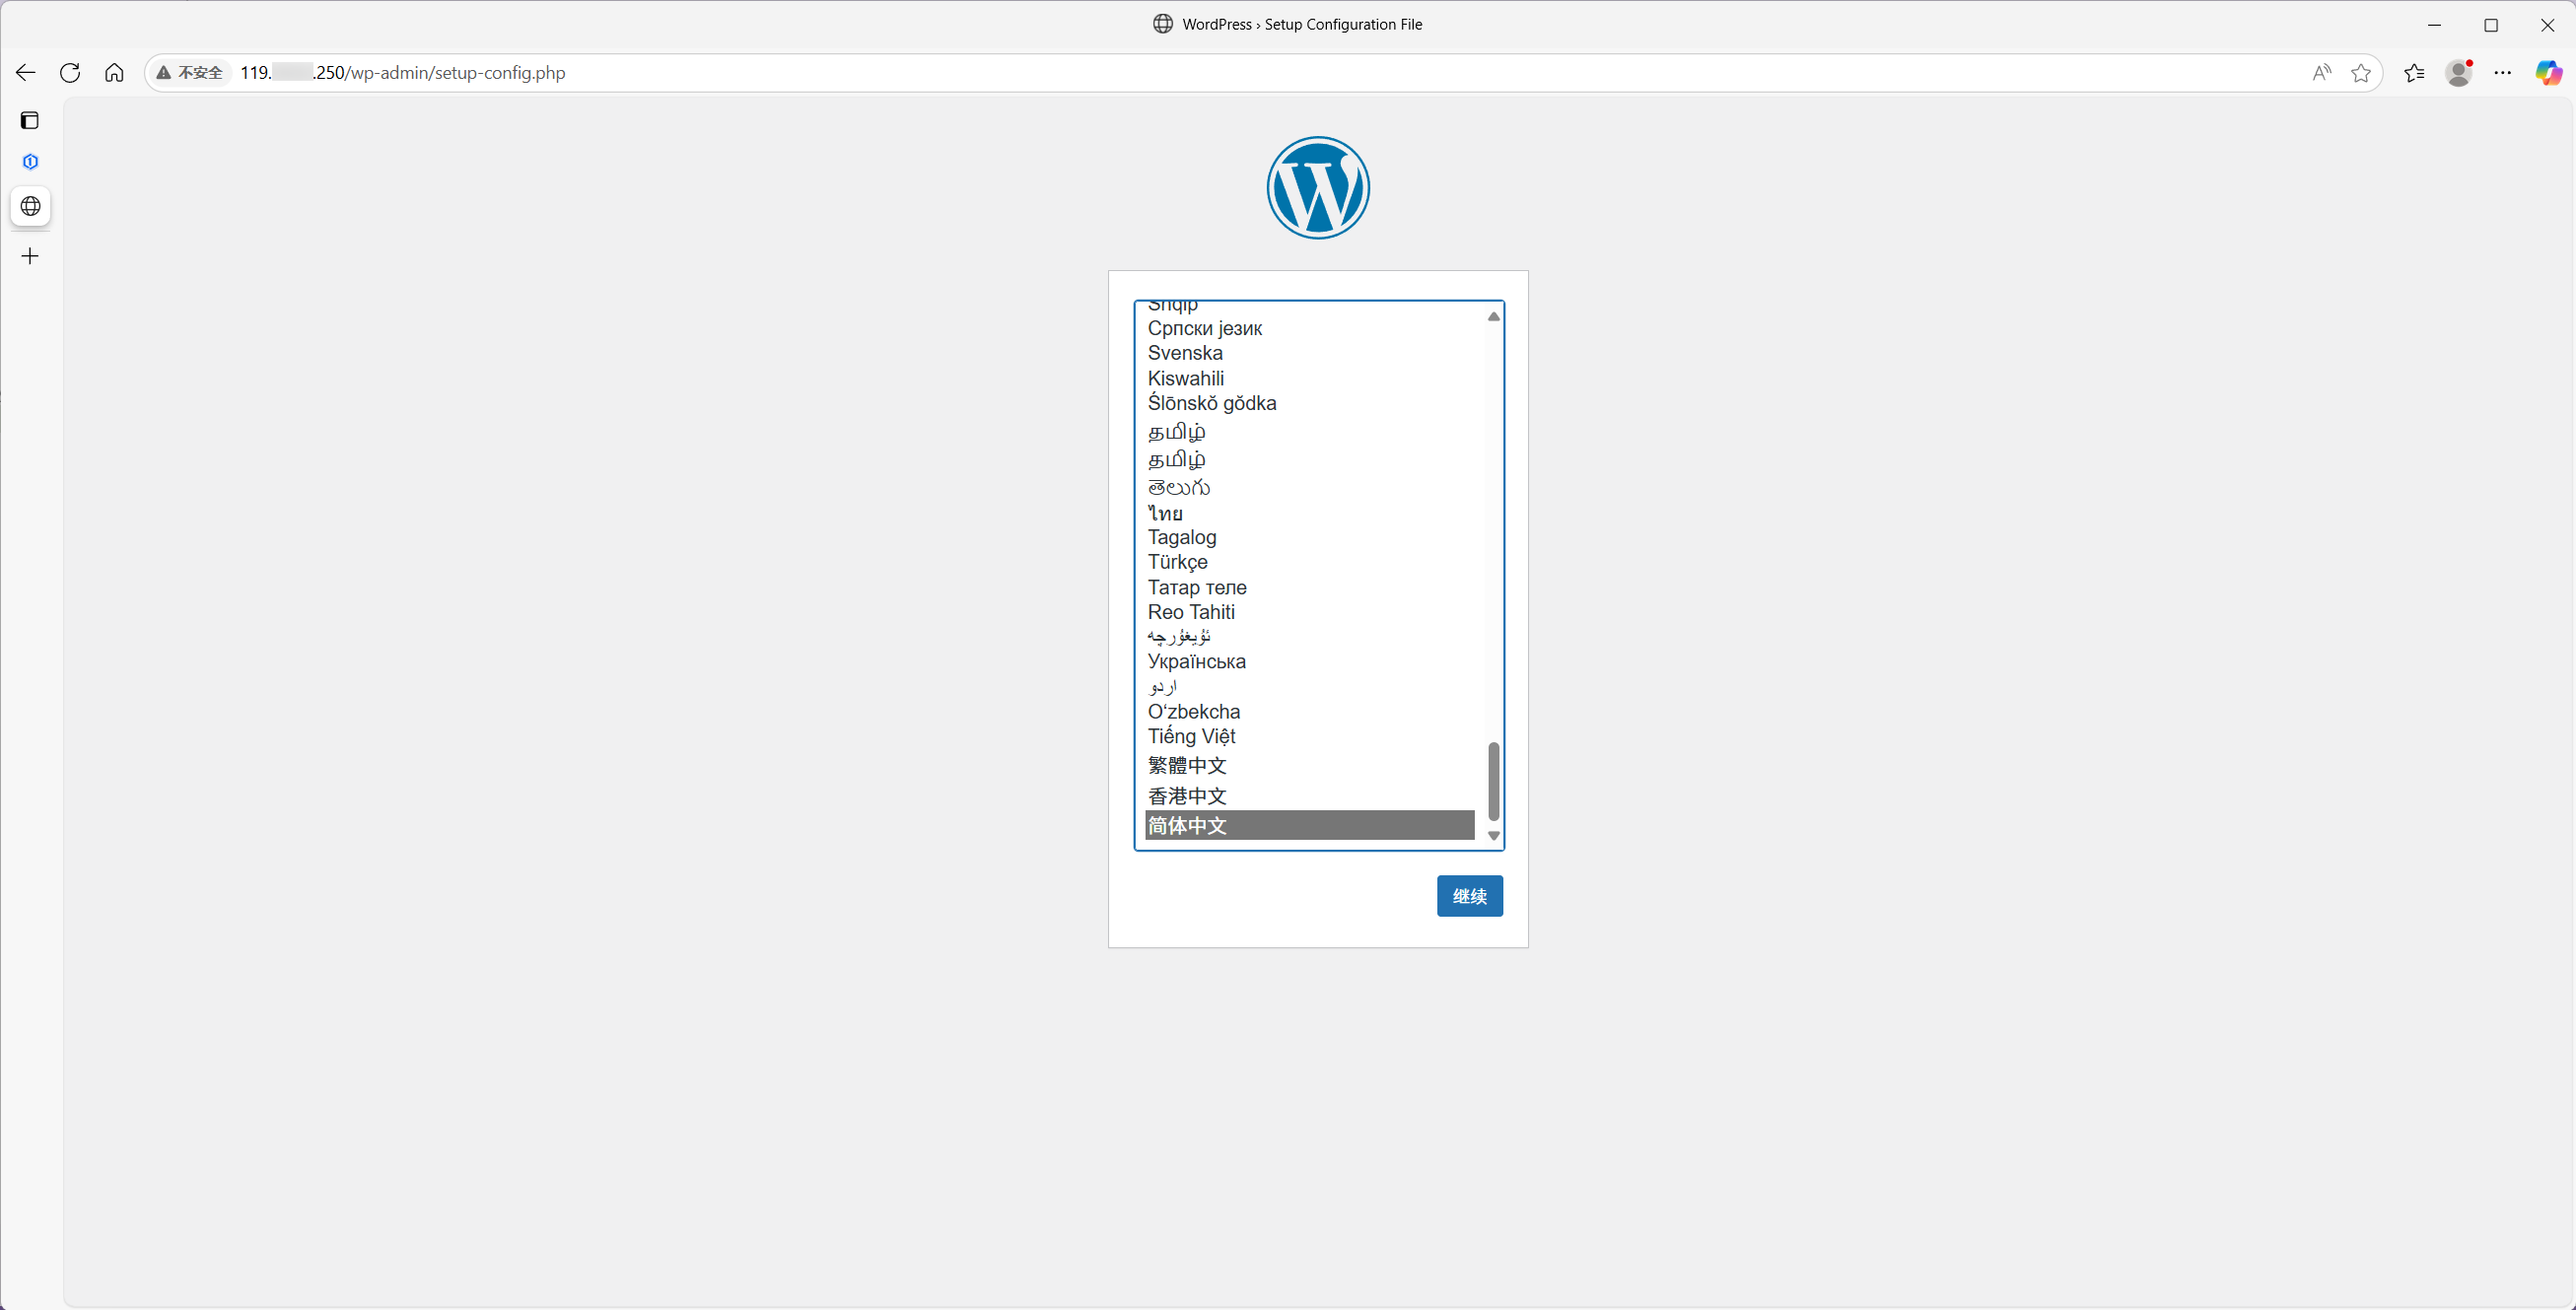
- Browse to your server IP again. You should see the WordPress setup wizard.
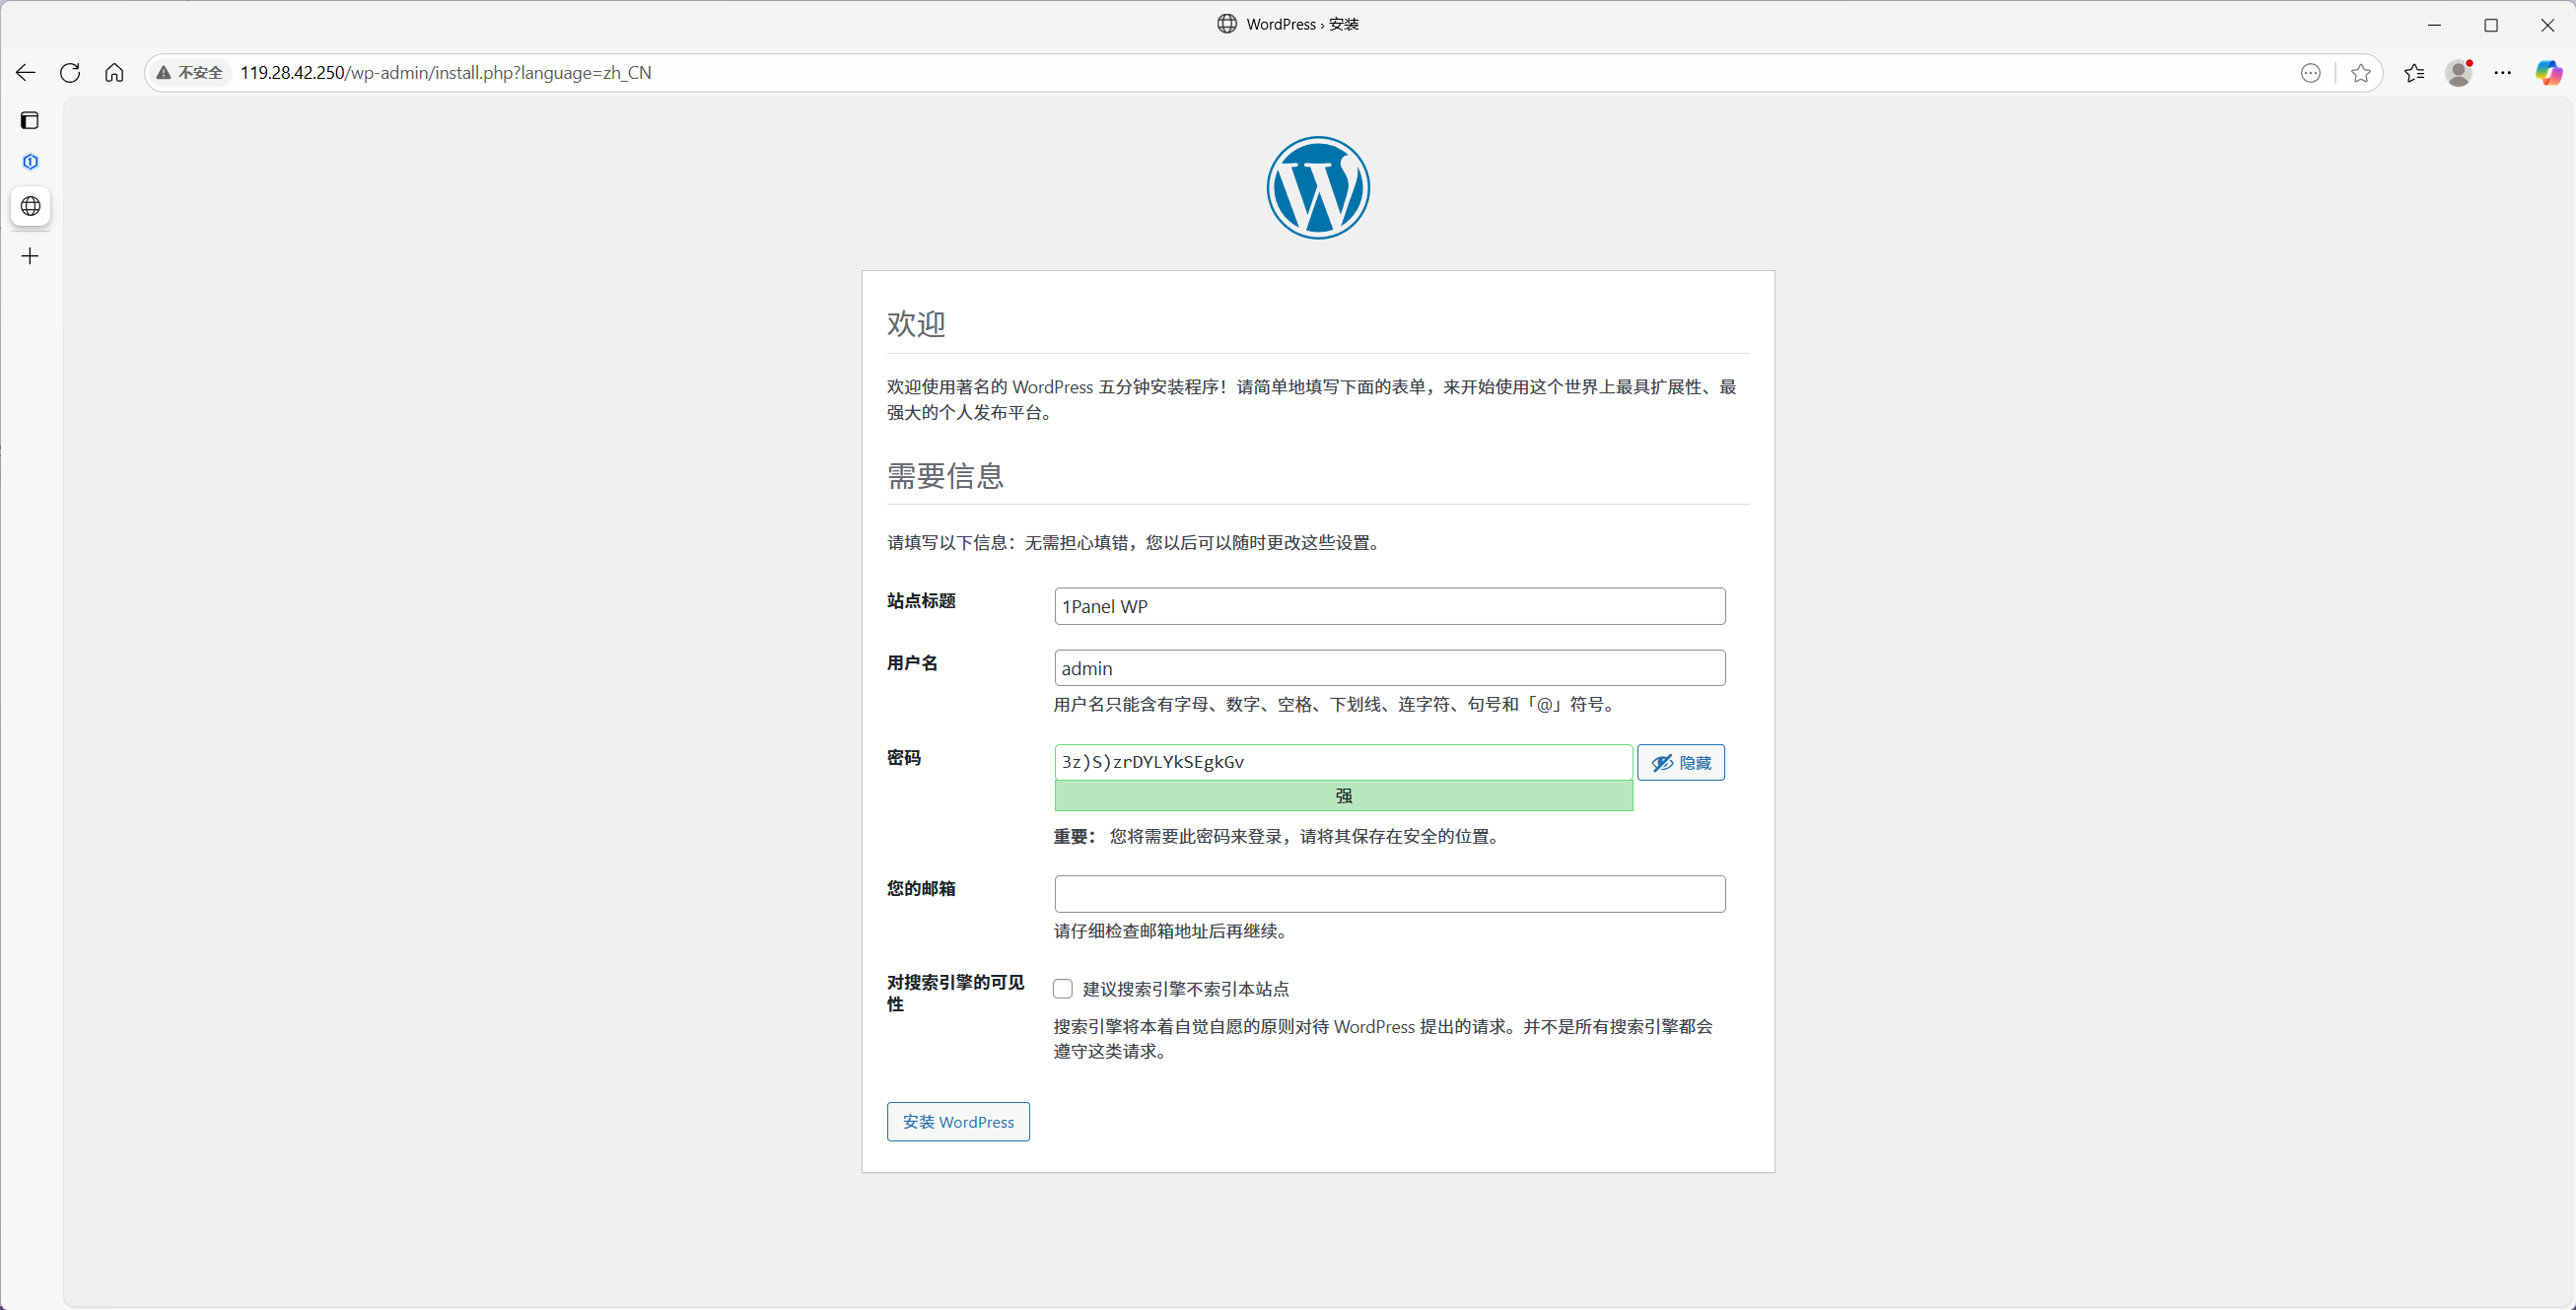
- Pick a language, enter the database details from the previous step, and submit.
- Complete site title, admin user, and final steps.

Step 4 — Point your domain
4.1 Add DNS records
At your DNS provider (e.g. Cloudflare, Alibaba Cloud):
- Create an A record for
@orwwwpointing to your server’s public IP. - Use a sensible TTL (e.g. 600 seconds).
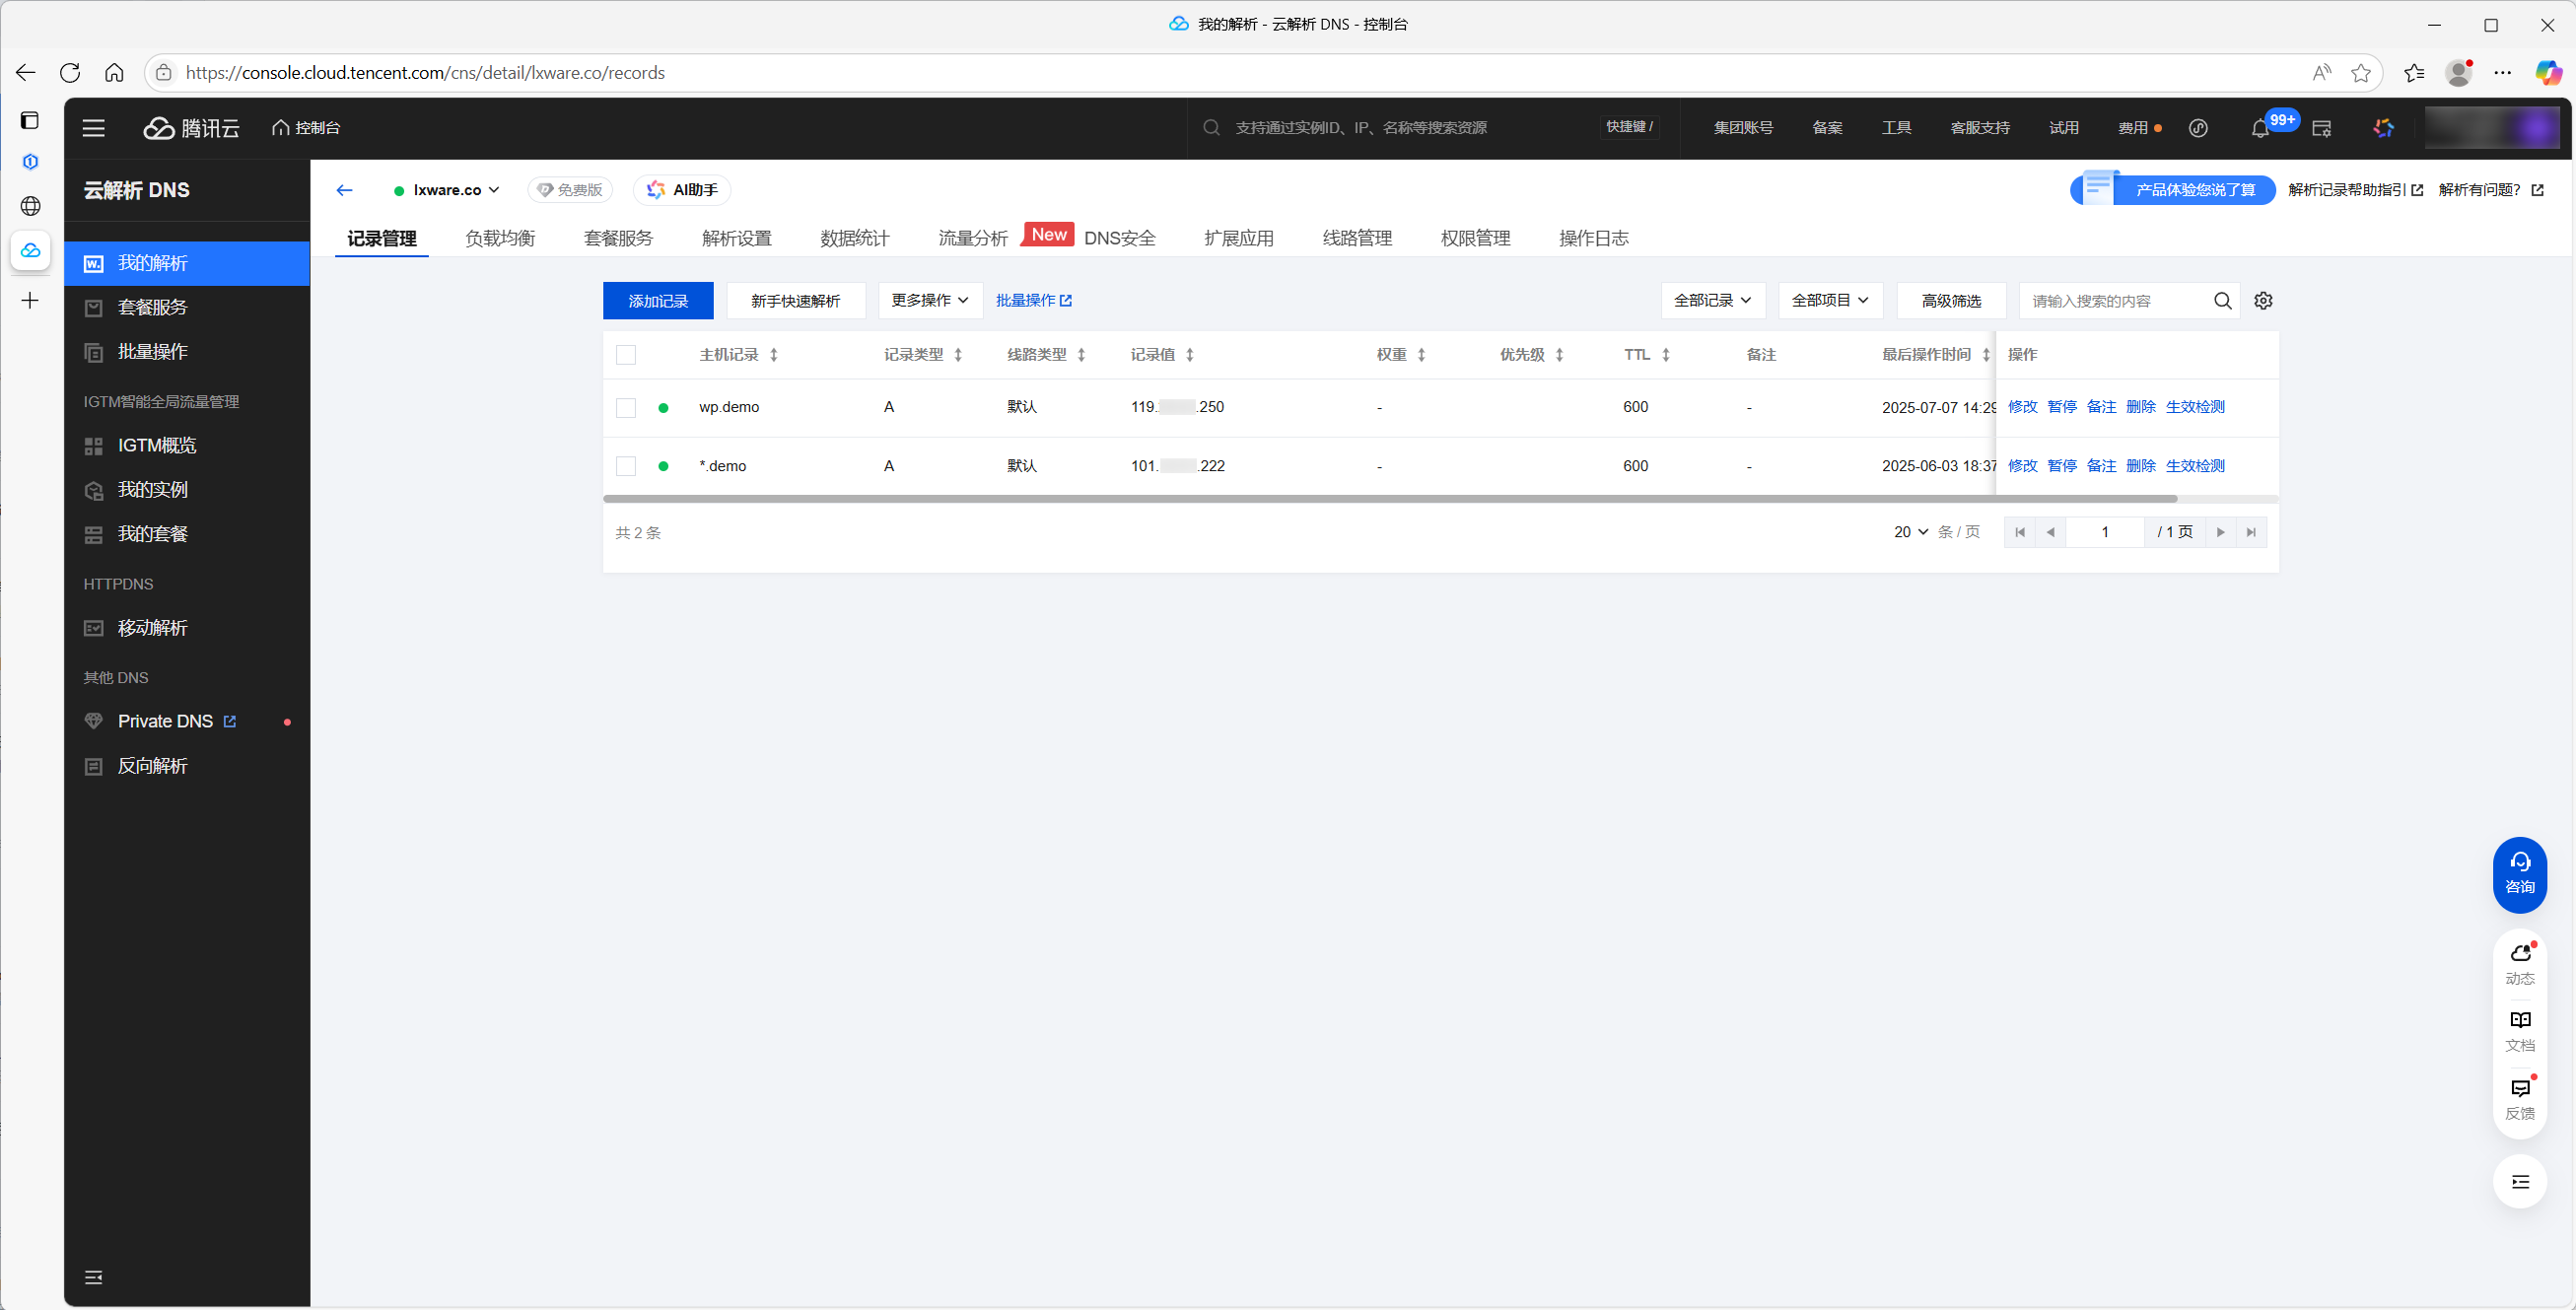
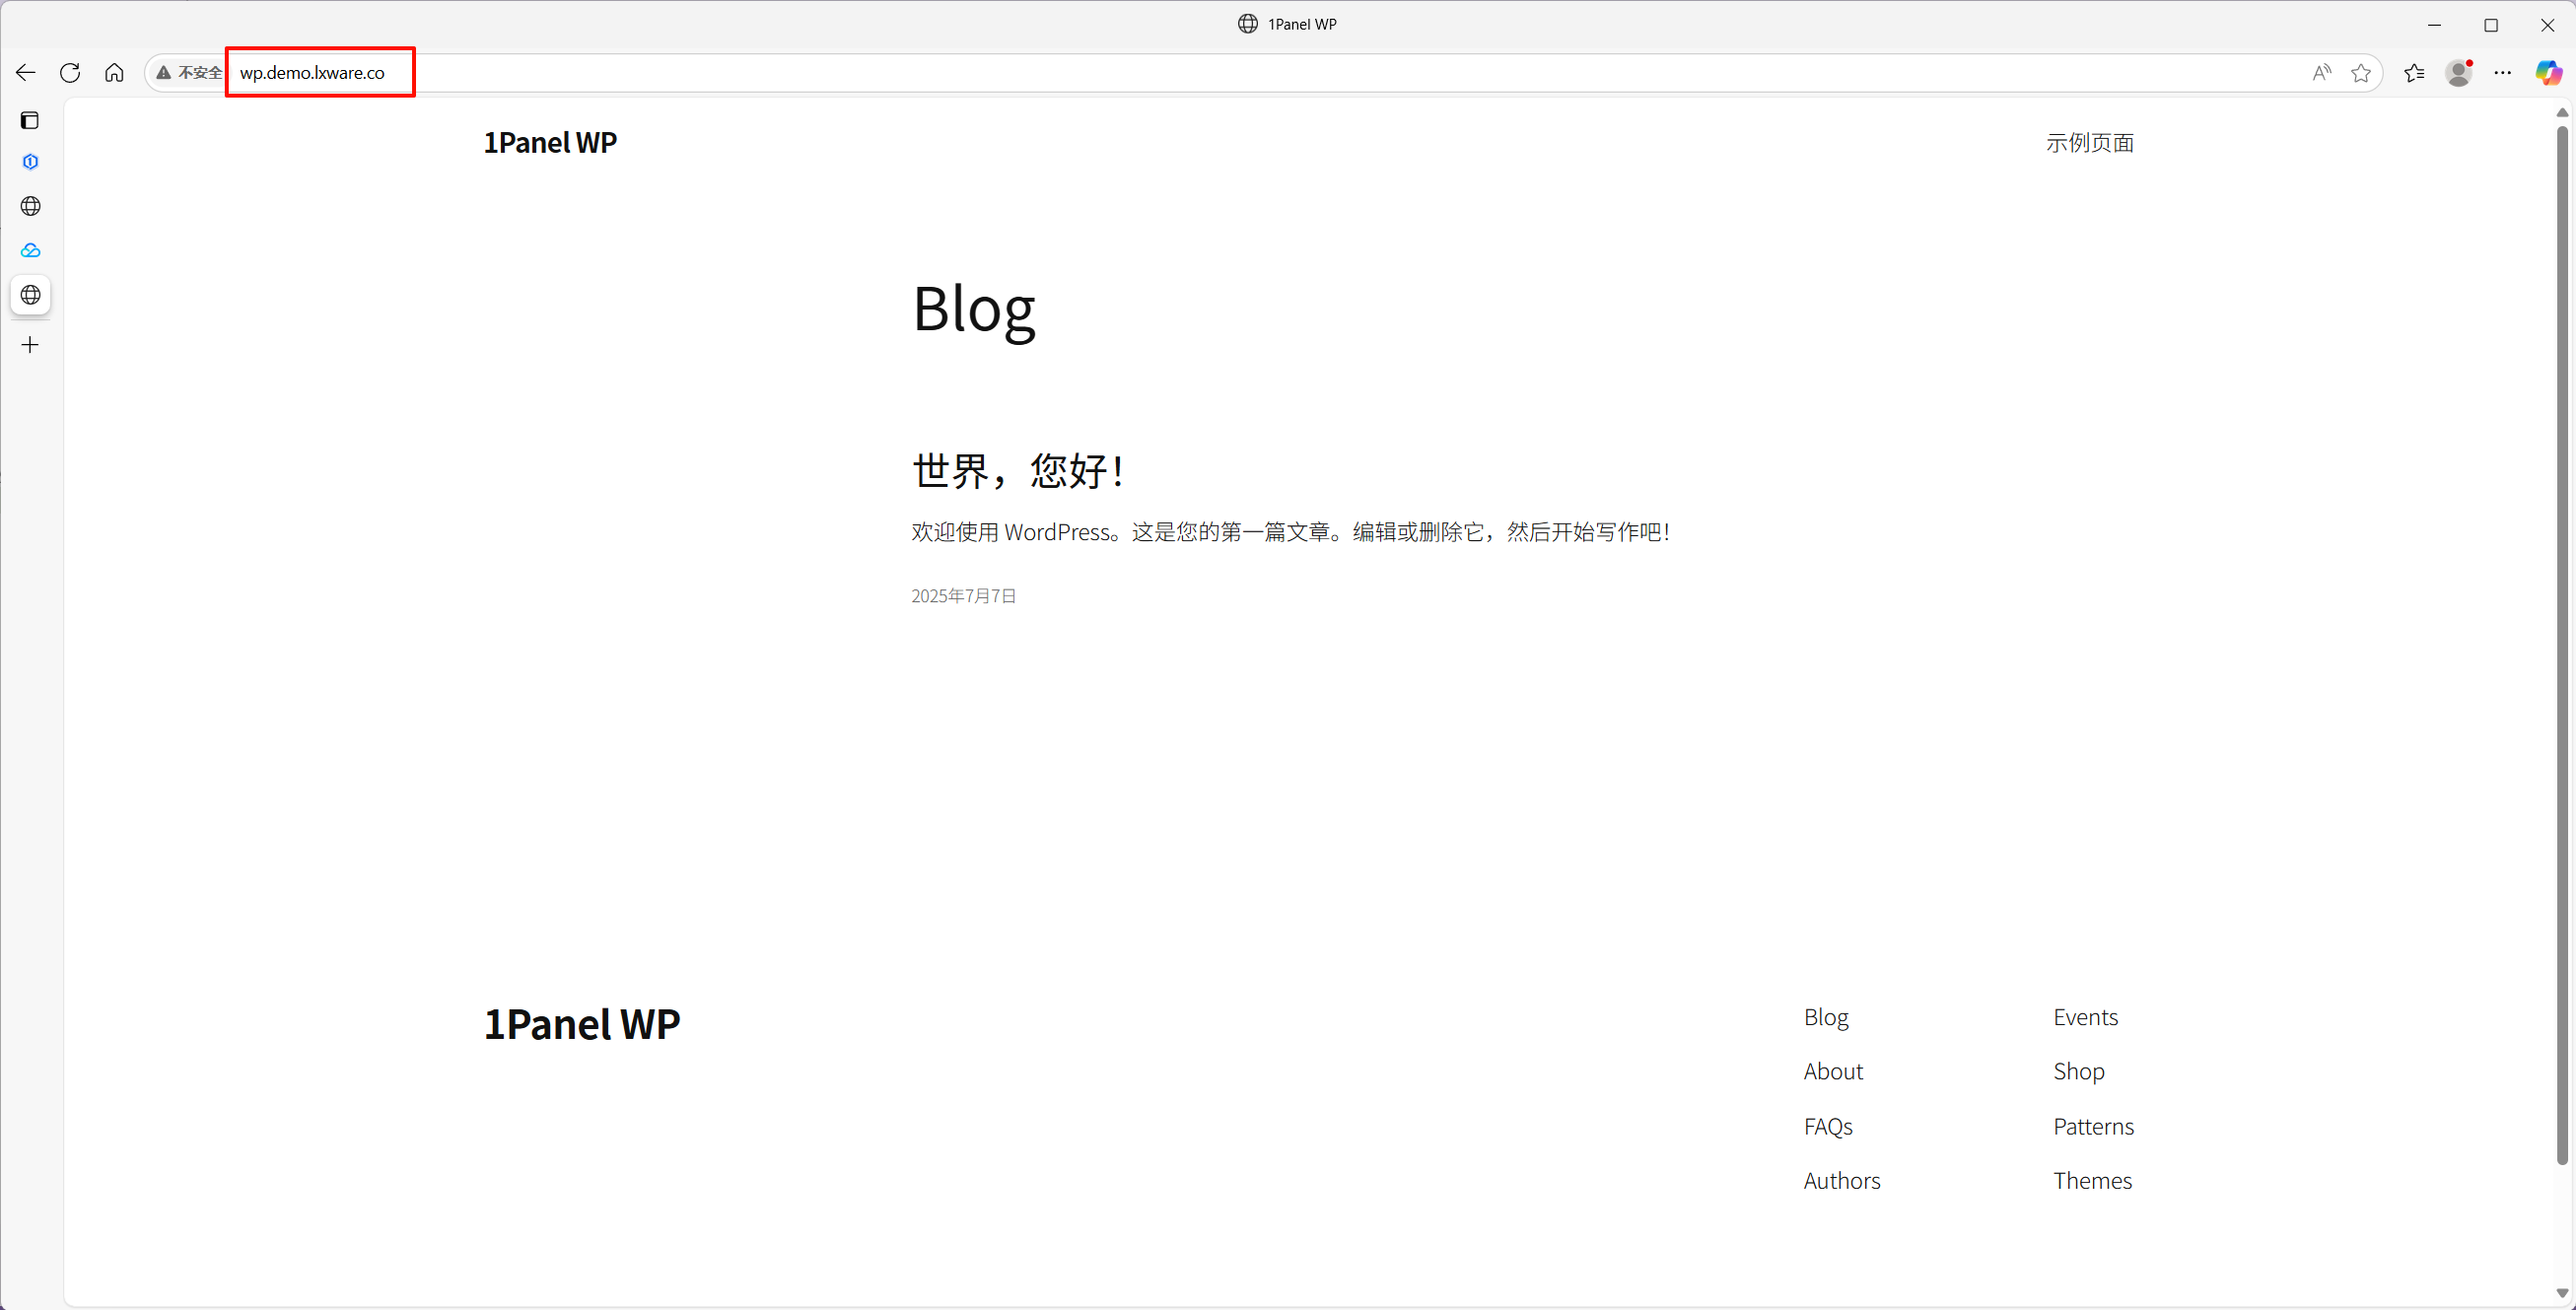
4.2 Verify resolution
Open your domain in a browser. If the WordPress front page loads, DNS is correct.
Step 5 — Enable HTTPS
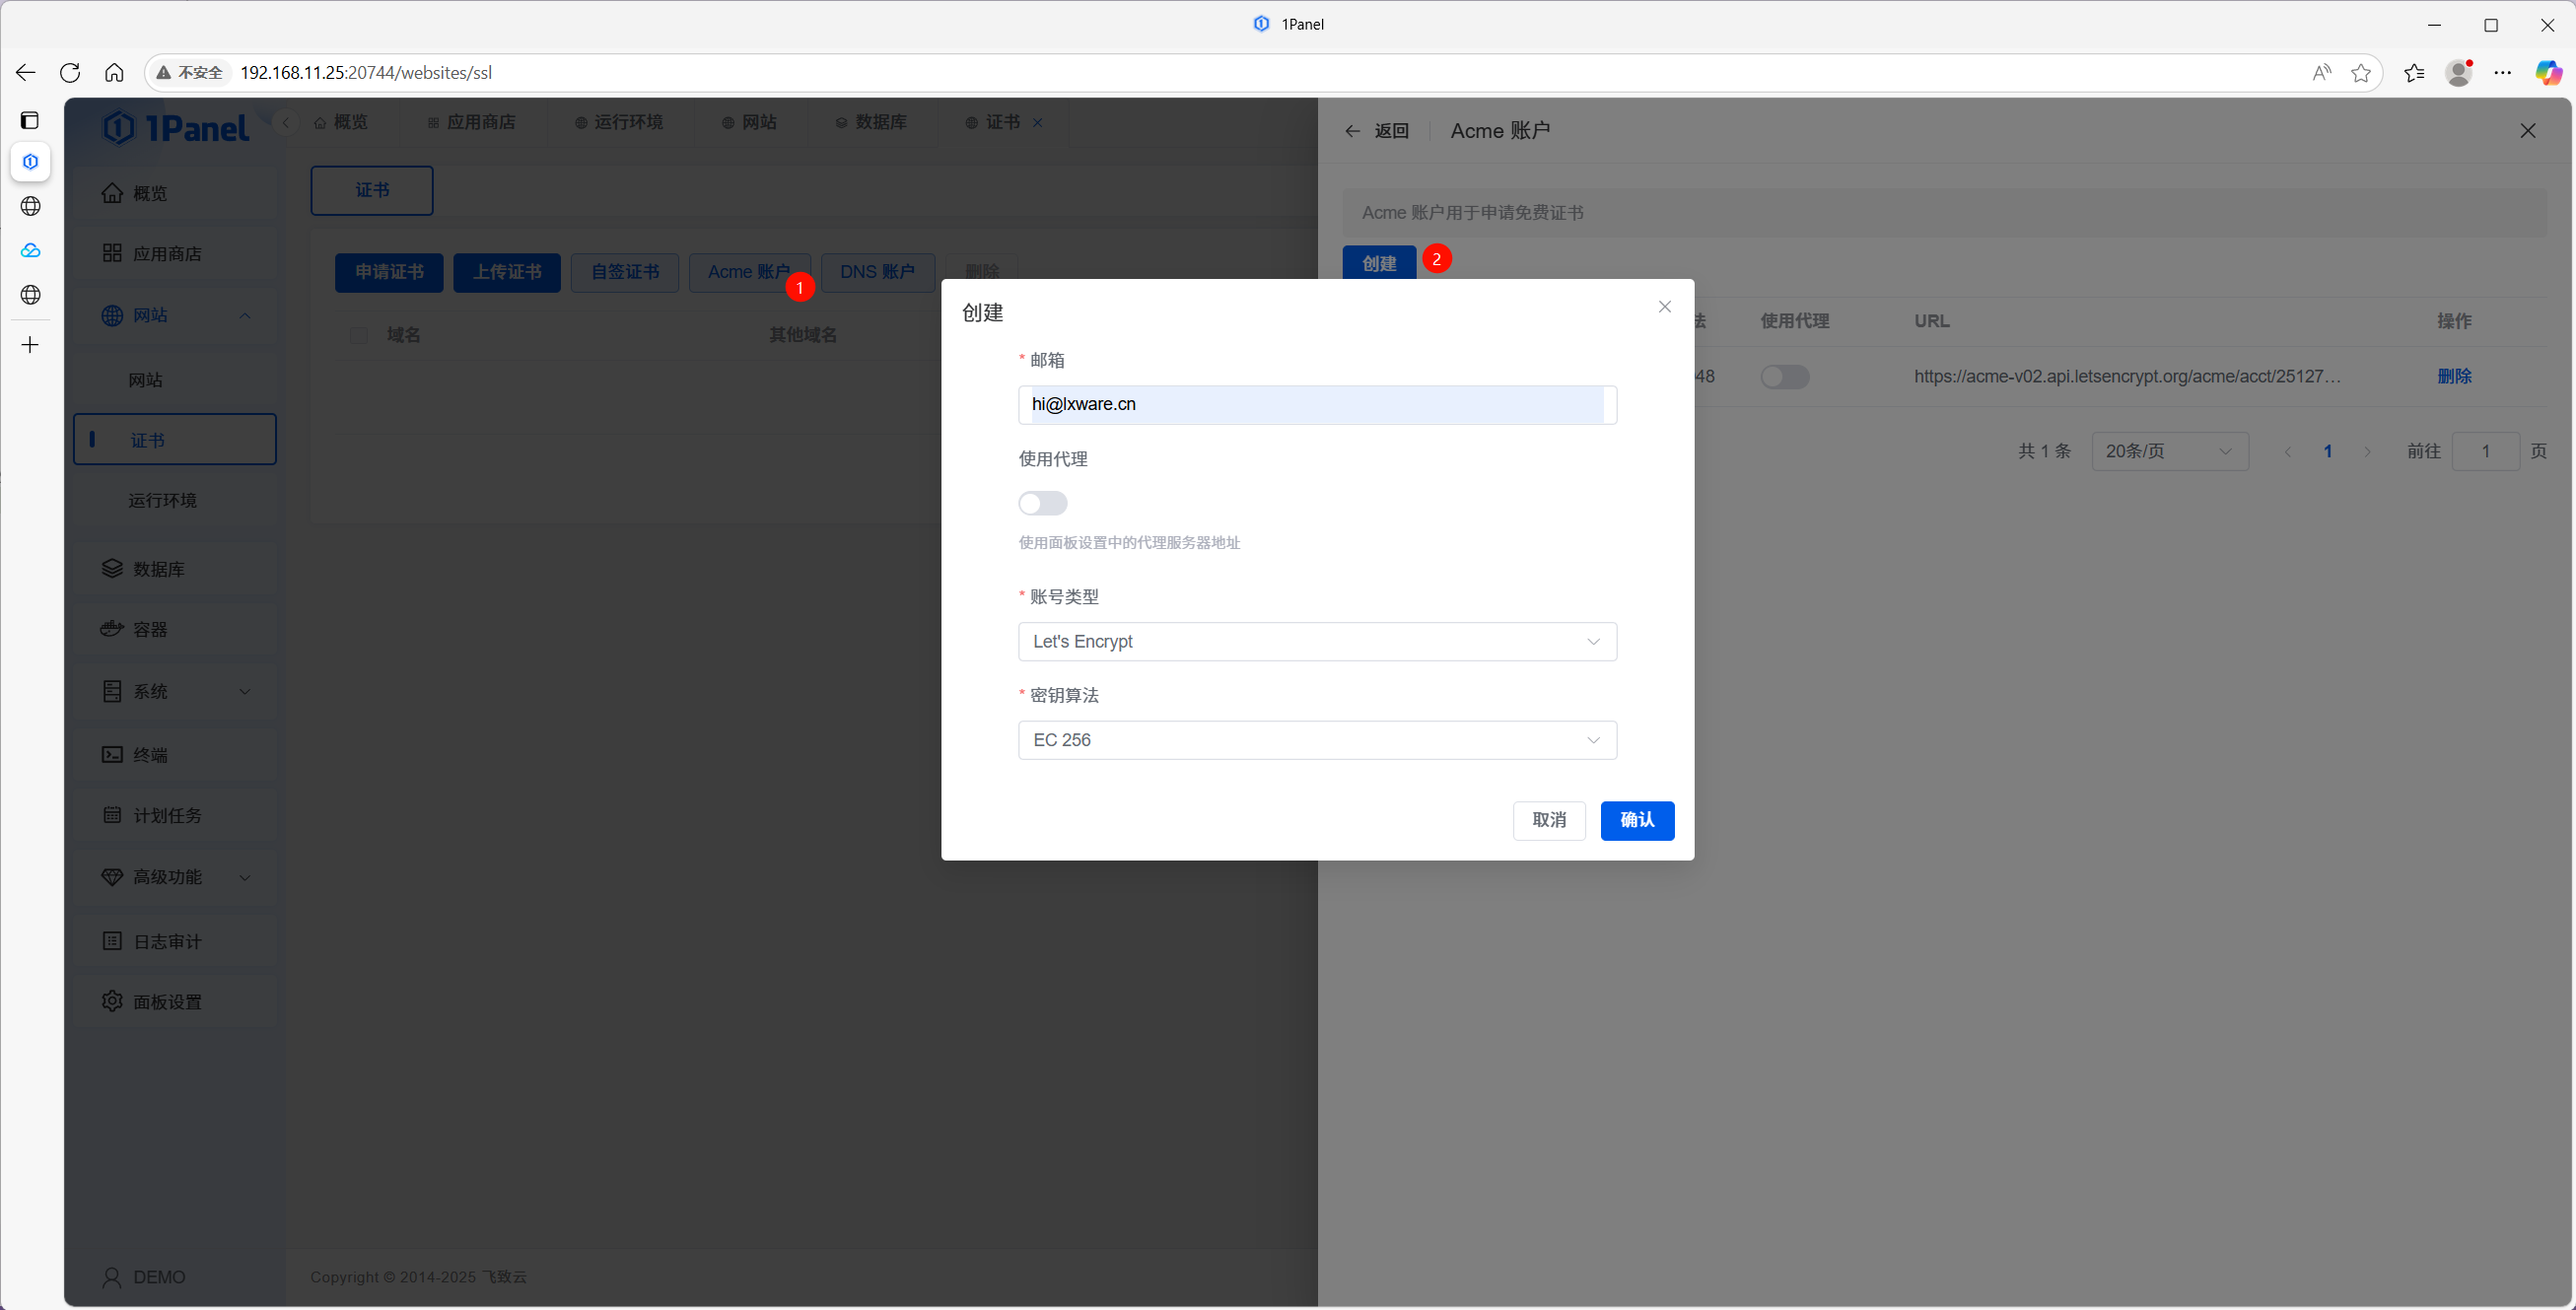
5.1 Create an ACME account
- Open Certificate management.
- Go to Manage ACME accounts.
- Add an email, pick account type and key algorithm, and create the account.
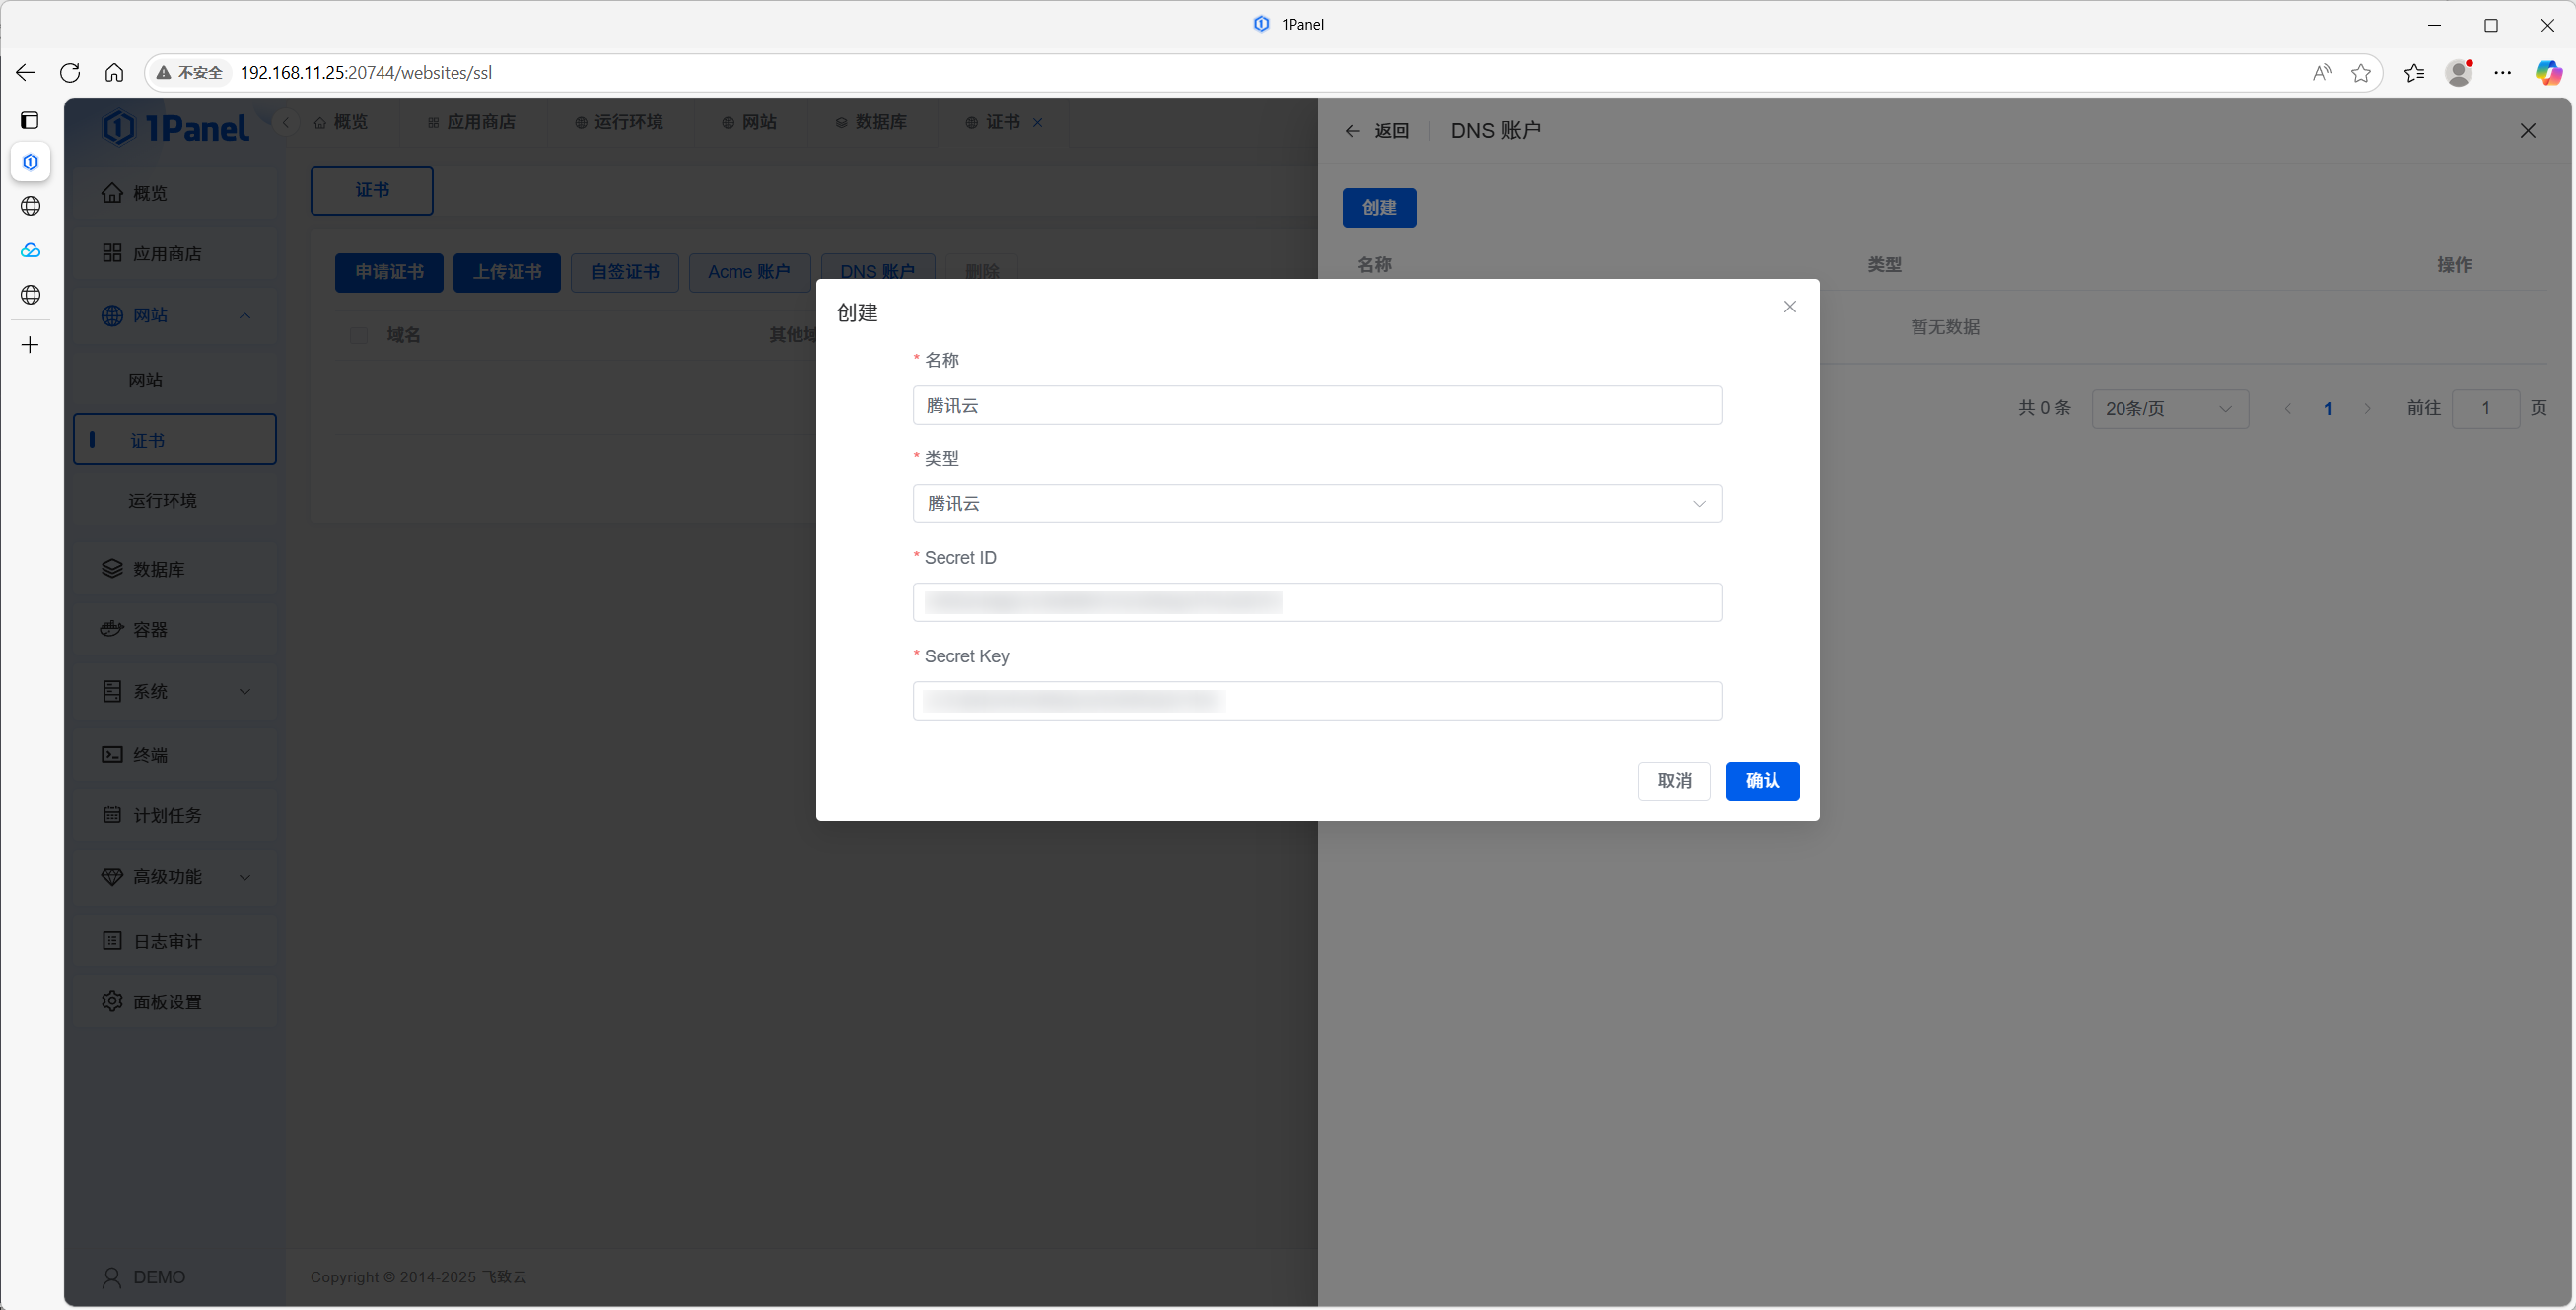
5.2 Configure a DNS provider (for DNS-01)
- Open Manage DNS providers.
- Select your provider (Tencent Cloud is shown as an example) and enter API credentials.
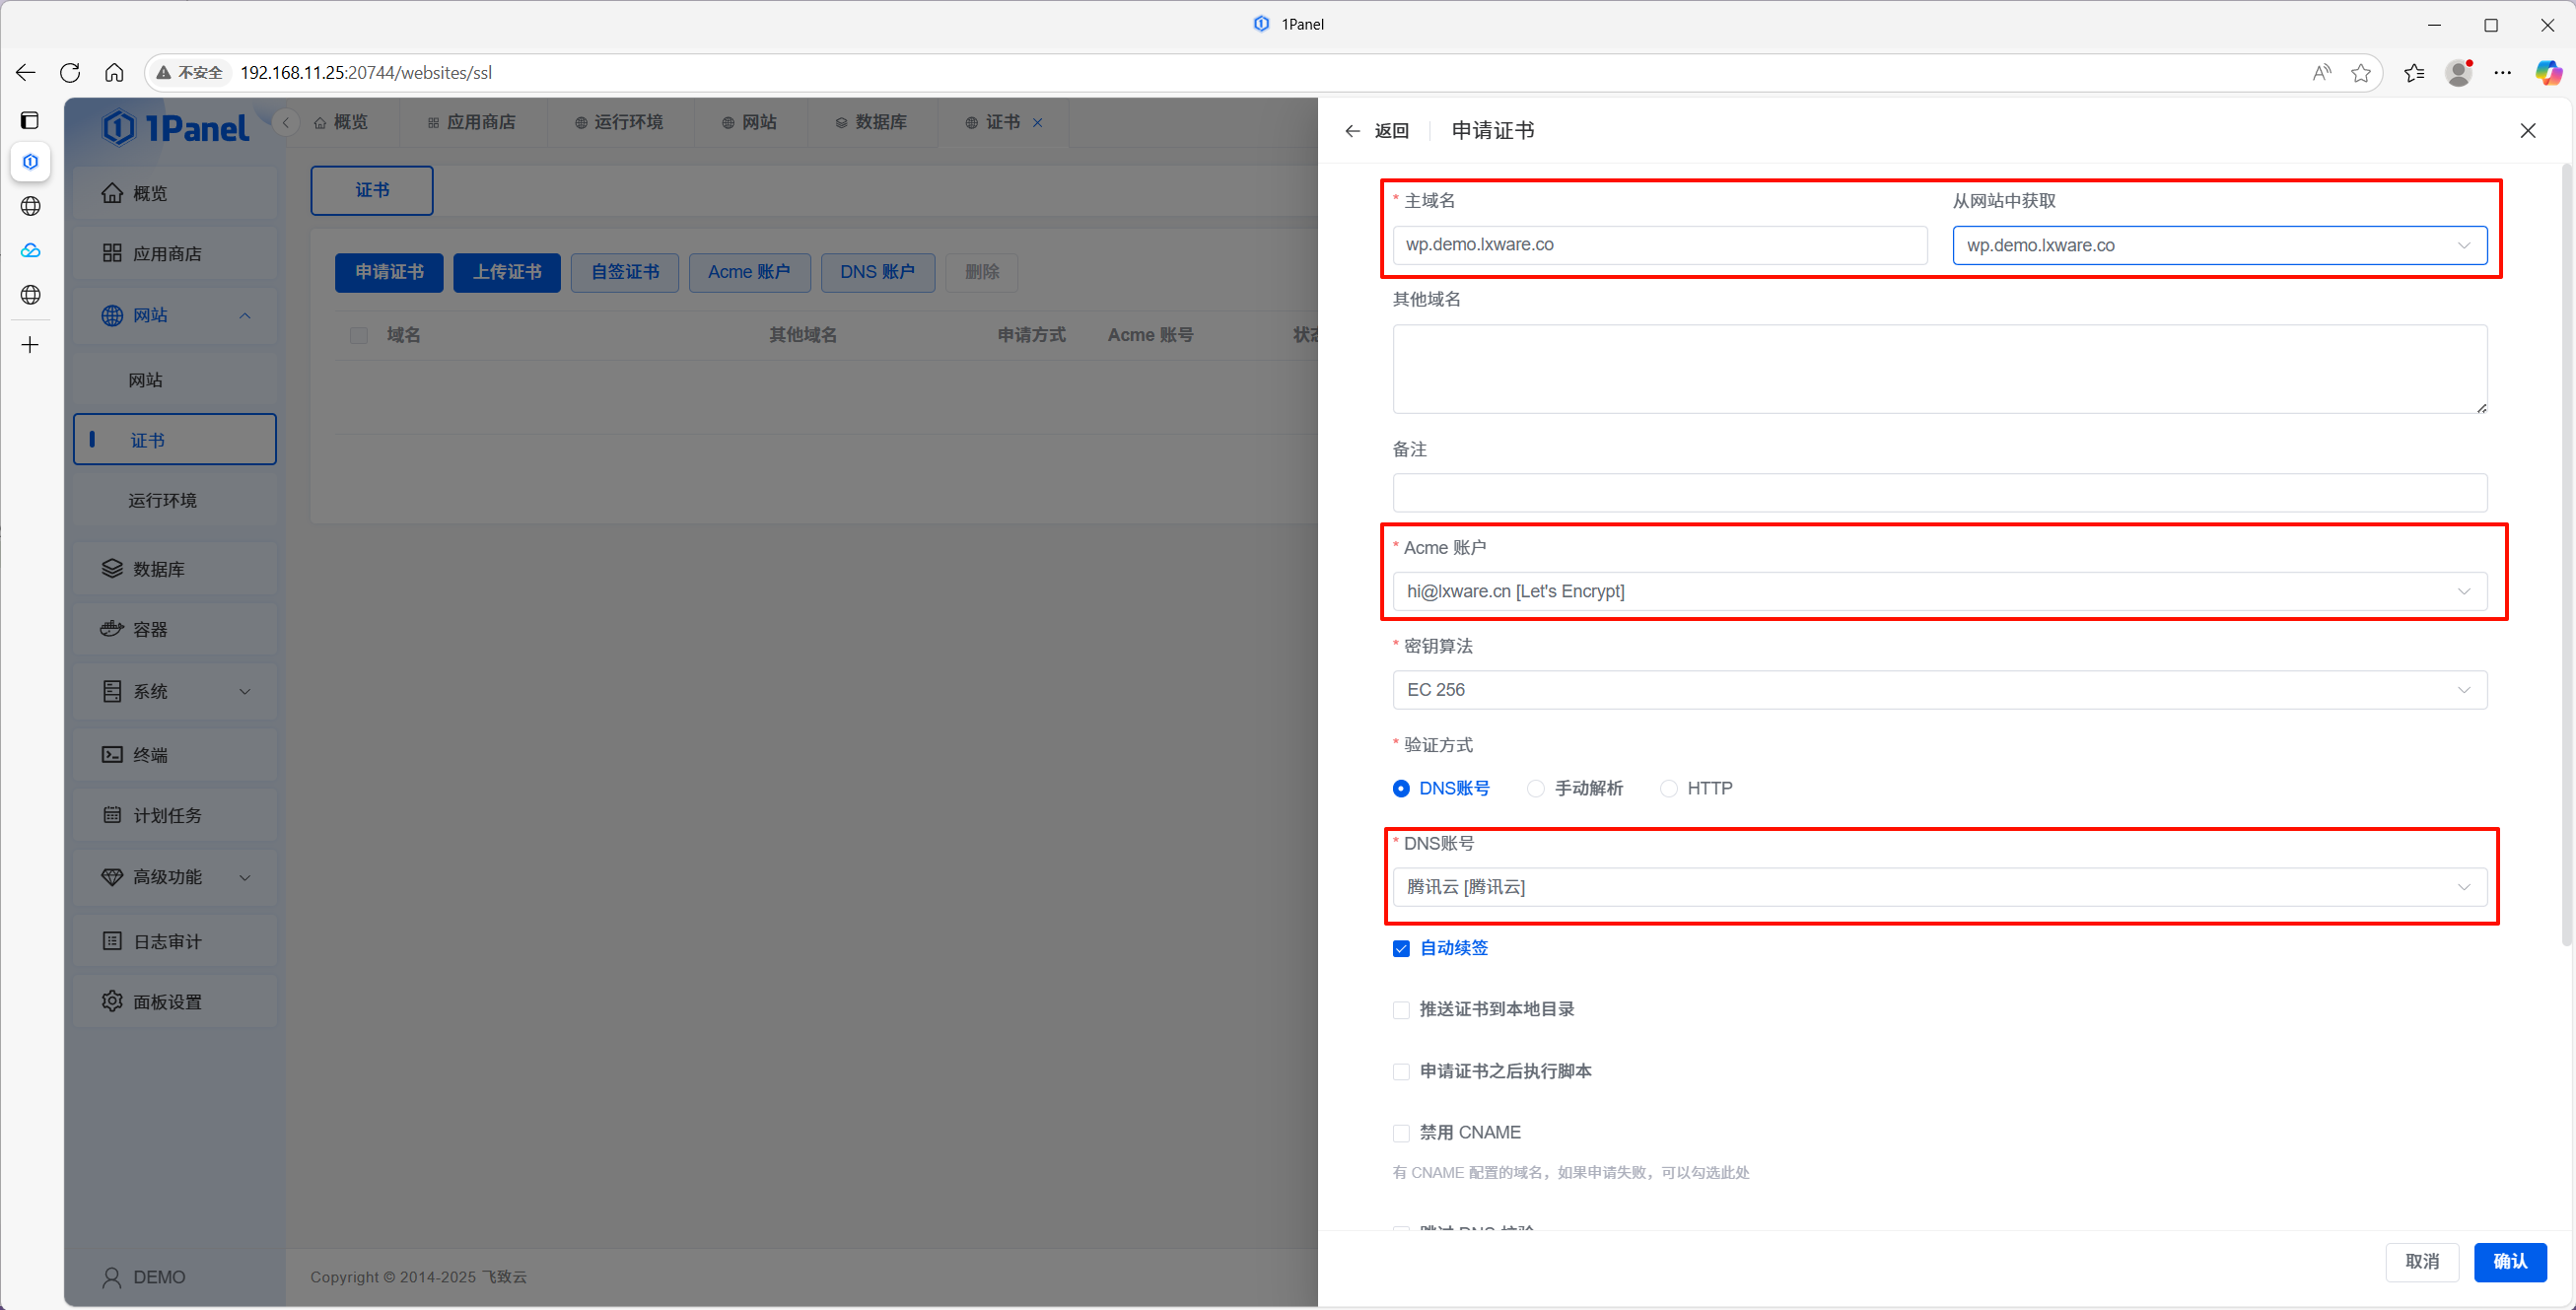
5.3 Issue a certificate
- On the certificate page, click Apply.
- Enter the primary domain, choose the ACME account, DNS validation, and the DNS provider account you configured.
- Wait until the certificate is issued.
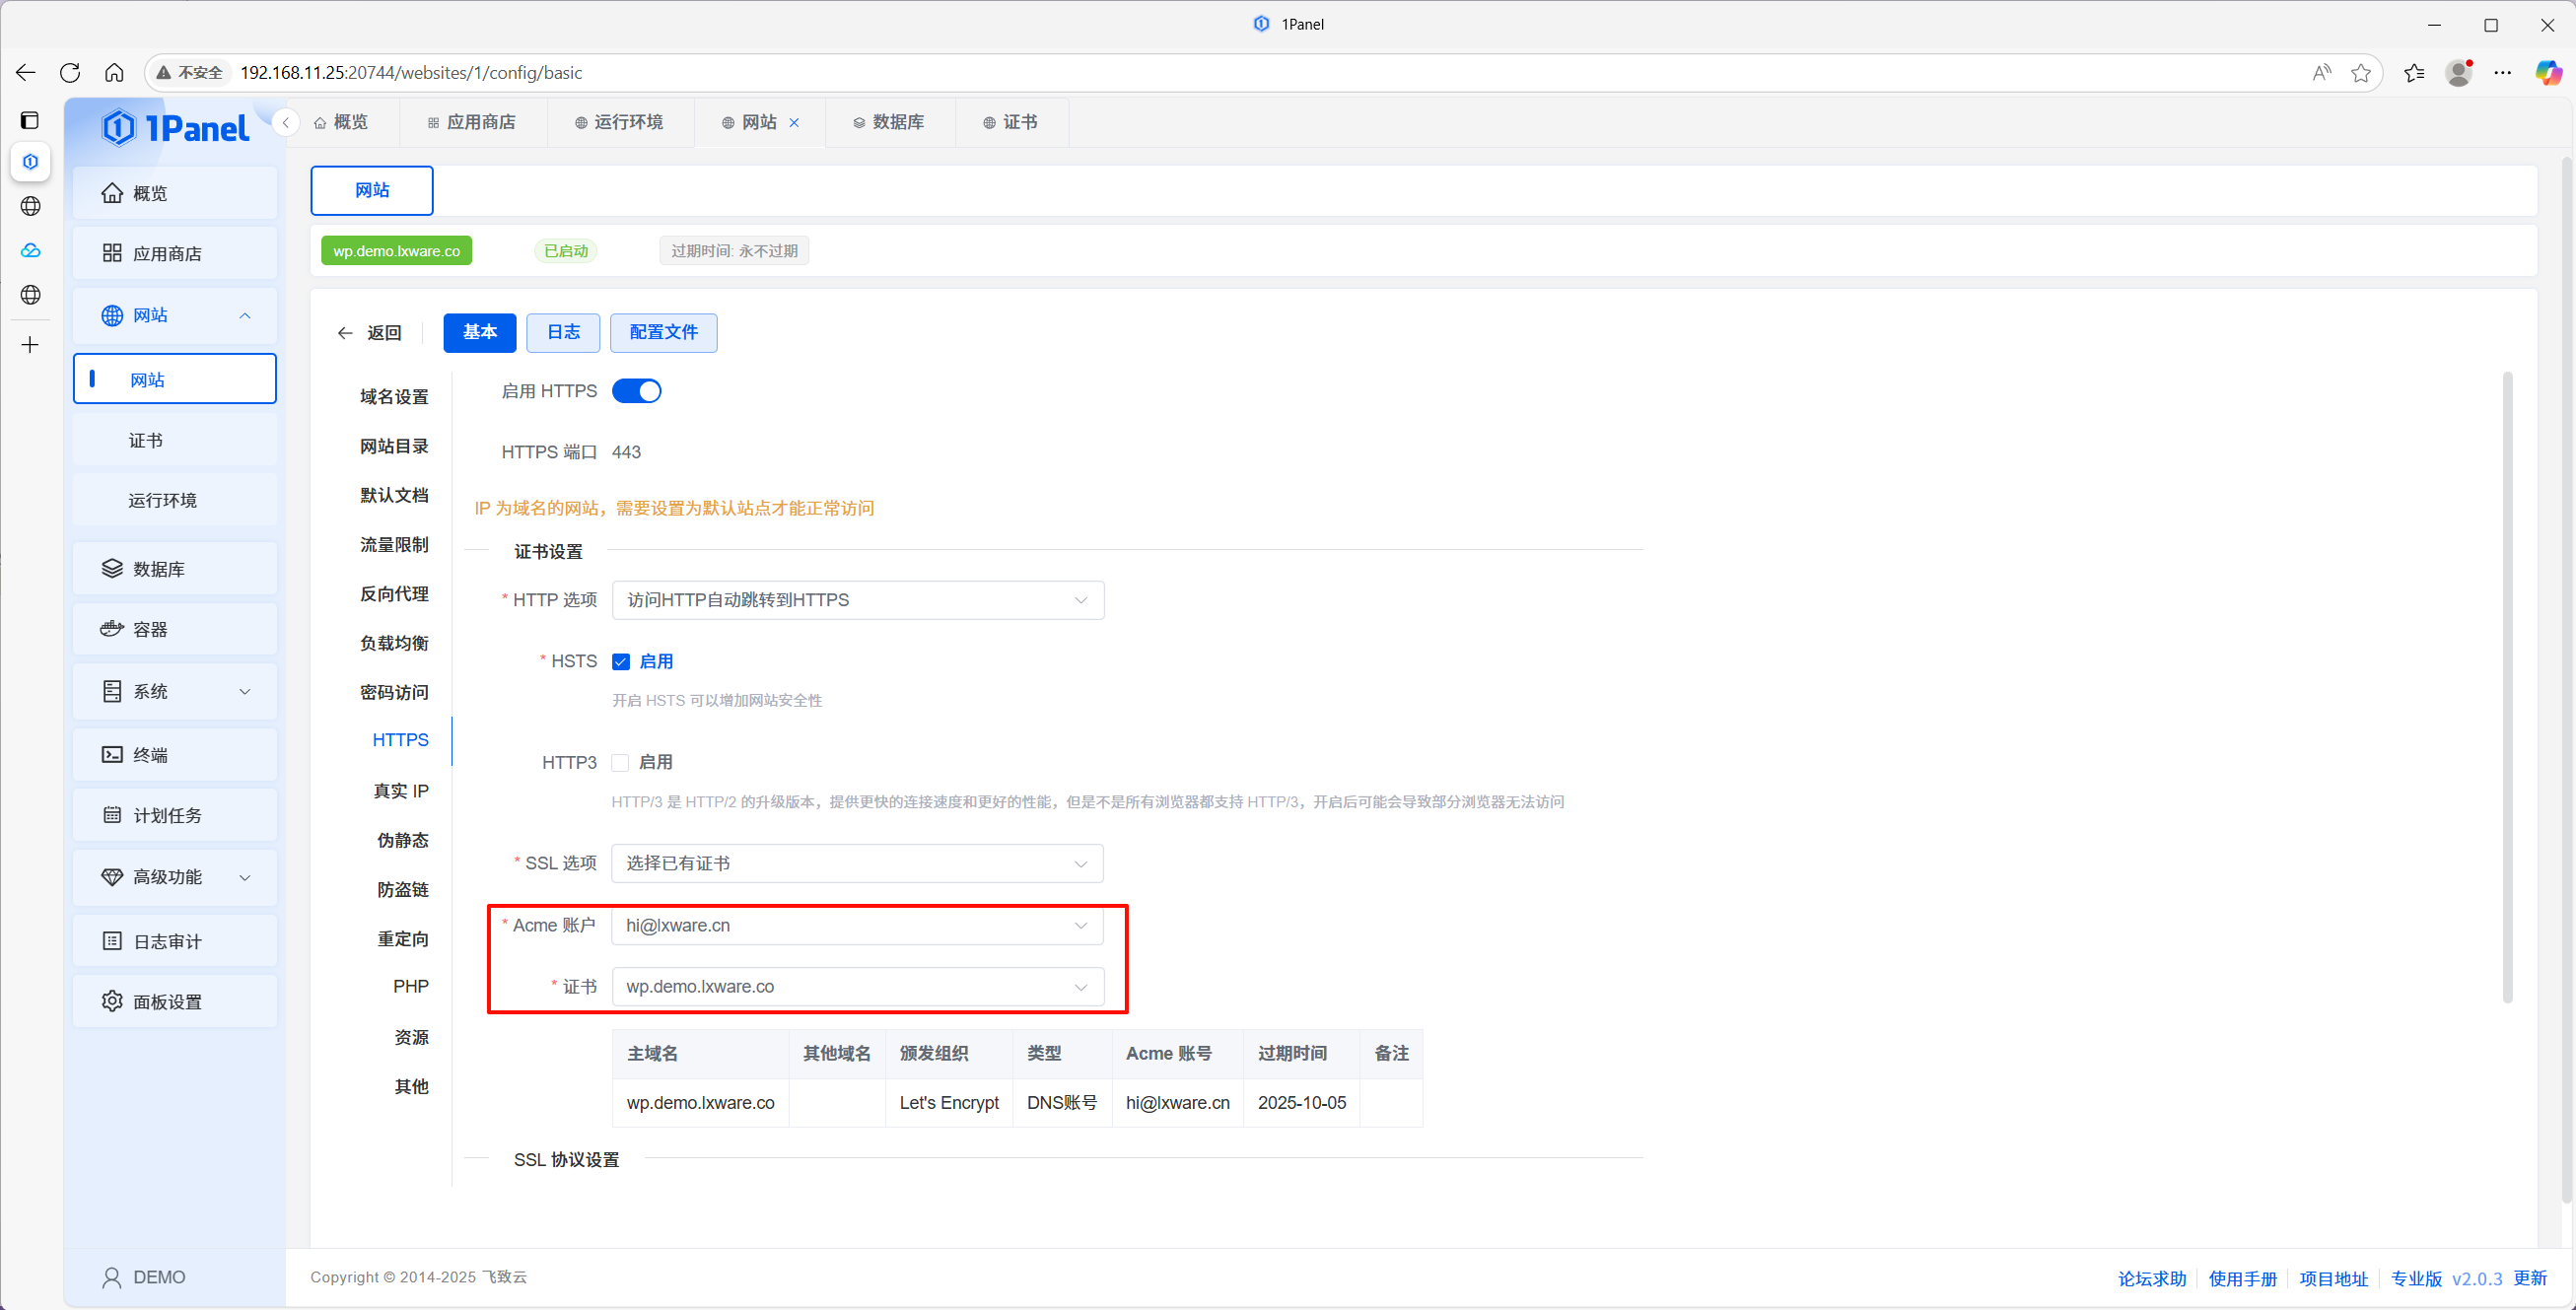
5.4 Attach HTTPS to the site
- Open the site’s settings.
- Under SSL, enable HTTPS, select the new certificate, and enable force HTTPS if you want HTTP → HTTPS redirects.
- Save.
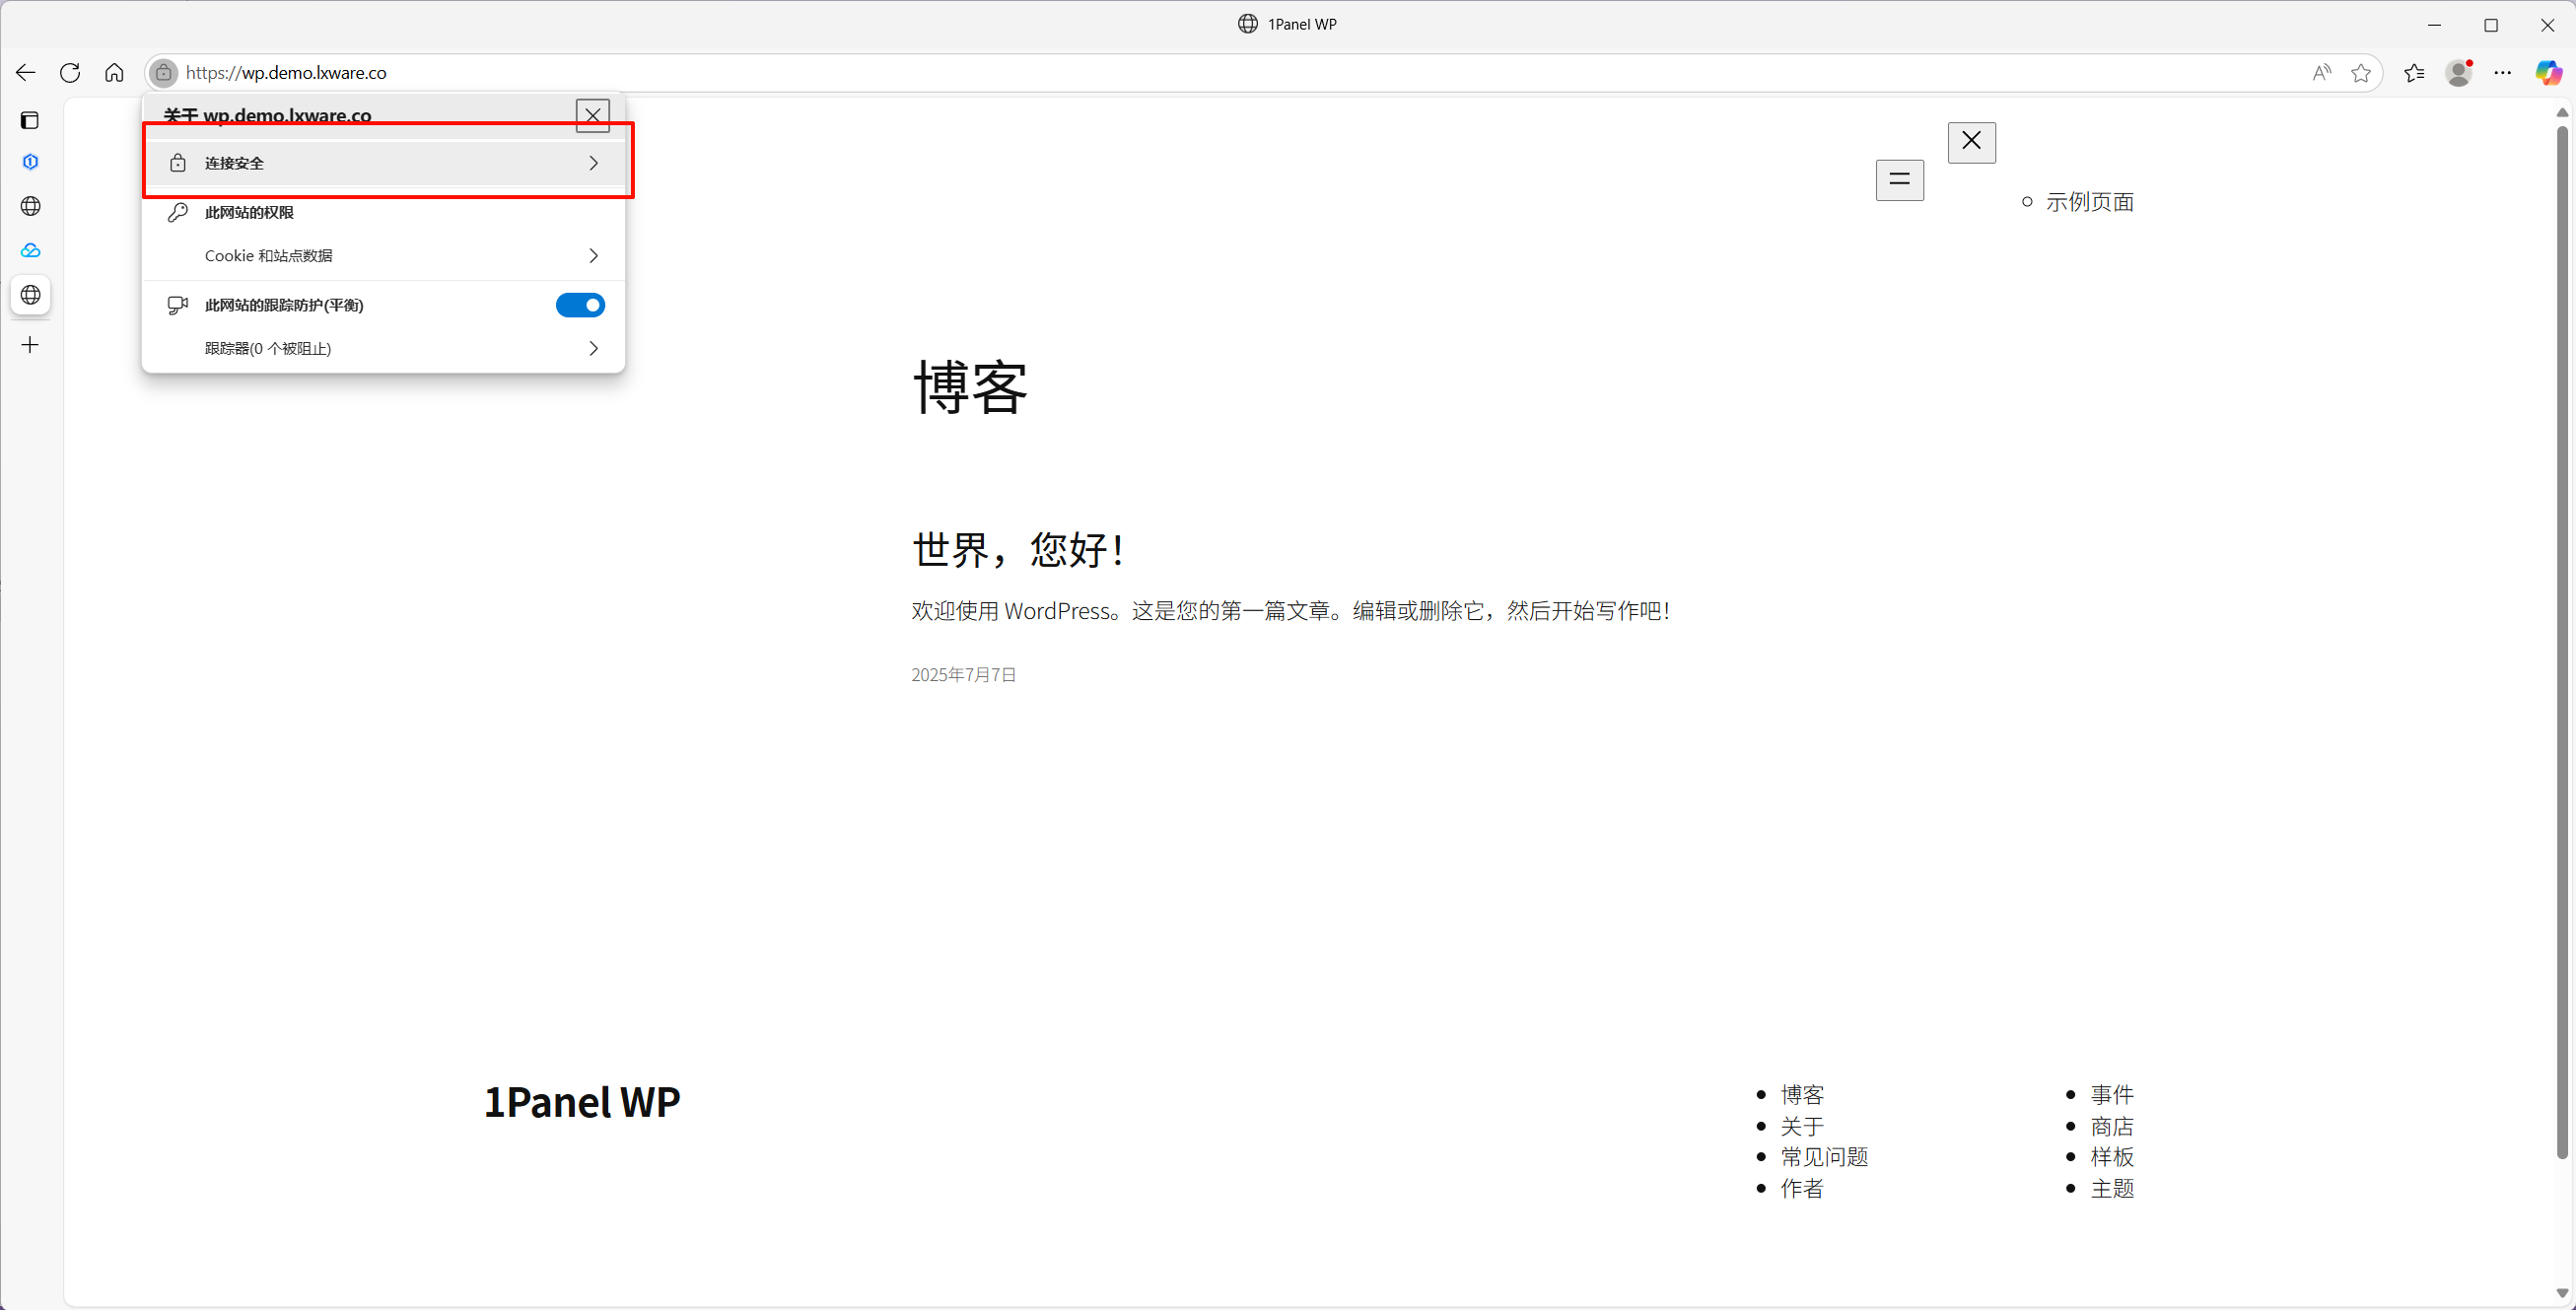
Visit https://your-domain and confirm the site loads over TLS.
Related links
This guide reflects recent 1Panel releases. For the latest behavior, refer to the official docs and community.